Going through school group projects were my least favorite projects. I was always the kid who ended up taking on the bulk of the work to ensure it got done and to my level of standards. Because of this deep dislike, I avoided collaborative art projects at all costs for my first few years of teaching. However, I have since realized the importance and benefits of a periodic collaborative art project.
A good collaborative art project teaches students to work as a team (as long as everyone has equal roles, I keep my eye out for this!) and allows them to create much larger works of art in a shorter period. I have sprinkled in group projects in my 2D and 3D art courses over the years, here are some of my favorites!
Sculpture Collaborative Art Projects
Tape Person Project
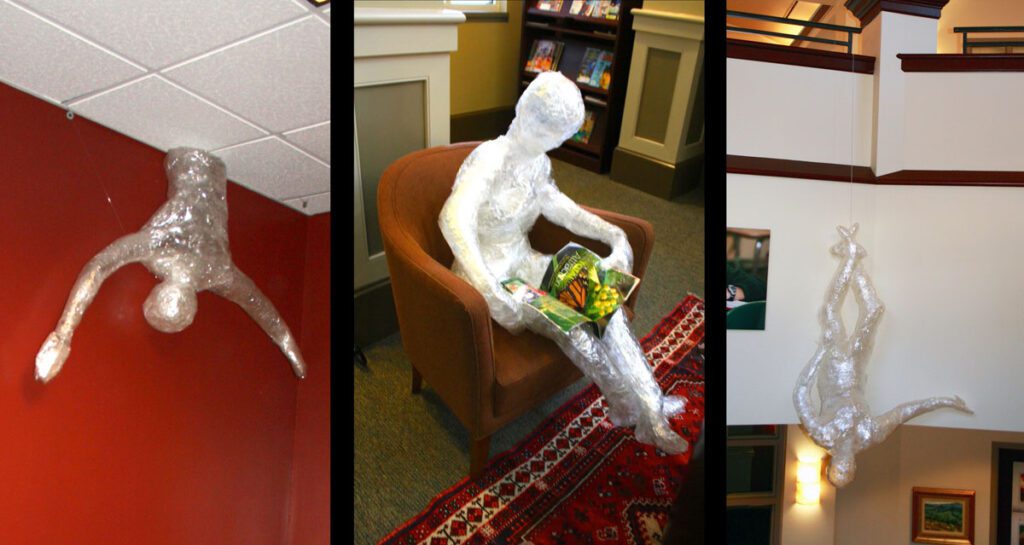
One of my favorite collaborative art projects is the tape person project. Students have to work in groups because the sculpture is created by wrapping packaging tape around one student’s body, carefully cutting the tape off, and reconstructing it into a lifesize work of art. Ideally, group students in groups of 2, I have found groups of 3 or more students mean an uneven distribution of work.
In addition to a fairly straightforward project that allows pairs to work together, this project is also low supply. All you need is packaging tape, scissors, and additional props or tools to display the work. You can find packaging tape for a bulk discount from websites such as Uline. This project also offers the opportunity to discuss installation art with students. They have to design their tape person to interact in a specific space. They have to consider things such as:
- How their piece brings awareness to the space.
- How the piece reflects the use of the space.
- How the piece enhances the space.
- How the viewer will feel sharing a space with the work of art.
Students explain their final work of art through an artist statement displayed with the collaborative art project. This project is perfect for upper middle school students, introduction to art students, or sculpture students. Read more in-depth information in a blog post here. Get everything you need to teach the project (minus the supplies) on my TPT shop here or my website shop here.
Collaborative Art Projects: Relief Sculpture
In my sculpture class I used a drawing collaborative art project as inspiration for a relief sculpture. In my introduction to art class, to introduce the concept of grid drawing I would pass out one-inch by one-inch squares from a cut-up image. Each student had to enlarge the square to six inches by six inches and recreate the image. Using information such as where a line intersected the edge of the paper or shifts in value, students recreated the image 6x larger than the original. Once students completed their square I would place them together to create one large image. I never told my students what image they were creating, it was always an exciting moment to reveal the final work of art and the image they took part in.
Once I switched schools and became a full-time 3D teacher, I translated my grid drawing projects into a collaborative relief project. I had my doubts that everything would come together during the project, but once all of the pieces were in place, I couldn’t believe how amazing it looked. This not only taught students about working on a slab, carving down, and building up to create a relief, but it also brought the class together around one community art project. Read more on the lesson below or hit the easy button and get this lesson on my TPT here or my full sculpture curriculum on my website here and TPT here.
ART LESSON OVERVIEW:
OBJECTIVE: For students to learn the history and techniques of relief carving, and apply those techniques in a collaborative relief carving project.
SUPPLIES:
- Lizella Clay
- Rolling pin or slab roller
- Ruler
- Needle tool or knife
- A variety of clay tools and textured items to carve and add texture
- Low fire underglaze (I used blue, green, red, brown)
- Low fire clear transparent glaze
- Kiln
- Wood panel
- Black Paint
- Heavy duty glue
STEPS:
- I begin this project by introducing my students to the artists, Brunelleschi and Ghiberti, and the famous Florence Baptistry doors competition. I had the students vote on which “Sacrifice of Isaac” relief they liked better, and we continued to discuss the doors as well as the Gates of Paradise doors.
- After the history lesson, I introduced the assignment. I explained that I would randomly hand out a 1″x1″ section of a larger image, and they would have to recreate it as a relief sculpture on a 6″x6″ clay slab. We discussed carving techniques and looked at the variety of tools they could use to create different textures.
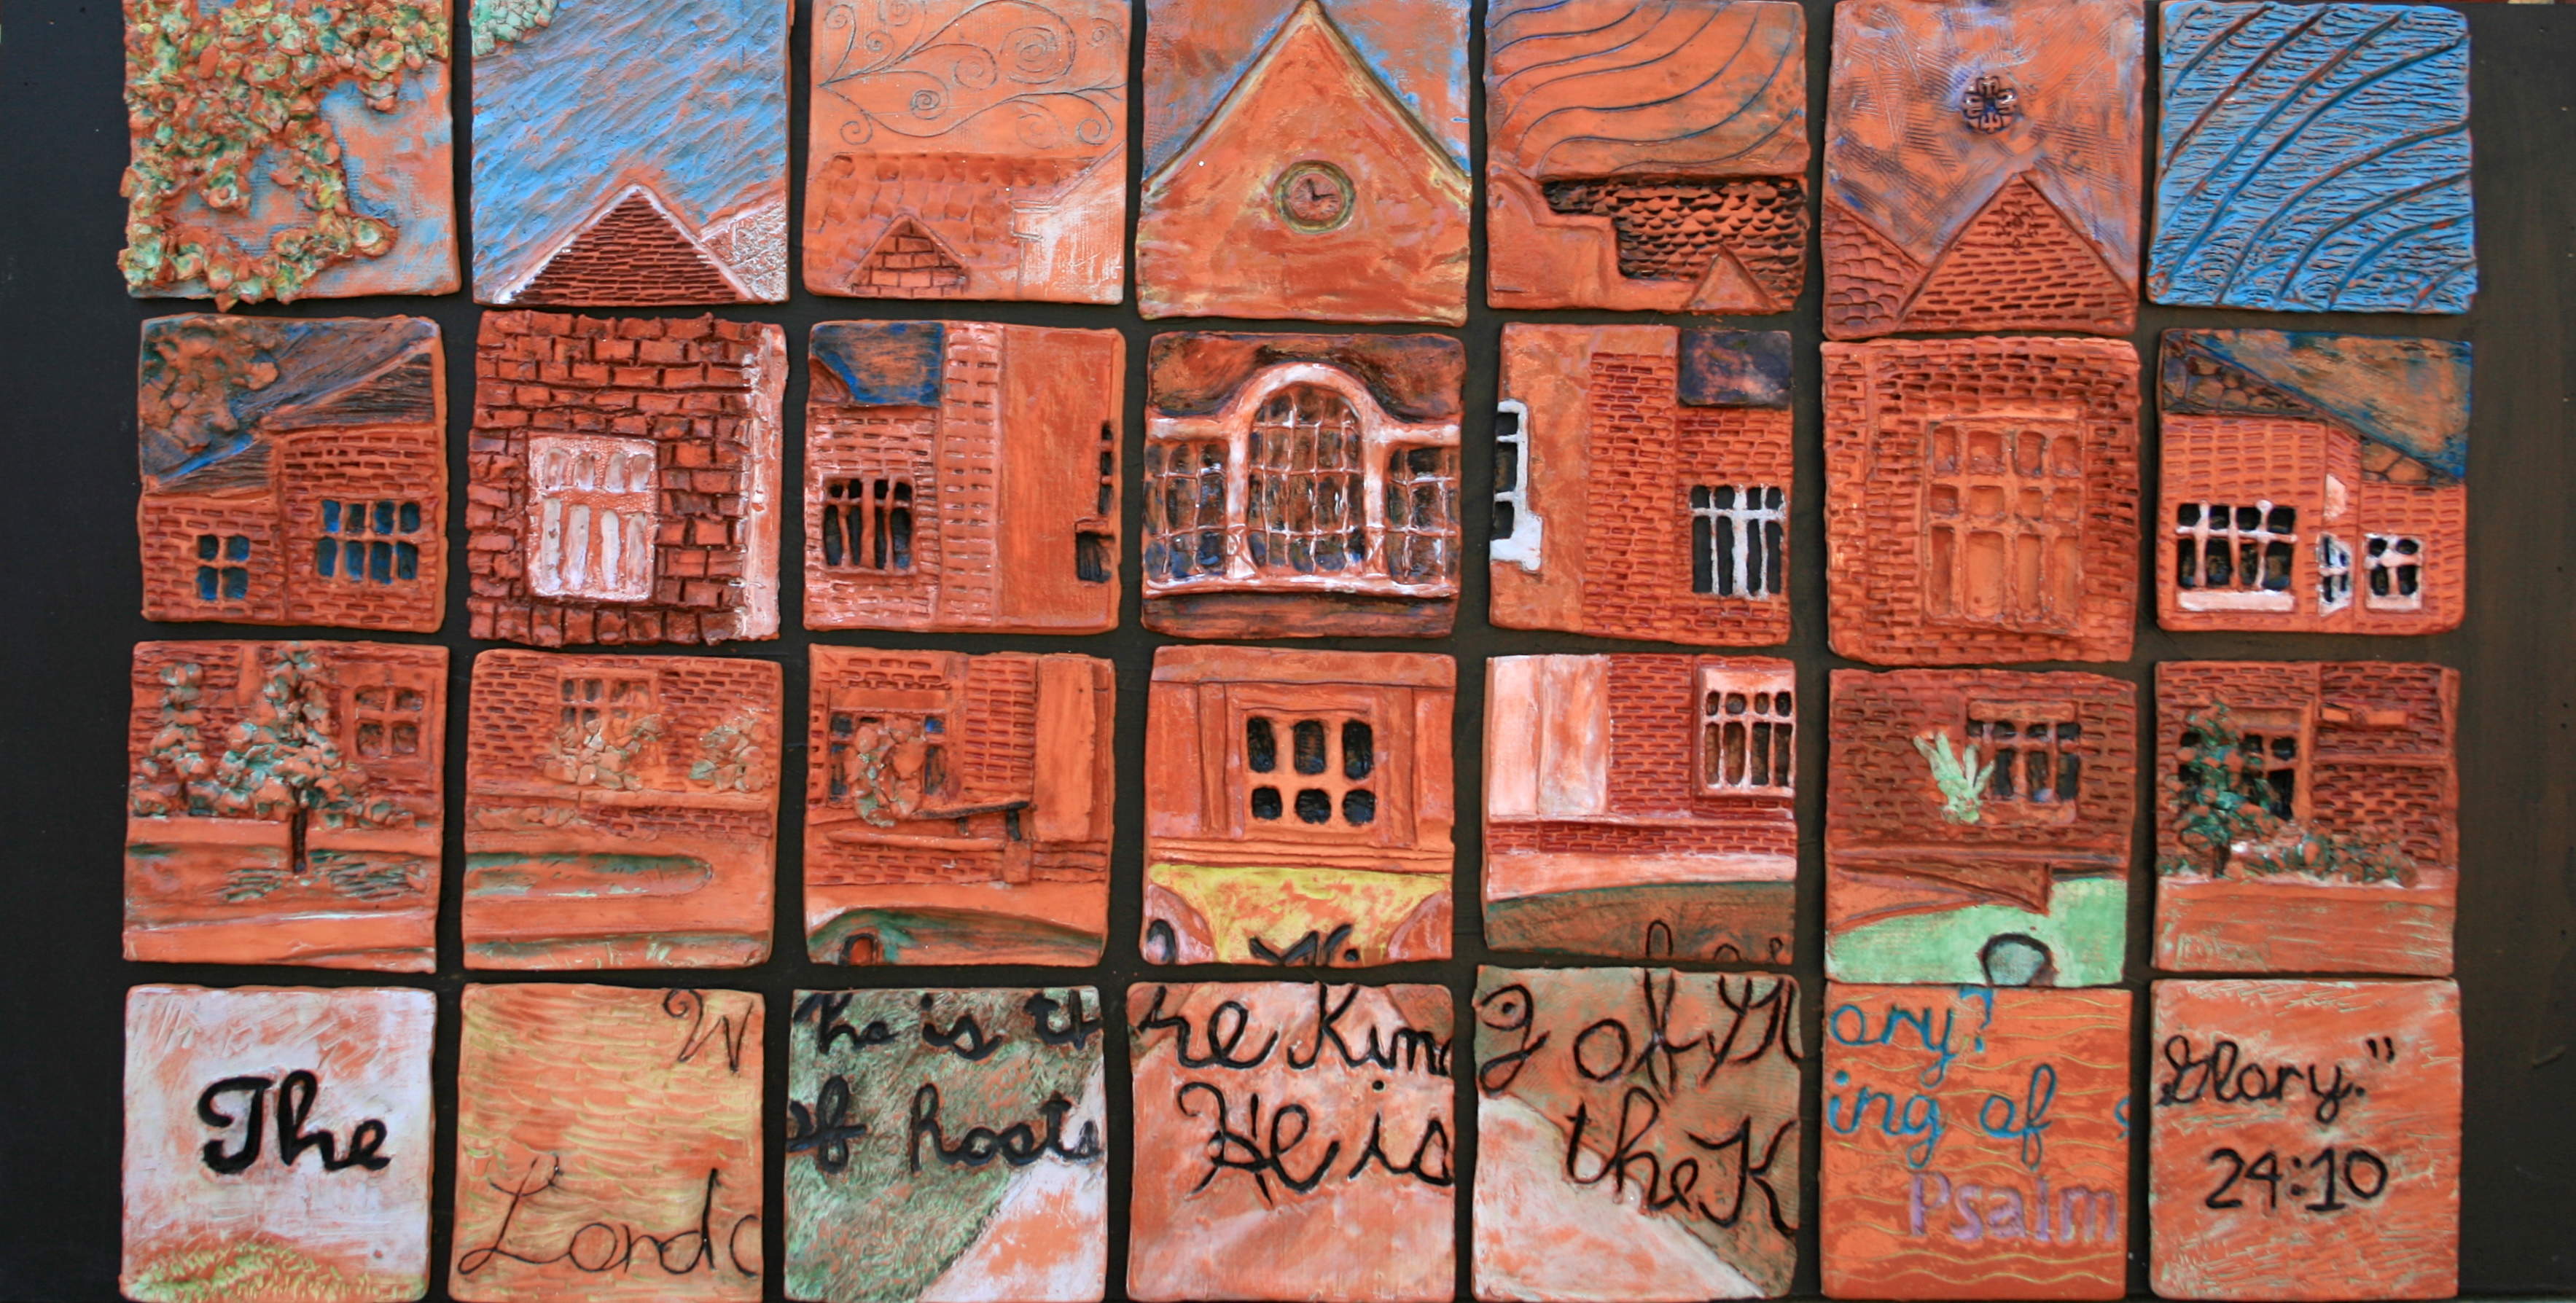
- After the assignment was explained they got to work. Before they started the project I had taken an image of our Fine Arts building, divided it into a grid, and put a number and letter on the back of each square (1A, 1B, 1C, etc.). I made sure to make a few copies, the students tend to misplace their squares and it helps to have extras on hand. As soon as the students got their slab square cut they had to flip it over and carve the letter and number into the back of it.
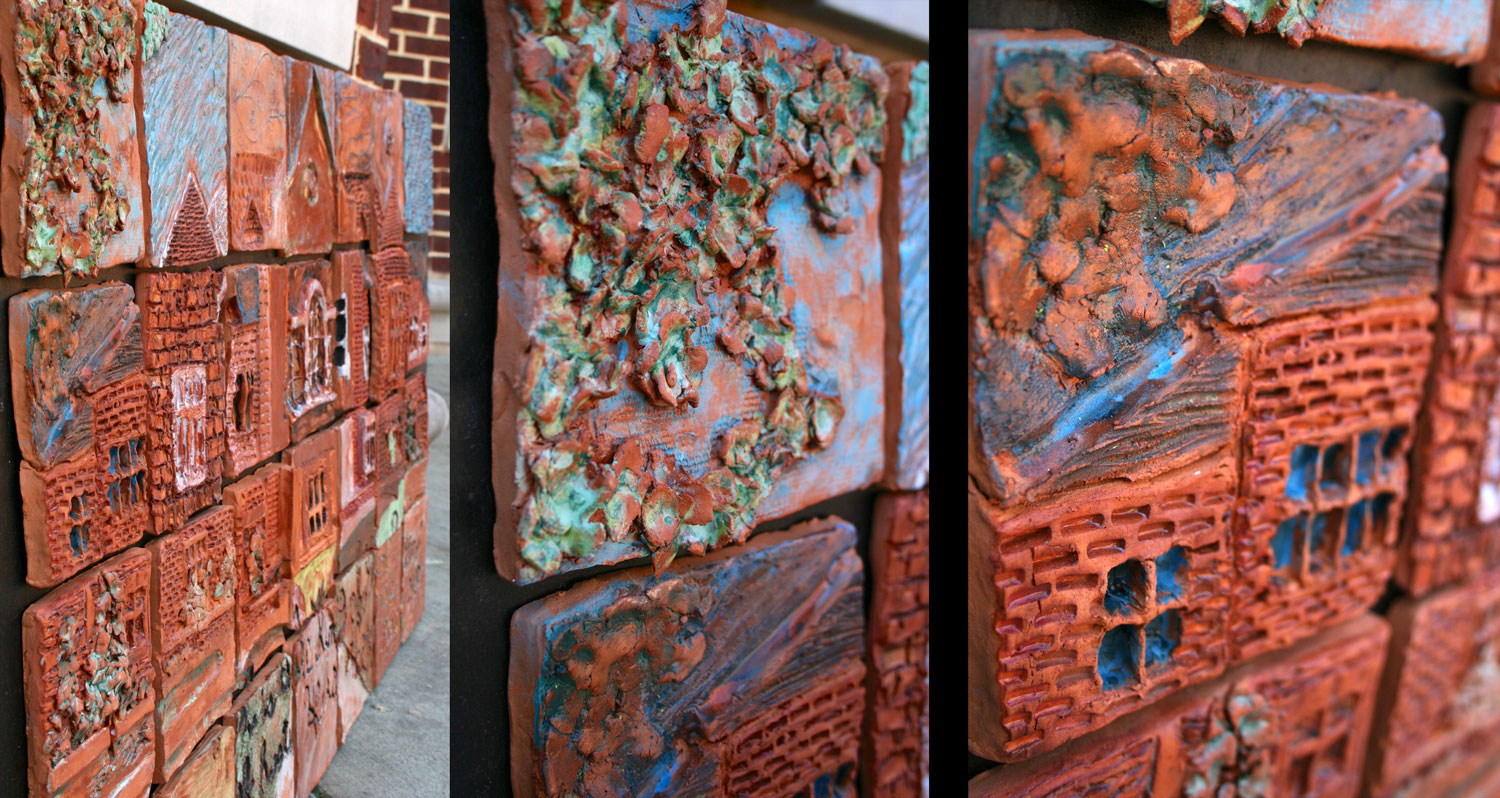
- After the students completed their squares I fired them and had the students glaze them. I knew every line and shape would not line up in the image, so my goal was to create a sense of unity through the glaze. I instructed the students to loosely paint underglaze onto their tile (I set up a few colors of blue, green, brown, and red) allow it to dry, then wipe it off with a wet sponge. This technique caused the underglaze to stick in the textured areas, and wipe off of the smooth area, giving it a loosely painted quality. Once the colors were added they painted a layer of clear glaze on top, and once again wiped it off. I loved the shiny vs. matte look this created.
- Once the pieces were fired a final time I glued them to a piece of wood I cut to size and painted black.
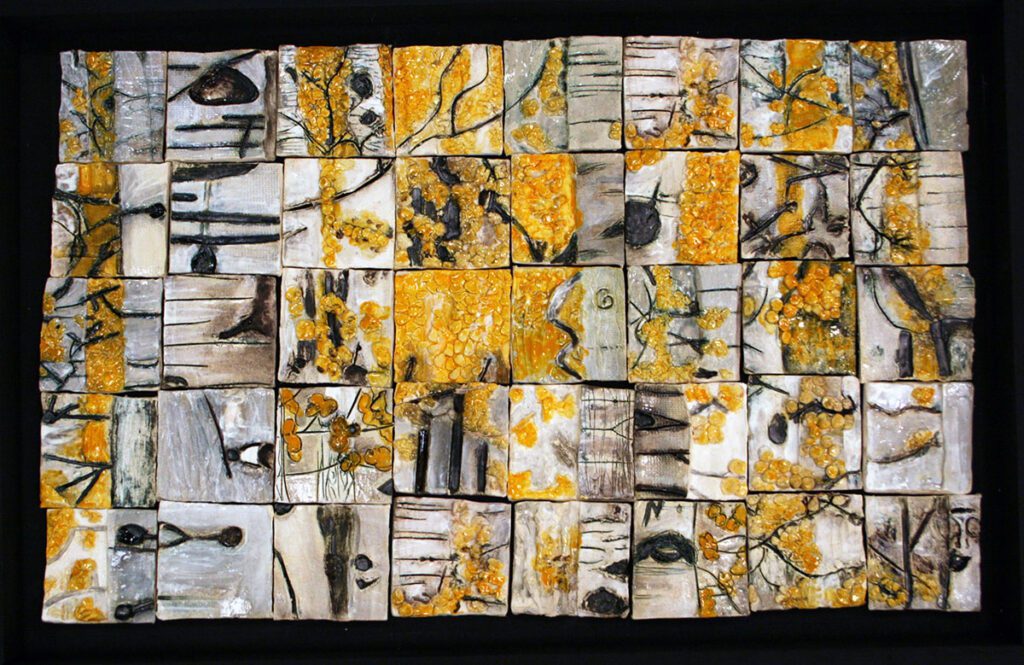
My students were as impressed as I was with the final product, and it was a huge hit at our annual art show. I love how each piece is important to the whole, and how it truly came together in the end. I taught this lesson twice, once focusing on a building on our school campus (the fine arts building), the other was an image of birch trees to donate to a silent auction for the school.
2D Collabortive Art Projects
Collaborative Grid Drawing
As mentioned above, I love introducing grid drawing by starting with a collaborative grid project. I typically chose images of buildings around town or of the school. The final drawings were permanently hung in the cafeteria, it was a great way to showcase architecture in the community. I have also seen painting versions of this project recreating famous works of art or famous historical figures.
TIPS: Focus on installation art with 2D versions of this project by scoping out a space with students first and discussing the impact a large-scale work of art will have on the space. When you select your image, print multiple copies and draw a 1″x1″ grid on the front. Add letters and numbers to the back to allow you to correctly piece the final work of art together. For example, write A1, A2, A3, on the back of the top row. On the second row write B1, B2, B2, and so on. The first step for students is to write this on the back of their piece of paper and make sure it is pointing the correct way when they start drawing. Cut up one image to pass out to students, hang onto one just in case students lose their pieces, and keep one intact to reference as you piece together the large work of art. You can check out the full lesson as a part of my grid drawing unit on my TPT here.
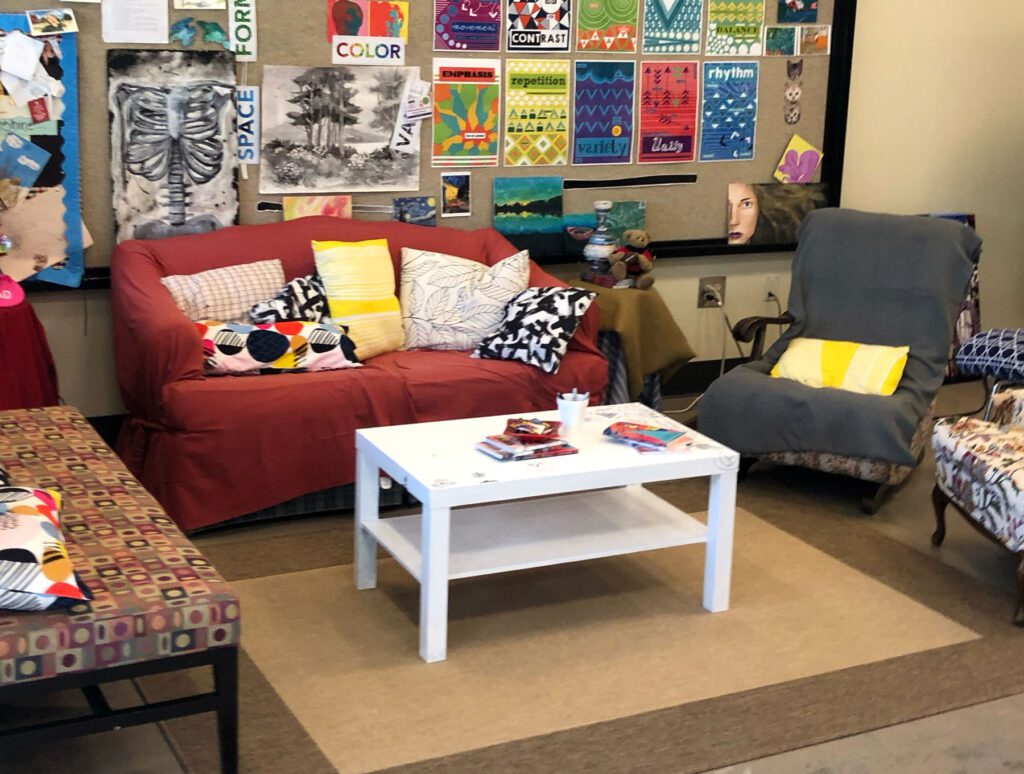
Collaborative Canvas
For more relaxed collaborative art projects try a collaborative canvas in your classroom. I love having this available as a fast-finisher activity. Every year, I would place a 24″x24″ canvas on an easel at the front of my classroom. If students needed a break from their project or “accidentally” cleaned up early, I would send them to the collaborative canvas. They can add whatever they want to the piece, as long as it is school-appropriate. It is so fun to see how it changes over the course of the school year. At the end of the year, I would display the piece at our annual art show.
Doodle Furniture
Another great fast-finisher activity is doodle areas. Paint furniture with white paint or gesso, add a chalkboard wall, or hang up a large blank sheet of paper. Place a cup of Sharpies nearby and allow students to fill the designated space with doodles. Look at the artist, Mr Doodle, for inspiration. If any inappropriate content pops up, cover it up, and move on. I think making a big deal about these things sometimes encourages the behavior.
Although group projects will never be my favorite the right collaborative art projects can encourage a sense of community and allow students to create large-scale works of art. If you set the project up right and keep an eye on participation, it can be successful for everyone.
Thanks for visiting my blog, I hope you find useful information you can use in your classroom. Please comment if you have additional tips, or ideas, or have done something similar in your class. Don’t forget to follow me on Instagram and TikTok for weekly visual journal demos and other project ideas. Subscribe here to get freebies, project tutorials, and more straight to your inbox. Until next time, keep sketching!
2 responses to “Collaborative Art Projects: Successful in 2D & 3D Art”
Leave a Reply
Related Posts

AWESOME, Whit! SO cool watching your life unfold as an art teacher 🙂 It is obviously your calling!
Thank you Jesse! I am blessed to be in a career I love, and I love following all of your projects as well. When I eventually have kids I can’t wait to try out all the projects you have done with Eli, they are adorable!