One of my favorite sculpture projects in my tape person project. I love it because it introduces the students to installation art, without taking over too much space at school, and the students love it because they get a life-size replica of themselves. You can get everything I use to teach this project here.
The only issue I have faced with this project is the amount of tape required. It takes a TON of packaging tape. I would estimate 10-15 rolls of packaging tape per sculpture. After checking prices at office stores, and even dollar stores, I decided to order from an online company. In the end I went with, boxforless.com, and got the tape for about $0.60 per roll. I hope you have the finances to do this project because it really is a great project for Sculpture I or II.
SUPPLIES
- Packaging tape
- Scissors
- Students
- Fishing wire (to hang)
- Paper clips, or something fancier to hang with
TAPE PERSON PROJECT HOW TO
1. I always start new projects with a PowerPoint of an artist exemplar, student examples (if I have them), the steps, and my expectations/grading. I like to give the students all of the information up front, that way there is no miscommunication, although with high school students, there is always some form of miscommunication. After I present the project I also add the step-by-step instructions to my board. My theory is by presenting the information to them verbally and visually, through my PowerPoint and on the board where they can reference it during class, there should be zero missteps. You would think this would be foolproof… but get ready… many repeated questions will still await you.
- For this particular project, I decided to present three artist exemplars. The reason I chose to do this is because installation art can be used for a number of reasons. For this assignment I focused on making a person aware of their space, Richard Serra was the exemplar for this, making a person aware of a particular part of their surroundings, Andy Goldsworthy was the exemplar for this, and making a statement about the location, Claes Oldenburg was used for this. I typically have a slide with basic background on the artist, followed by images. Whenever I introduce a new artist I have my students fill out a worksheet I hand out at the beginning of the year. All it is, is two columns with “artist” written above the left column and “artist info” written above the right column. They fill in general points to help them remember the artist on the sheet, and I grade it at the end of the year.
- I followed the artist exemplars with student examples. Since I had done this project once before, I had a few images to share. I cannot stress enough the importance of photographing student work. It helps tremendously when introducing projects.
- After all of the examples, I explain the assignment and my expectations. I explained to the students they could choose any area of the school to display their sculpture but it had to some how to relate to the space. Like the artist exemplars, they could either focus on making someone aware of their space by the presence of the sculpture, bringing attention to a specific architectural element or part of the space, or they could make a statement about the space. The students were divided into groups of two, but if they wanted to team up with another group and have their sculptures interact that was an option.
2. In order to create a tape person you must use your own body to construct it, which is why the students need to work in groups. I tell my students to first consider what position their tape person will be in, that way they can arrange their body in that position to make building it easier.
- The students work on building their person section by section. They wrap the packaging tape sticky side up on a part of their body, for example their forearm, and then they wrap the tape sticky side down. I recommend wrapping two layers sticky side up, two layers sticky side down, in order for the tape person to be thick enough.
- Once the body part is wrapped they CAREFULLY use scissors to cut the tape off. I have had only one incident where a student was jabbed a little too hard and had a minor cut on his arm. I told him to tell Mom it happened in PE, and all was good.
- Once they have all of the pieces created they have to tape them back together. First they need to tape the cut line, and then they need to tape the pieces to each other. In this step they must consider the position of the body. Is the elbow bent, is the person crouching, sitting, or standing. They can slightly overlap the sections as they tape them back together, but they must be careful not to lose the correction proportions.
- I have mannequin heads in my classroom, which we use to create the head. Find something that will work for a head, you do not want your students wrapping their heads in tape.
- Because you have to wrap sensitive areas, I also recommend dividing the students up based on gender. I allowed my girls to use my storage closet if they felt uncomfortable wrapping certain areas in front of the class.
3. Once the tape people are constructed it’s time to hang. I have had a lot of help from facility employees in the past, but this year I has a little more on my own. If you are hanging in high places, just be careful! Most schools have the tiles that can be moved, with the metal support bars in between. I tie fishing wire to the sculpture, and then to a bent paperclip. I then bend the paperclip around the metal support bar, and put the tiles back in place. This may sound ghetto, but it works like a charm. The tape people are relatively light and as long as you have at least two hanging points you shouldn’t have an issue.
- If any students want their tape person standing make sure the legs are thick enough to hold the weight, put it in an out of the way spot, and prop it against a wall. I haven’t had a lot of luck with the standing people staying standing. Typically a weak point will buckle, and they turn into sitting people.
Here are examples from my Fall 2012 Sculpture I class! I hope you enjoy!
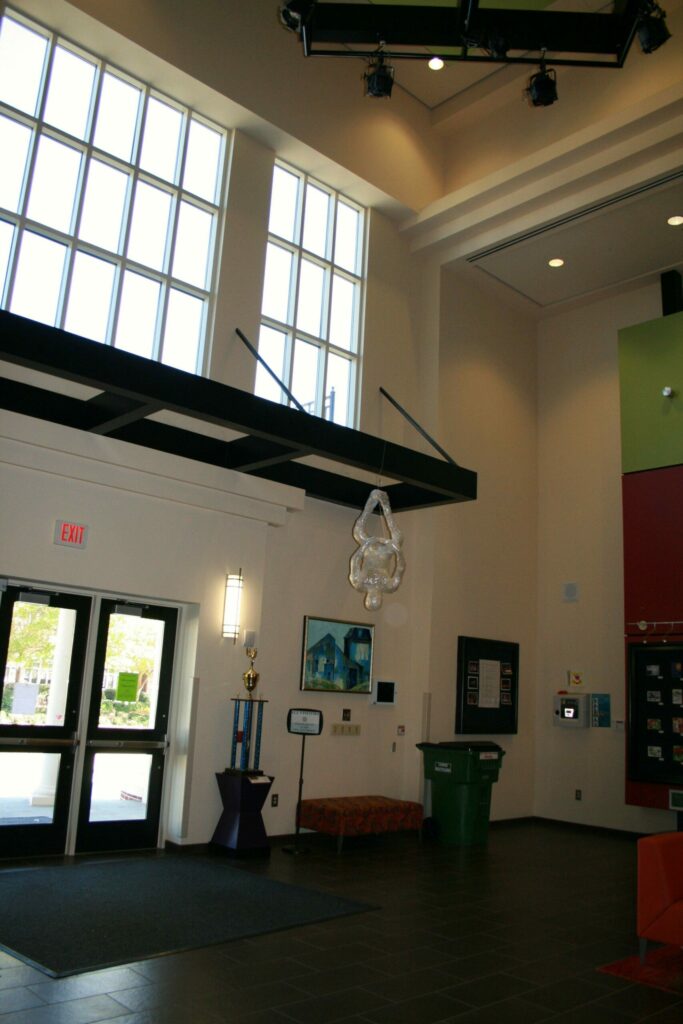
I don’t know how it happened, but someone I ended up with two groups doing upside-down Spidermen in two different areas. Typically I would encourage one group to do something else, but they were both so excited about it, I let it go. The purpose of both sculptures were to bring attention to the high ceilings in the areas. When you are walking in a building you are in day, after day, you begin to forget about all of the interesting architectural details. I thought both did a great job! This sculpture was suspended from the overhang above the entrance. I love how it makes you look up and pay attention to the high ceilings.
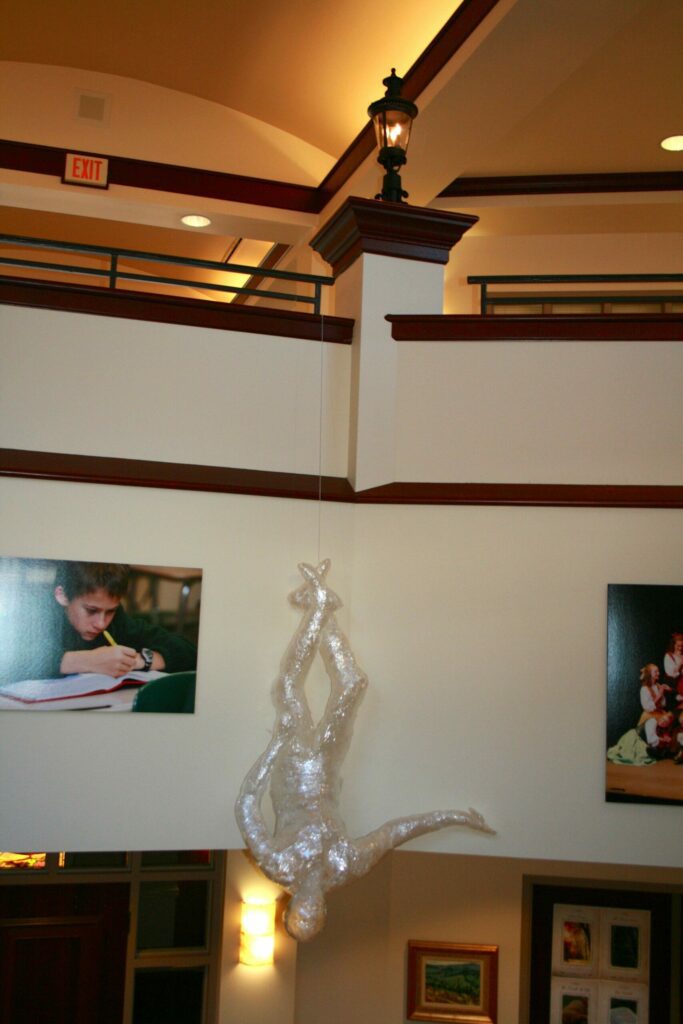
Even though I had two Spidermen, at least they were in different areas and had slightly different positions. This sculpture was suspended from the railing. I loved how the head looked from the floor below, all you could see was a round orb until you walked up the stairs. This one is hung in the Middle School building, and of course they ate it up!
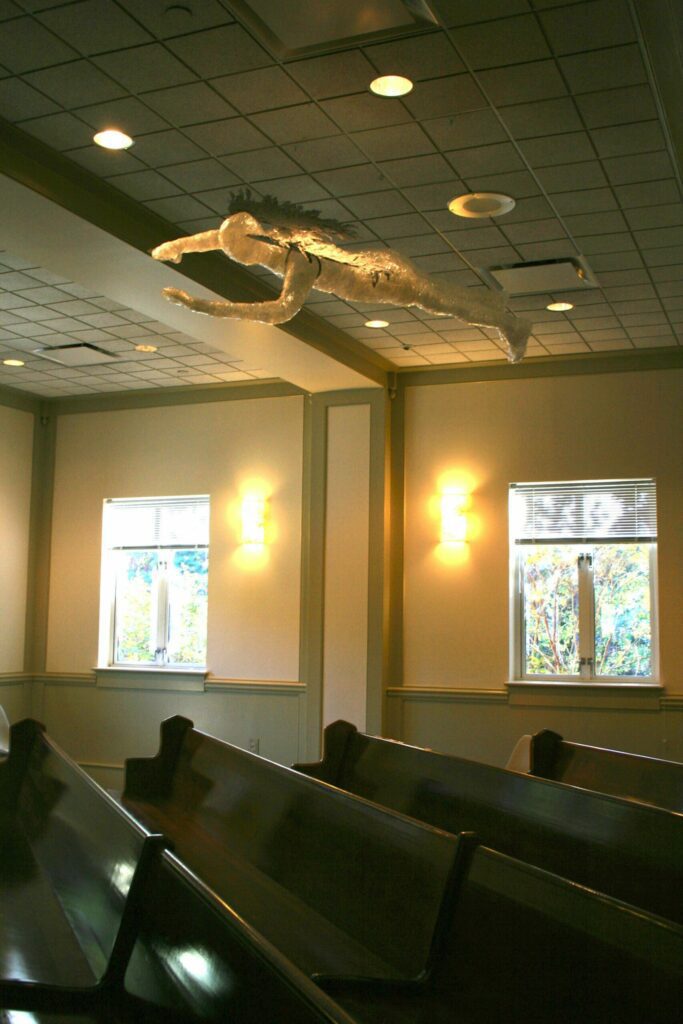
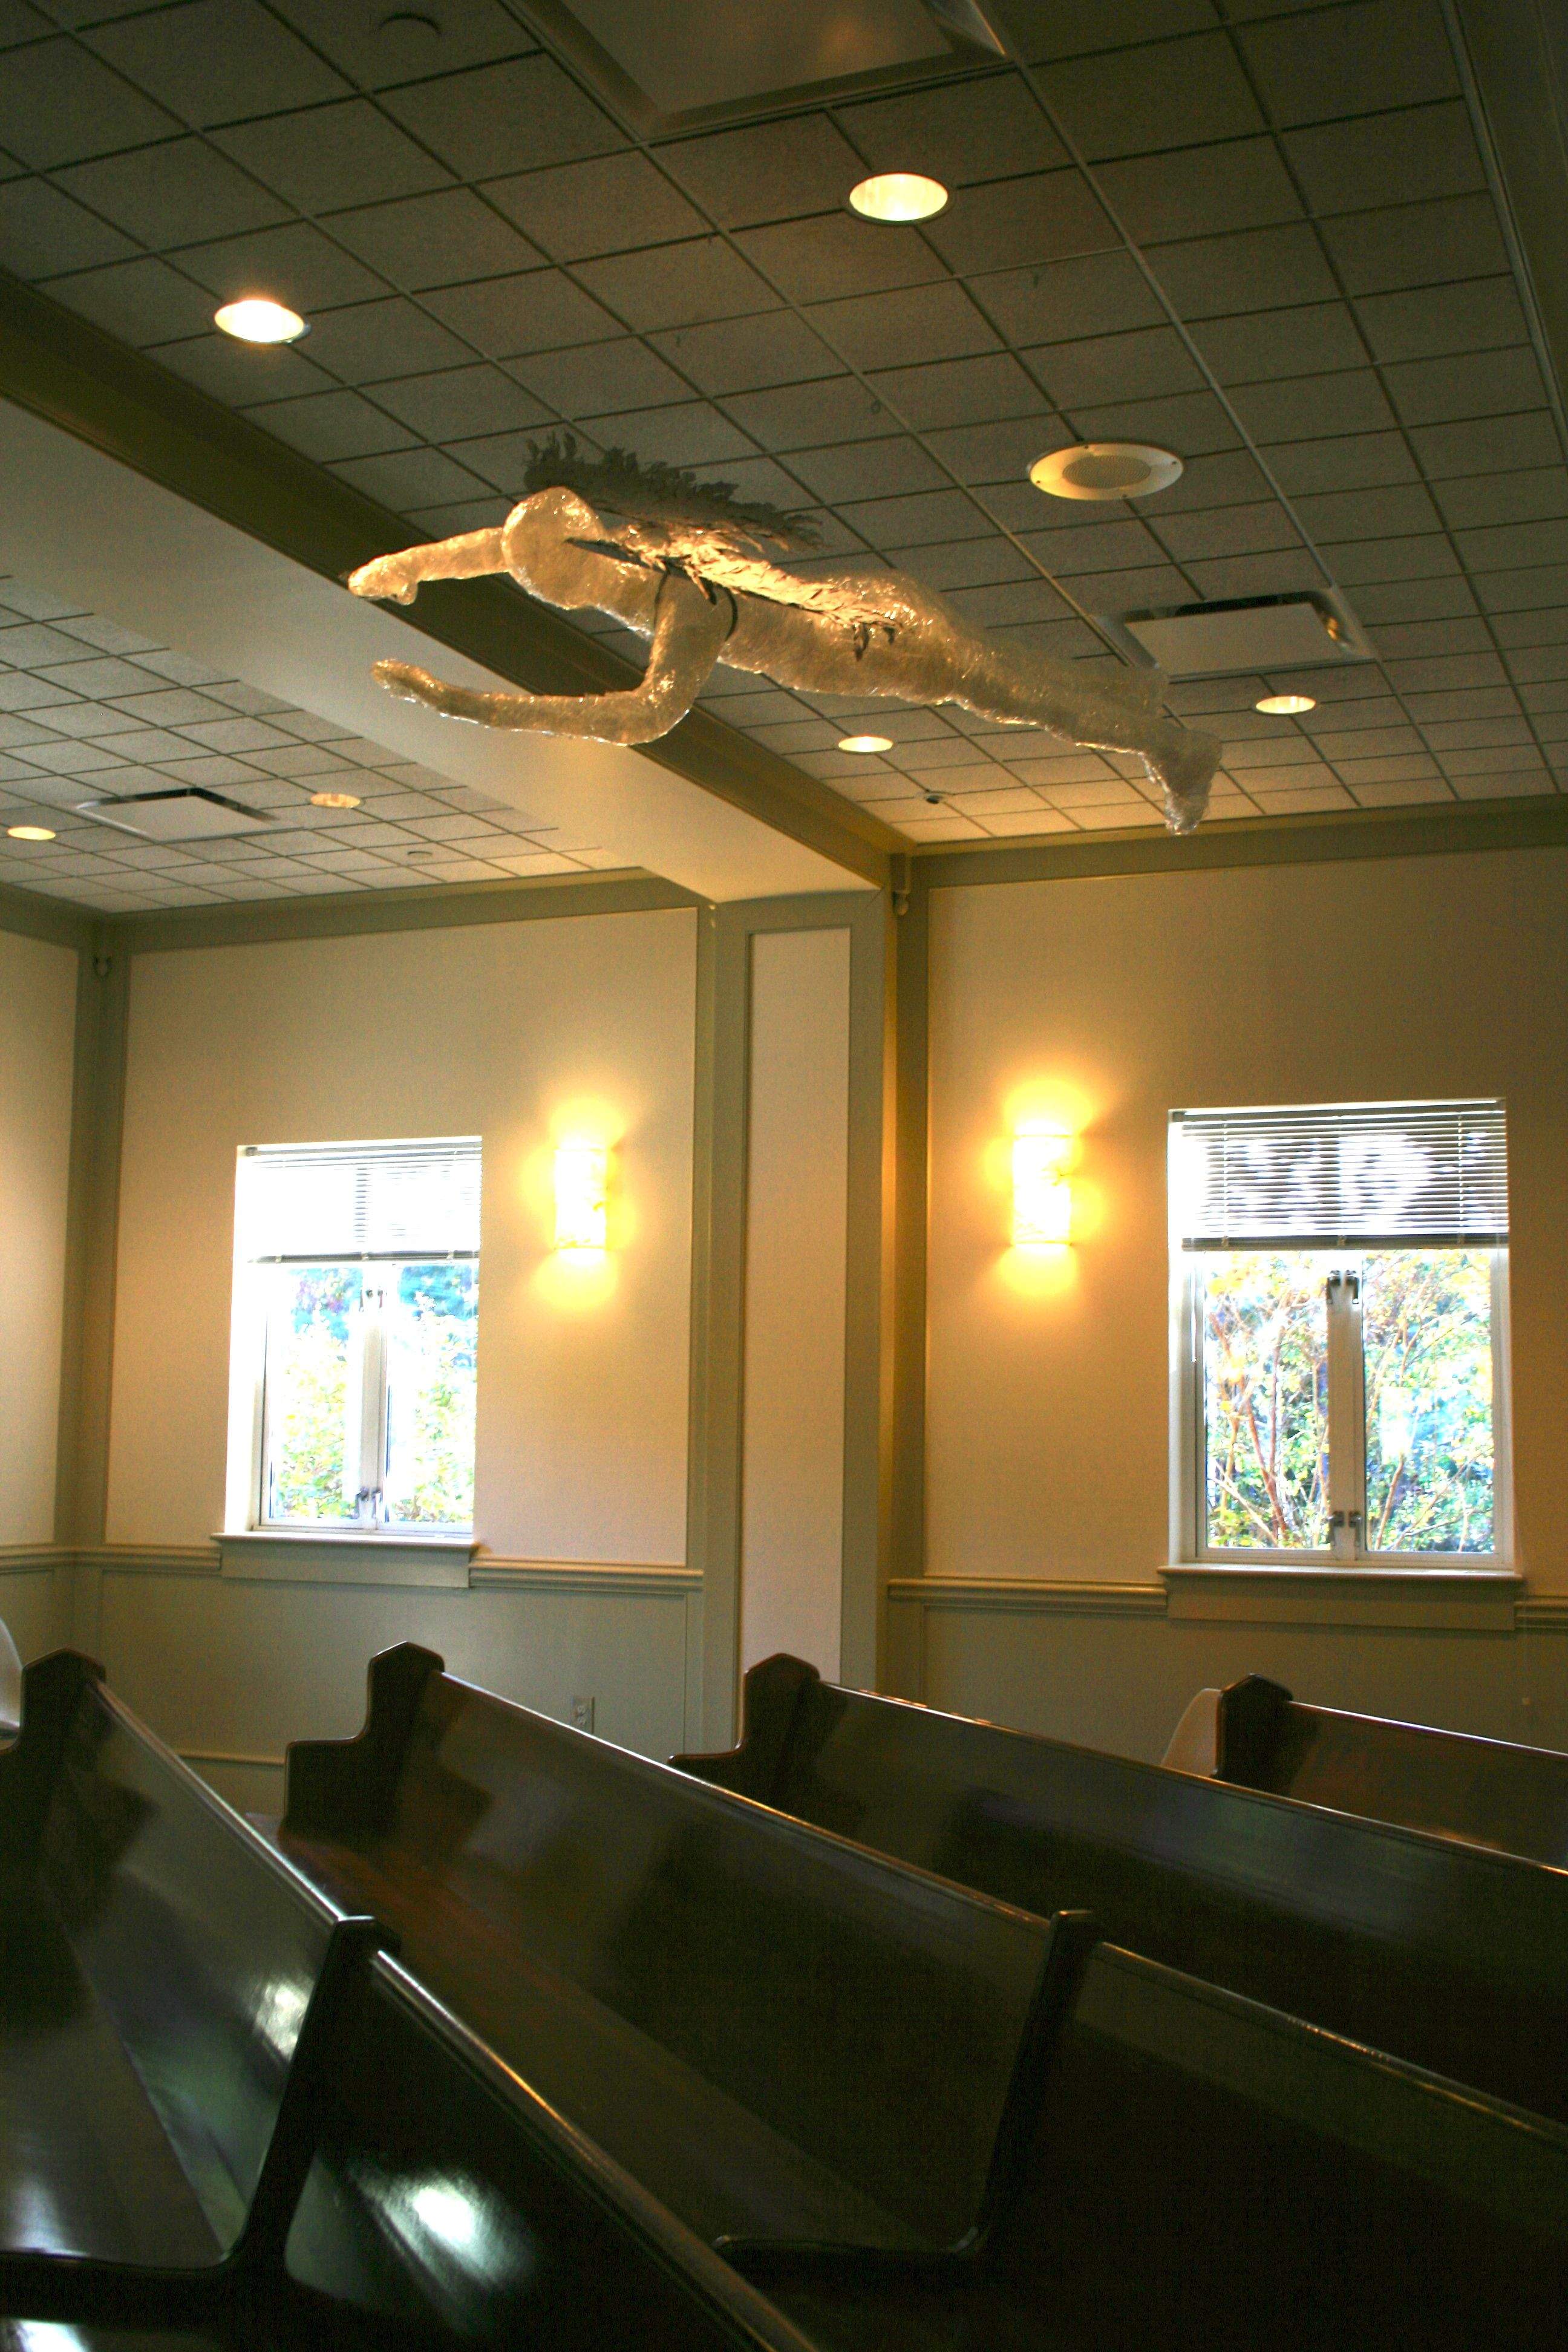
This sculpture is one of my favorites from this group. It was well made and they added the wings for an extra detail. I currently work at a private Christian school. This is my first year here, and I came from a title one public school. HUGE difference. As a Christian school we have a chapel, and this piece is placed in the chapel. The students wanted to bring focus to the purpose of the space, to worship. They placed the angel in a position to make it seem as if it is flying towards the altar, and the angel emphasizes the idea of a holy place. This group was very thoughtful with the location.
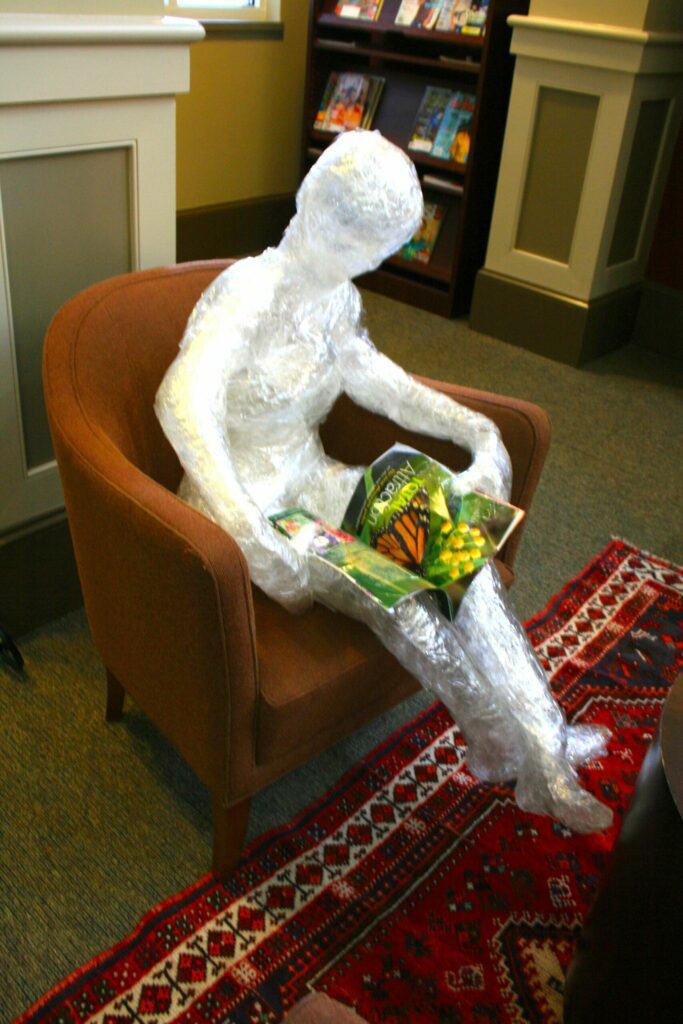
This sculpture was the only sitting sculpture. It was placed in the library, in a chair that is one of a group of four. The librarians LOVED having it, they cracked up when they saw three students studying in the chairs with the tape person occupying the fourth. The purpose of this sculpture was to highlight the purpose of the space, to read and learn.

This tape person project was placed at the end of the hallway. It was meant to make the viewer aware of their space, if you sit on the bench you may become uncomfortable with a tape person’s hand almost touching your head. I believe this one would’ve been more successful if it had hung lower, however in a high school, you must consider keeping things out of reach.
The students, administrators, and faculty all love this project. It’s a great way to display art in your school and get a lot of chatter going about your program. I found out about this lesson through one of my former coworkers, who found out about it through her former coworker, sometimes the best lessons are the ones that are stolen from others! Good luck, I hope you give it a try, and if you do send me some pictures!
This looks like an awesome project! I am currently teaching K-High school art at a private Christian school. I am interested in doing this body taping project. I have seen it done with saran wrap and tape also. Wondering if you had any insight on which way you think would be better. Also, how is the deflation rate on these pieces? Trying to gage when I should do them. Our art show is the first part of May and wanted to hang them then. I have 5 art students in high school this year and wondered how long this would take them to complete. We meet for 50 minutes twice a week. Thank you for your help!
His Blessings,
Crystal Strong
Sorry it has taken me so long to respond! I have never done it with saran wrap, but that sounds like such a smart step. I typically wrap sticky side up then sticky side down, but that means it takes double the packaging tape. I assume plastic wrap is cheaper, which could save some money on your end. The piece are held up by the structure of the tape, not air inside the pieces, so they stay three-dimensional forever! As long as they don’t get smushed, you should be all set to do them early then display them at your art exhibit. It took my students 1.5-2 weeks to complete, meeting approximately 4 times a week for 50 minutes. I would plan for 3 weeks, and hopefully it will wrap up sooner than that.
Good luck! Let me know if you decide to test out the plastic wrap!
I would love to try this at my school! How did you go about installing each piece? Did each group work on install separately?
I helped with the install if it involved ladders, moving ceiling tiles, or similar. The group would scope out a location to place their sculpture before they started and I would coach them through what that looks like and what we could and couldn’t do. I sometimes had to call in help from maintenance workers if it was very high up. It’s such a fun project I highly recommend it!
When we created our tape sculptures, we used balloons to keep the body cavity open, since the pieces were not strong enough to keep the shape. We found that placing balloons in them and then blowing them up helped.
That’s such a good idea! My kids always had to do a lot of layers of tape in order to get them structurally sound to stand on their own, but balloons are a great support while you are working towards that thickness (and the model is tired of being wrapped in tape).