Nick and I were very blessed to receive many amazing gifts on our wedding day. We were overwhelmed with the amount we received, and it helped us fill our house and start our wedded life together. However, while unwrapping gift after gift, we couldn’t help but notice a common theme, cutting boards. This led us to creating our first hand built piece of furniture.
While registering for gifts we found a cutting board we both liked. It was a nice medium size, had an interesting wood texture, and seemed like it would fulfill all of our cutting needs. Apparently, many of our guests felt one cutting board just wasn’t enough. We were beyond grateful for all of the wonderful gifts we received, but by the time we opened the seventh cutting board, we couldn’t help but wonder what we were going to do with all of them.
I began hitting kitchen store after kitchen store trying to find possible returns, exchanges, and any options to reduce our number of cutting boards. After many attempts and failures, I finally returned the only one I could, the one we registered for.
Four of the remaining six found homes in our kitchen cabinets, one oversized one lives on top of our microwave, and the last of the 6, a beautiful, yet massive cutting board had nowhere to go.
It was obviously an expensive gift, and the pattern of the wood was beautiful. I loved it, but it was so large it wouldn’t even fit on our countertop. After throwing around ideas, Nick came up with a brilliant plan, turn it into a piece of furniture.
We both loved butcher block tables, but in our tiny kitchen adding one wasn’t an option. However, this particular cutting board was almost exactly as long as our counters, and perfectly filled the wall space between the end of the counter and a window in our kitchen.
We took off to our local Lowes and began planning out the project. I wanted decorative legs, and after comparing prices and heights, we realized deck balusters were the perfect size, shape, and design. They also fit into our very meager budget. We gathered our supplies and headed home to get to work.
Nick build out a frame, attached legs, built a lower shelf, added wheels for maneuverability, and a towel bar. Meanwhile, I went through paint color after paint color, trying to find the perfect shade of turquoise blue. After the seventh or eighth layer of paint, I found the perfect shade. Our table was almost complete, the last piece was the cutting board.
After many discussions of variations on the original design, Nick decided he wanted to make the cutting board detachable. It was a great idea but involved cutting holes in the bottom of the board, in order to use wood dowels to attach it to the table bottom, which allowed us to remove it.
I was terrified as we lined up the bottom of the cutting board with the drill press. I held my breath at the whirring drill bit that made it’s way to the surface of the wood. What if it cracked? After all this work, what if we break the one piece we can’t replace? As the drill connected, it easily ate through the wood and created the perfect hole. Three holes, and four dowels later, our hand built table was complete.
We have received compliment after compliment on our hand built table. I love that it has a story behind it, as well as some blood, sweat, and tears. If we had only received the one cutting board we asked for, this table would have never come to be. I didn’t realize how seven cutting boards could spark inspiration.
SUPPLIES
- Visual journal
- Rubber cement
- Hot glue
- White paper
- Pencil
- Colored pencils
- Paint samples
- Sharpie
- Scissors
- Xacto knife
HOW TO
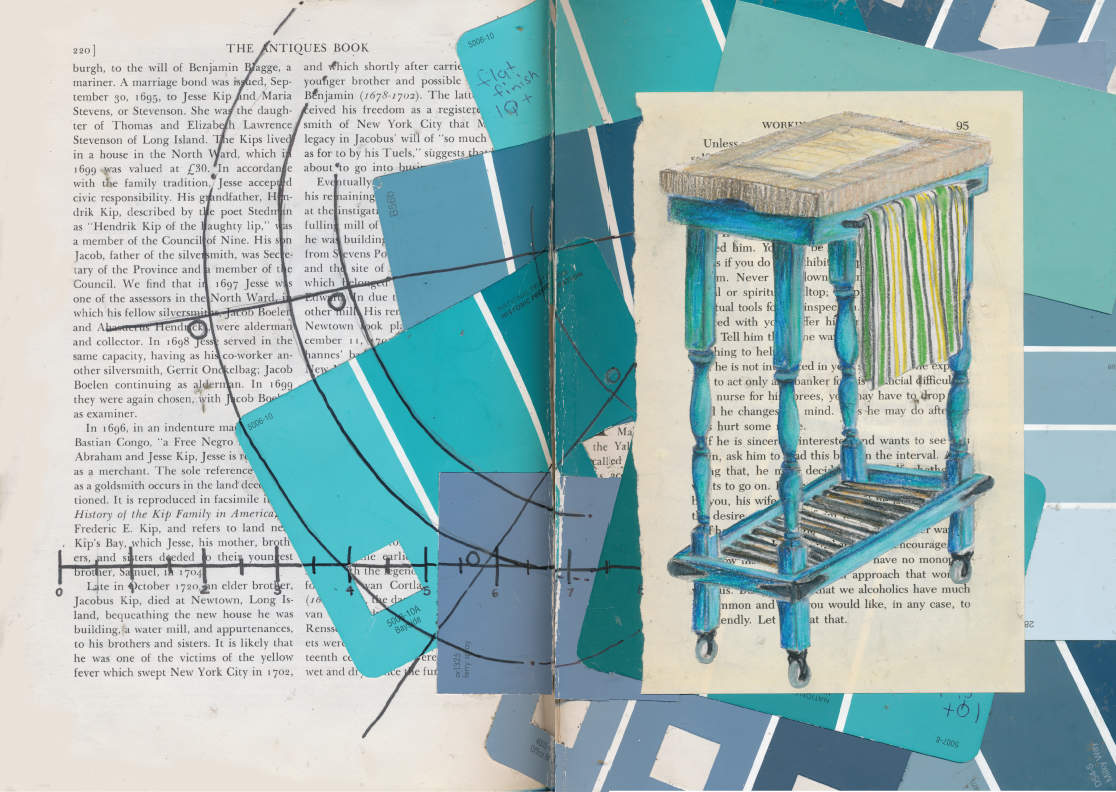
To create this visual journal page I started with a base layer of paint samples. Since it took many layers before I was satisfied with the color, I thought it was a good place to start. I used hot glue to glue them down, which is a little more sturdy than rubber cement.
Next, I started drawing out our homemade table. I sat in my kitchen, did a quick sketch, then began adding color. I lightly layered various shades of colors, until the layers blended together to create a solid look. Once I finished I carefully cut it out using scissors and a Xacto knife.
I glued my finished table drawing on top of the paint samples and added a few measurement lines with a sharpie in the background.
CHALLENGE
Create a color base in your visual journal using paint samples from your local hardware store. Nothing beats the range of colors you can get and they are free!
Thanks for stopping by! Check out more visual journals blog posts here. Don’t forget to follow me on Instagram and TikTok for weekly visual journal demos. Until next time!
Related Posts


Leave a Reply