I used a technique called packaging tape transfer to create this layered visual journal page. Read about the inspiration and how-to below.
THE STORY
For over two years I functioned without a printer in my classroom. In my class, visual journals are a big focus. Every Friday my students get out their journals and make whatever they want. With this open-ended assignment also comes a need to print images for my students to use in their visual journals. In addition to my weekly need for a printer, my students often used images as references for their projects. At the start of every project I had to reserve time in the only computer lab in the school just so my students had access to a computer to look up images and a printer to print them.
For living in such a technically advanced age it shocks me when schools are so far behind. We are supposed to be preparing these students for college and the workforce. Technology is an inevitable part of their futures and they need experience using it before they get there. Many of my students were fortunate enough to live in homes that could afford computers. However, not all of my students are that lucky. Some of their only contact with technology was in school, and we had low availability of it.
By my third year I was fed up. I was tired of battling every other teacher for time in the computer lab and sending students to the library to print for 25 cents a page. It was time to find a way to get technology in my classroom. I decided to apply to a grant program in Newton County called the Snapping Shoals Bright Ideas grant, provided by Snapping Shoals Electric Membership Corporation. To apply to the grant I had to provide a lesson plan and what materials needed funding for the lesson. I chose to submit a lesson for my Advanced Placement Art class that involved photo transfers. In order to print pictures to transfer they needed a computer and a laser printer.
The previous year I had applied to Snapping Shoals and was awarded grant money to help fund my sculpture program. I was one of 19 teachers selected to receive funding from the surrounding counties. I was proud of myself and excited for the prospects this provided for my students. Because I was awarded money the previous year, I figured my chances were slim of being selected again. Despite this I put together my lesson and submitted my application.
The announcement day came and I couldn’t believe it when I found my name on the list. I was going to receive two computers and a printer for my students to use. I would finally have a space to allow my students to expand their ideas and create their projects.
SUPPLIES
- Visual journal
- Elmer’s glue
- Scissors
- Laser printed image
- Packaging tape
- Book pages
- Sharpie
PACKAGING TAPE TRANSFER HOW TO
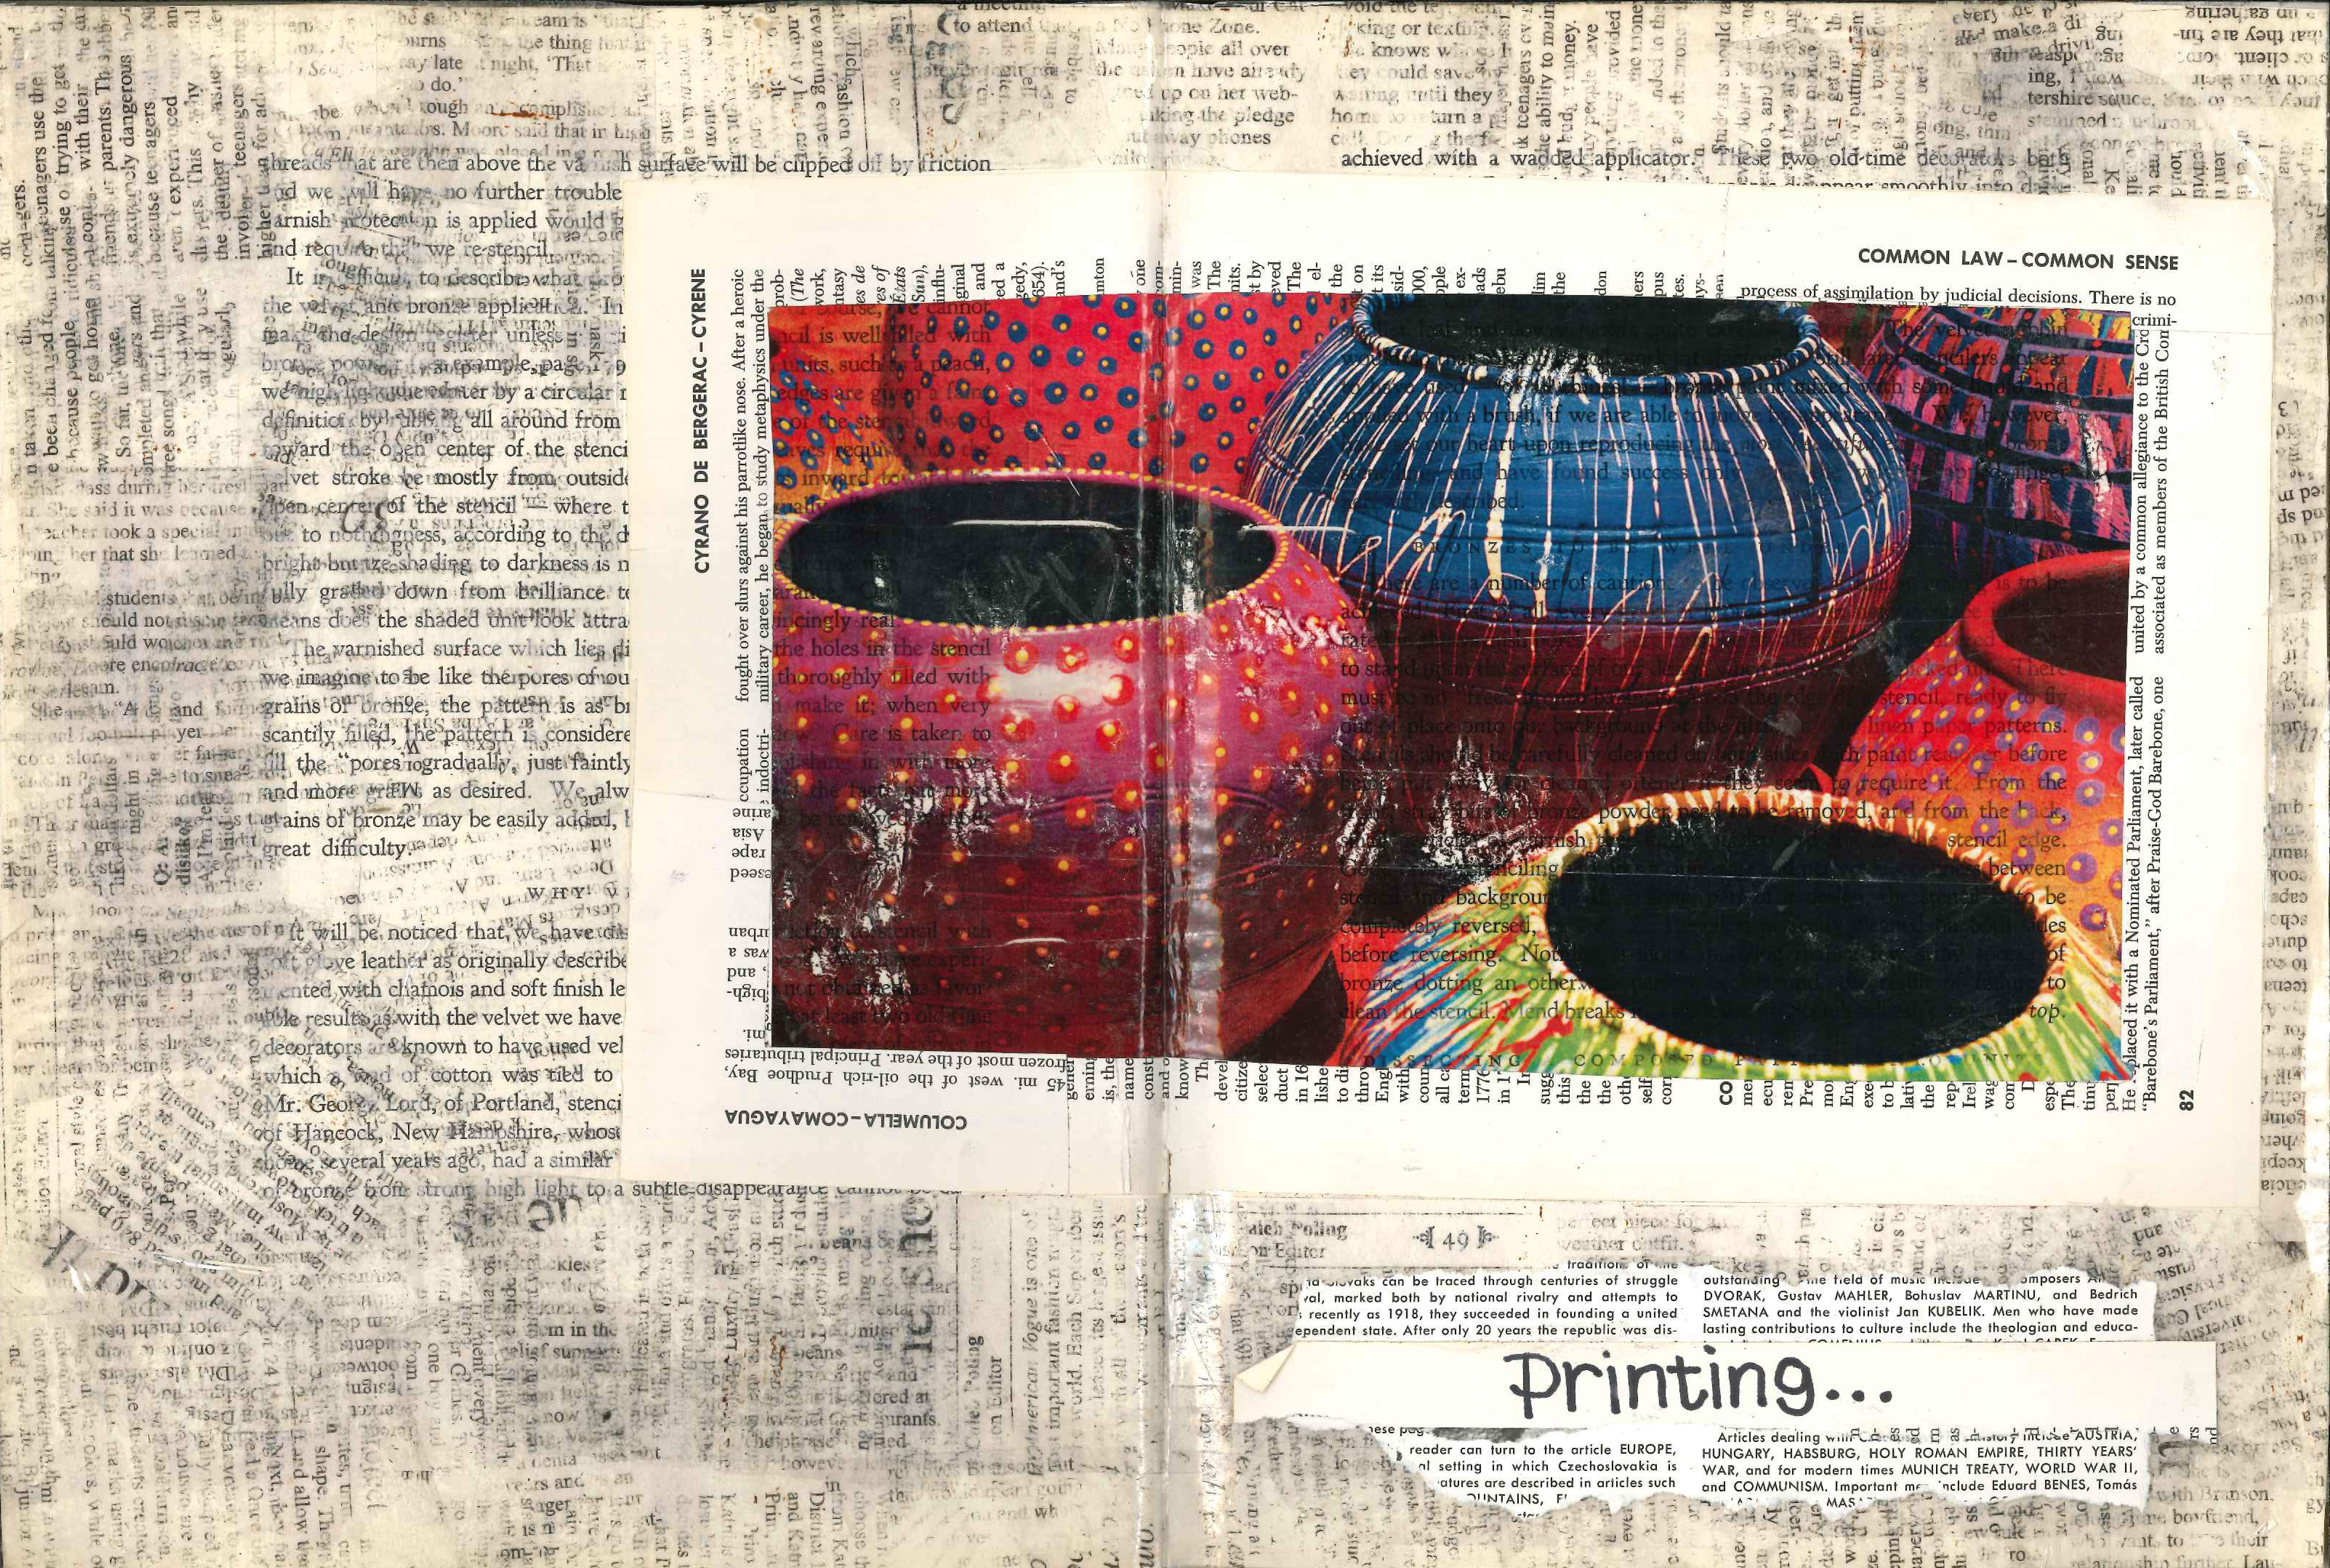
To create this visual journal page I started with a printout of the most colorful, vibrant picture I could find. I wanted to show off my printer’s ability, and loved this picture of the brightly colored pots. I printed it off on my fancy new laser printer and got to work creating a tape transfer. I carefully placed packaging tape over the picture, sticky side down, on top of the front of the image. After I had one layer of tape covering the picture, I trimmed off the white edges, leaving just the picture stuck to the tape. I rubbed the back of the picture with scissor handles (burnishing) to ensure the ink was well stuck to the tape. I then placed the image in water until the paper began separating from the tape. I carefully rubbed the paper away, leaving just the ink stuck to the tape and creating a semi-transparent image.
I wanted to emphasize my ability to now create image transfers easily (thanks to my new computers and printer) so I also layered tape transfers of text in the background. To create these all I did was lightly stick packaging tape on a book page, then ripped it off, so the ink from the text stuck to the tape without too much of the paper sticking. I layered these in the background, the stickiness of the tape was enough to adhere it to the page.
Because the tape transfer of the image was very ink-heavy, the tape lost its stickiness. In order to adhere it to the page I had to glue it down with Elmer’s glue. Do not use rubber cement when layering tape, it creates a chemical reaction and makes the tape bubble. I wanted to emphasize the image even more, so I cut a paper frame out of a book page to outline it.
To complete the page I layered two pieces of book pages on the right page, then wrote “printing” on top with sharpie.
CHALLENGE
Create a visual journal page using a packaging tape transfer. One where you layer tape on a laser-printed image and wash off the paper. The second should be a quick transfer of text by lightly sticking packaging tape to a book page or newspaper and ripping it off.
Thanks for taking the time to check out my blog! Help me spread the word about visual journaling by sharing with others. Check out more visual journal blog posts here. Shop my education resources here. Don’t forget to follow me on Instagram and TikTok for weekly visual journal demos. Until next time!
Related Posts


Leave a Reply