GLASS FUSING LESSON OVERVIEW
I recently did my first glass fusing lesson with my high school 3D II students, and they loved it! Only halfway through the first day of this fused glass lesson almost every one of my students had proclaimed this as their favorite project. It’s easy, fun, and almost foolproof. Even my students who quickly rushed through, and didn’t really consider the design had a good turnout. I am now starting this with my 3D I student and can’t wait to see what they produce!
In this post, you will find the necessary supplies, approximate cost, and how to do this glass fusing lesson with your students! If you want to hit the easy button and get everything I use to teach this lesson in presentation, lesson plan, and handout formats check out my lesson pack here. This lesson is also part of my semester curriculum pack for a sculpture and ceramics class. Check it out on my TPT here or on my website shop here.
SUPPLIES:
- A digital kiln: They do make glass kilns but I converted one of my ceramic kilns to glass only. It is a programable Skutt kiln. By entering “ramp and hold” information I am able to achieve the same results as I would in a glass kiln!
- Glass glove: Not necessary but a number of my students left class with sliced fingers, and the majority of them were using the gloves by the end of the project
- Grozer: Glass scorer for organic shapes
- Glass pliers: For breaking
- Glass breaker: I found a cheap pink one that works great!
- Cutting system: I bought a kit that included a waffle grid, Flying Beetle cutter, and a Beetle bit cutter
- Kiln wash or spray: I use the spray and it is more expensive but you don’t have to set the wash before you fire on it, it’s very easy!
- Kiln wash sheets: I place these thin sheets on top of my ceramic kiln shelves, each one lasts a few firings, and they cost $5 per sheet, so this adds up.
- Adhesive, heat gun, bail bonds: This is if you want to do jewelry pieces and pendants
- Molds: I have a variety of plate and bowl molds, my most popular are my 7″ sqaure bowl and jumping bean mini bowl, I plan to purchase a few of these in the future.
- 96 COE glass: You must purchase glass with the same COE, 96 is the easiest to work with
- 96 COE frit: Ground up glass into a sand-like substance
- Noodles and stringers: Long, thin pieces of glass
APPROXIMATE COST: $600.00
HOW TO:
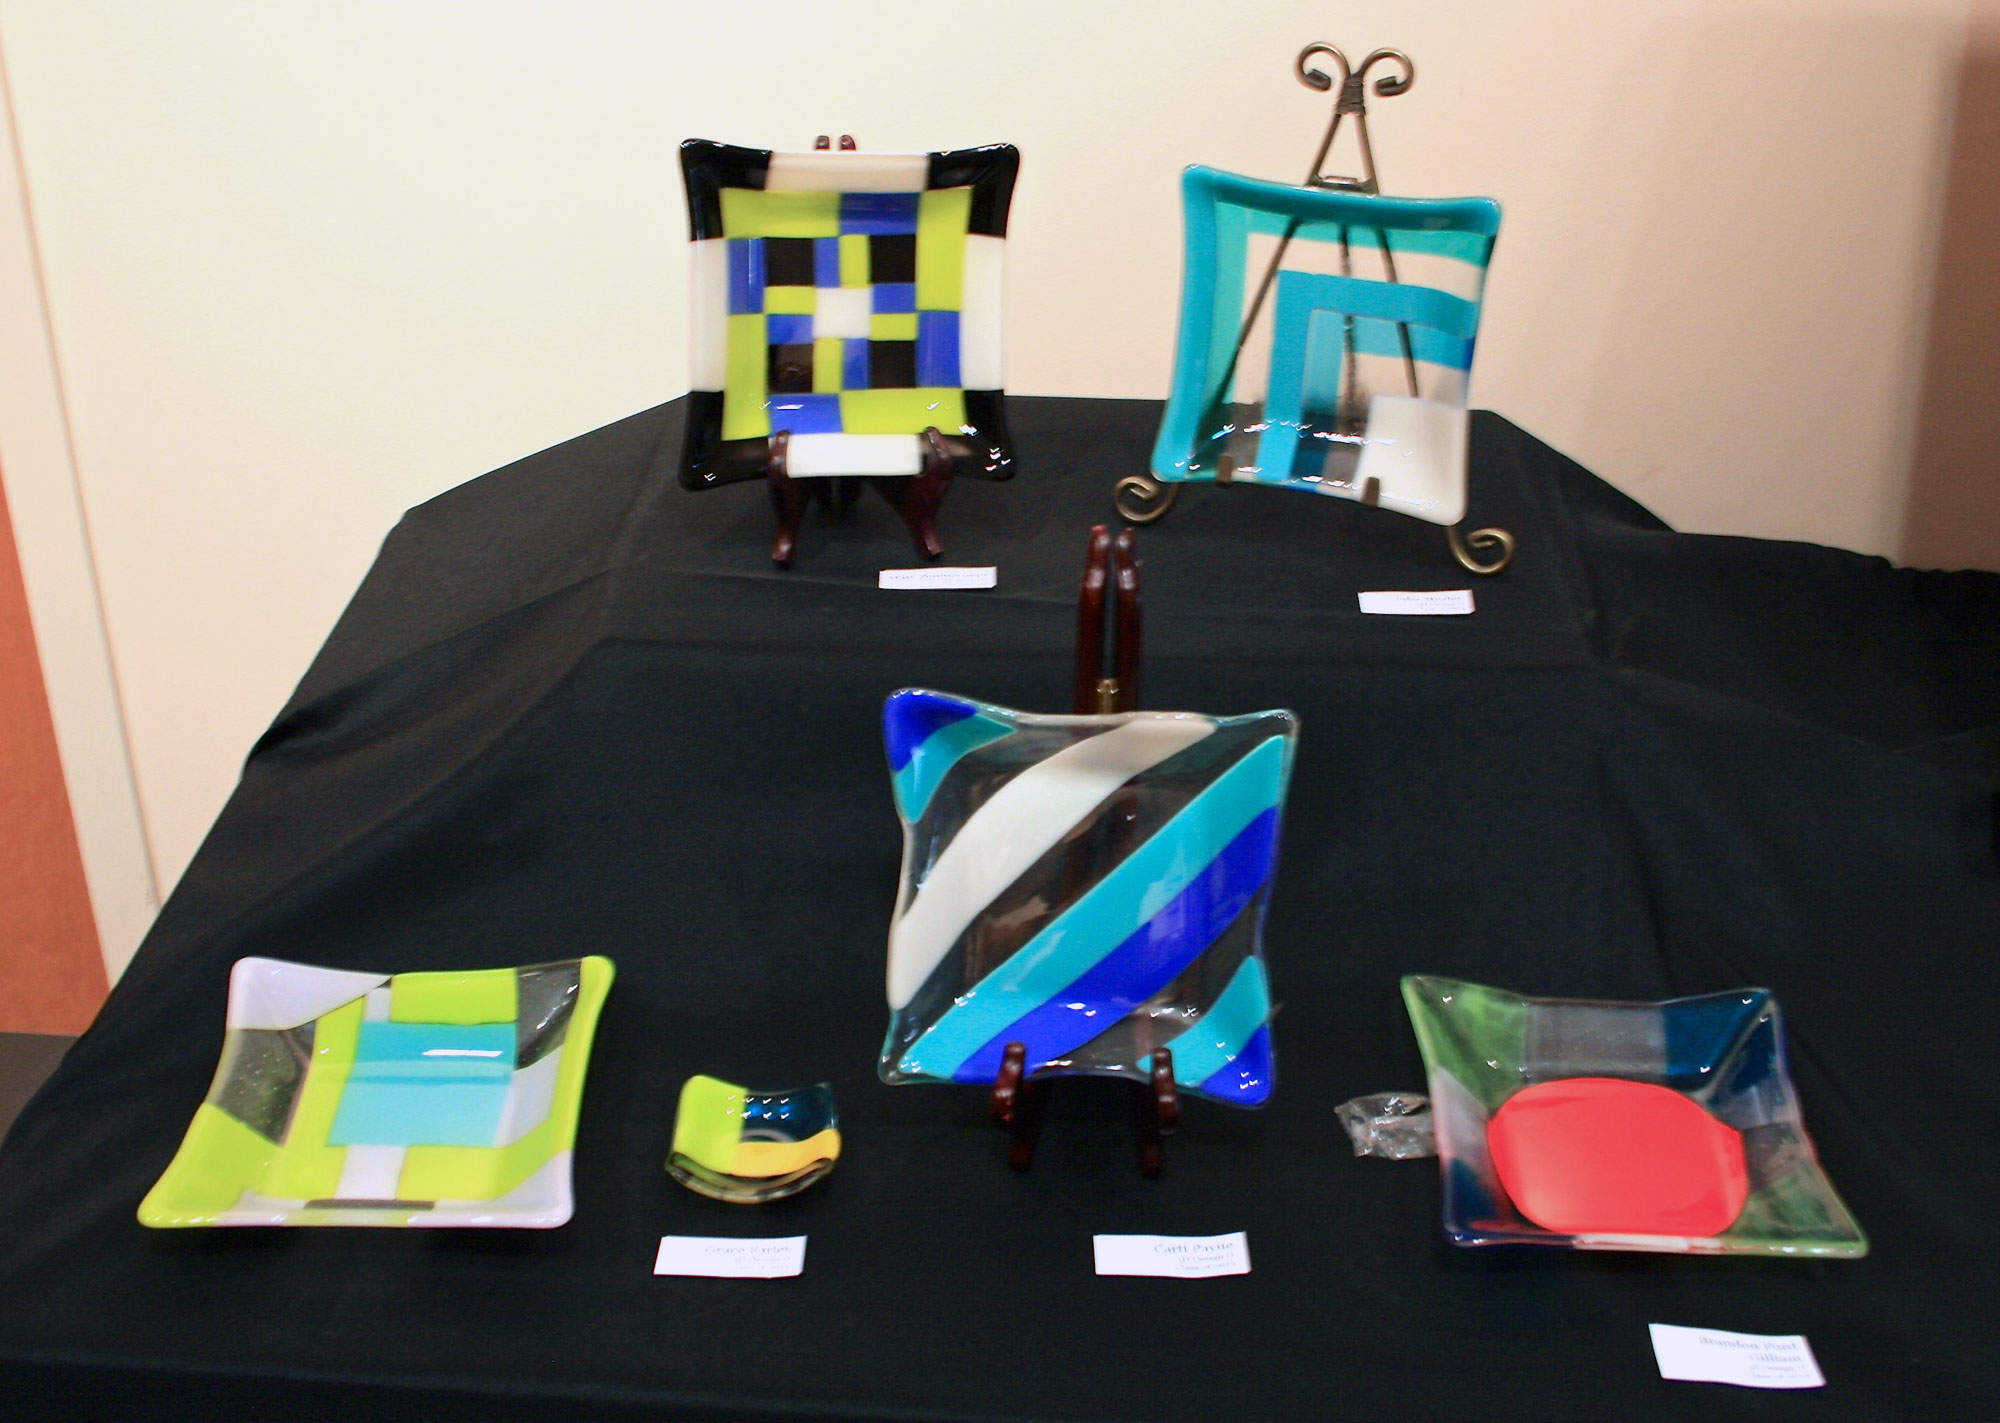
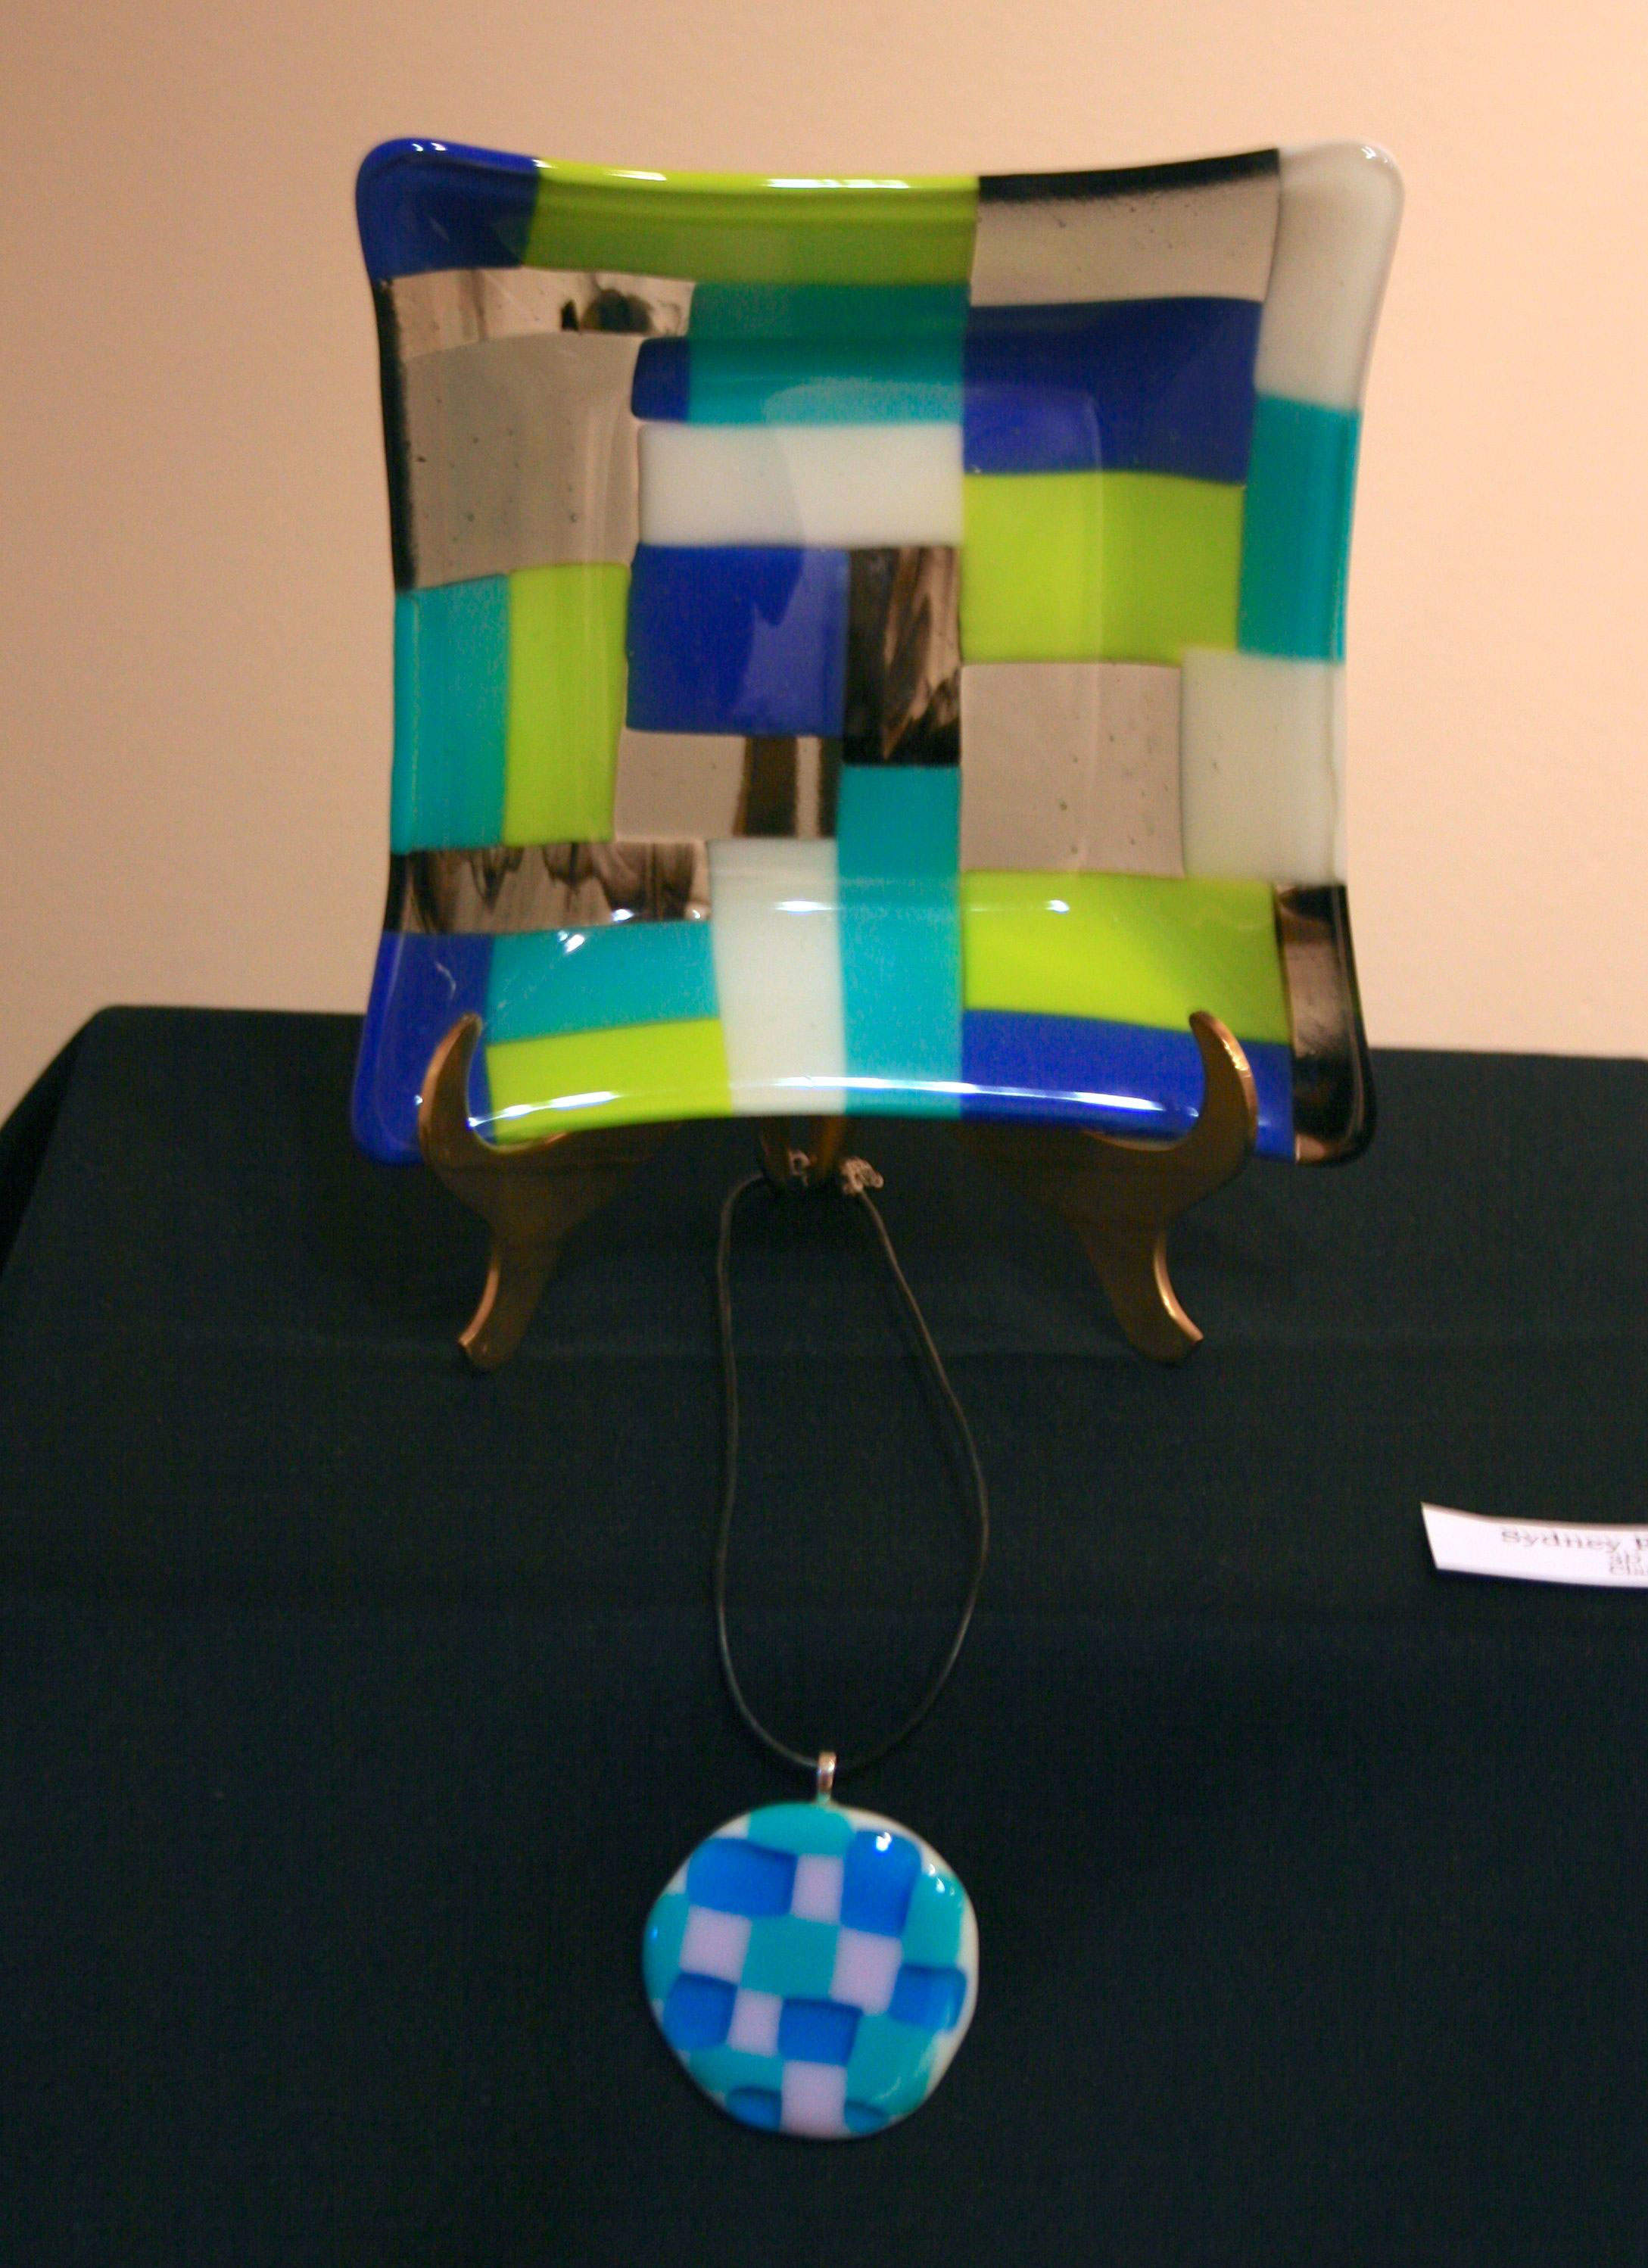
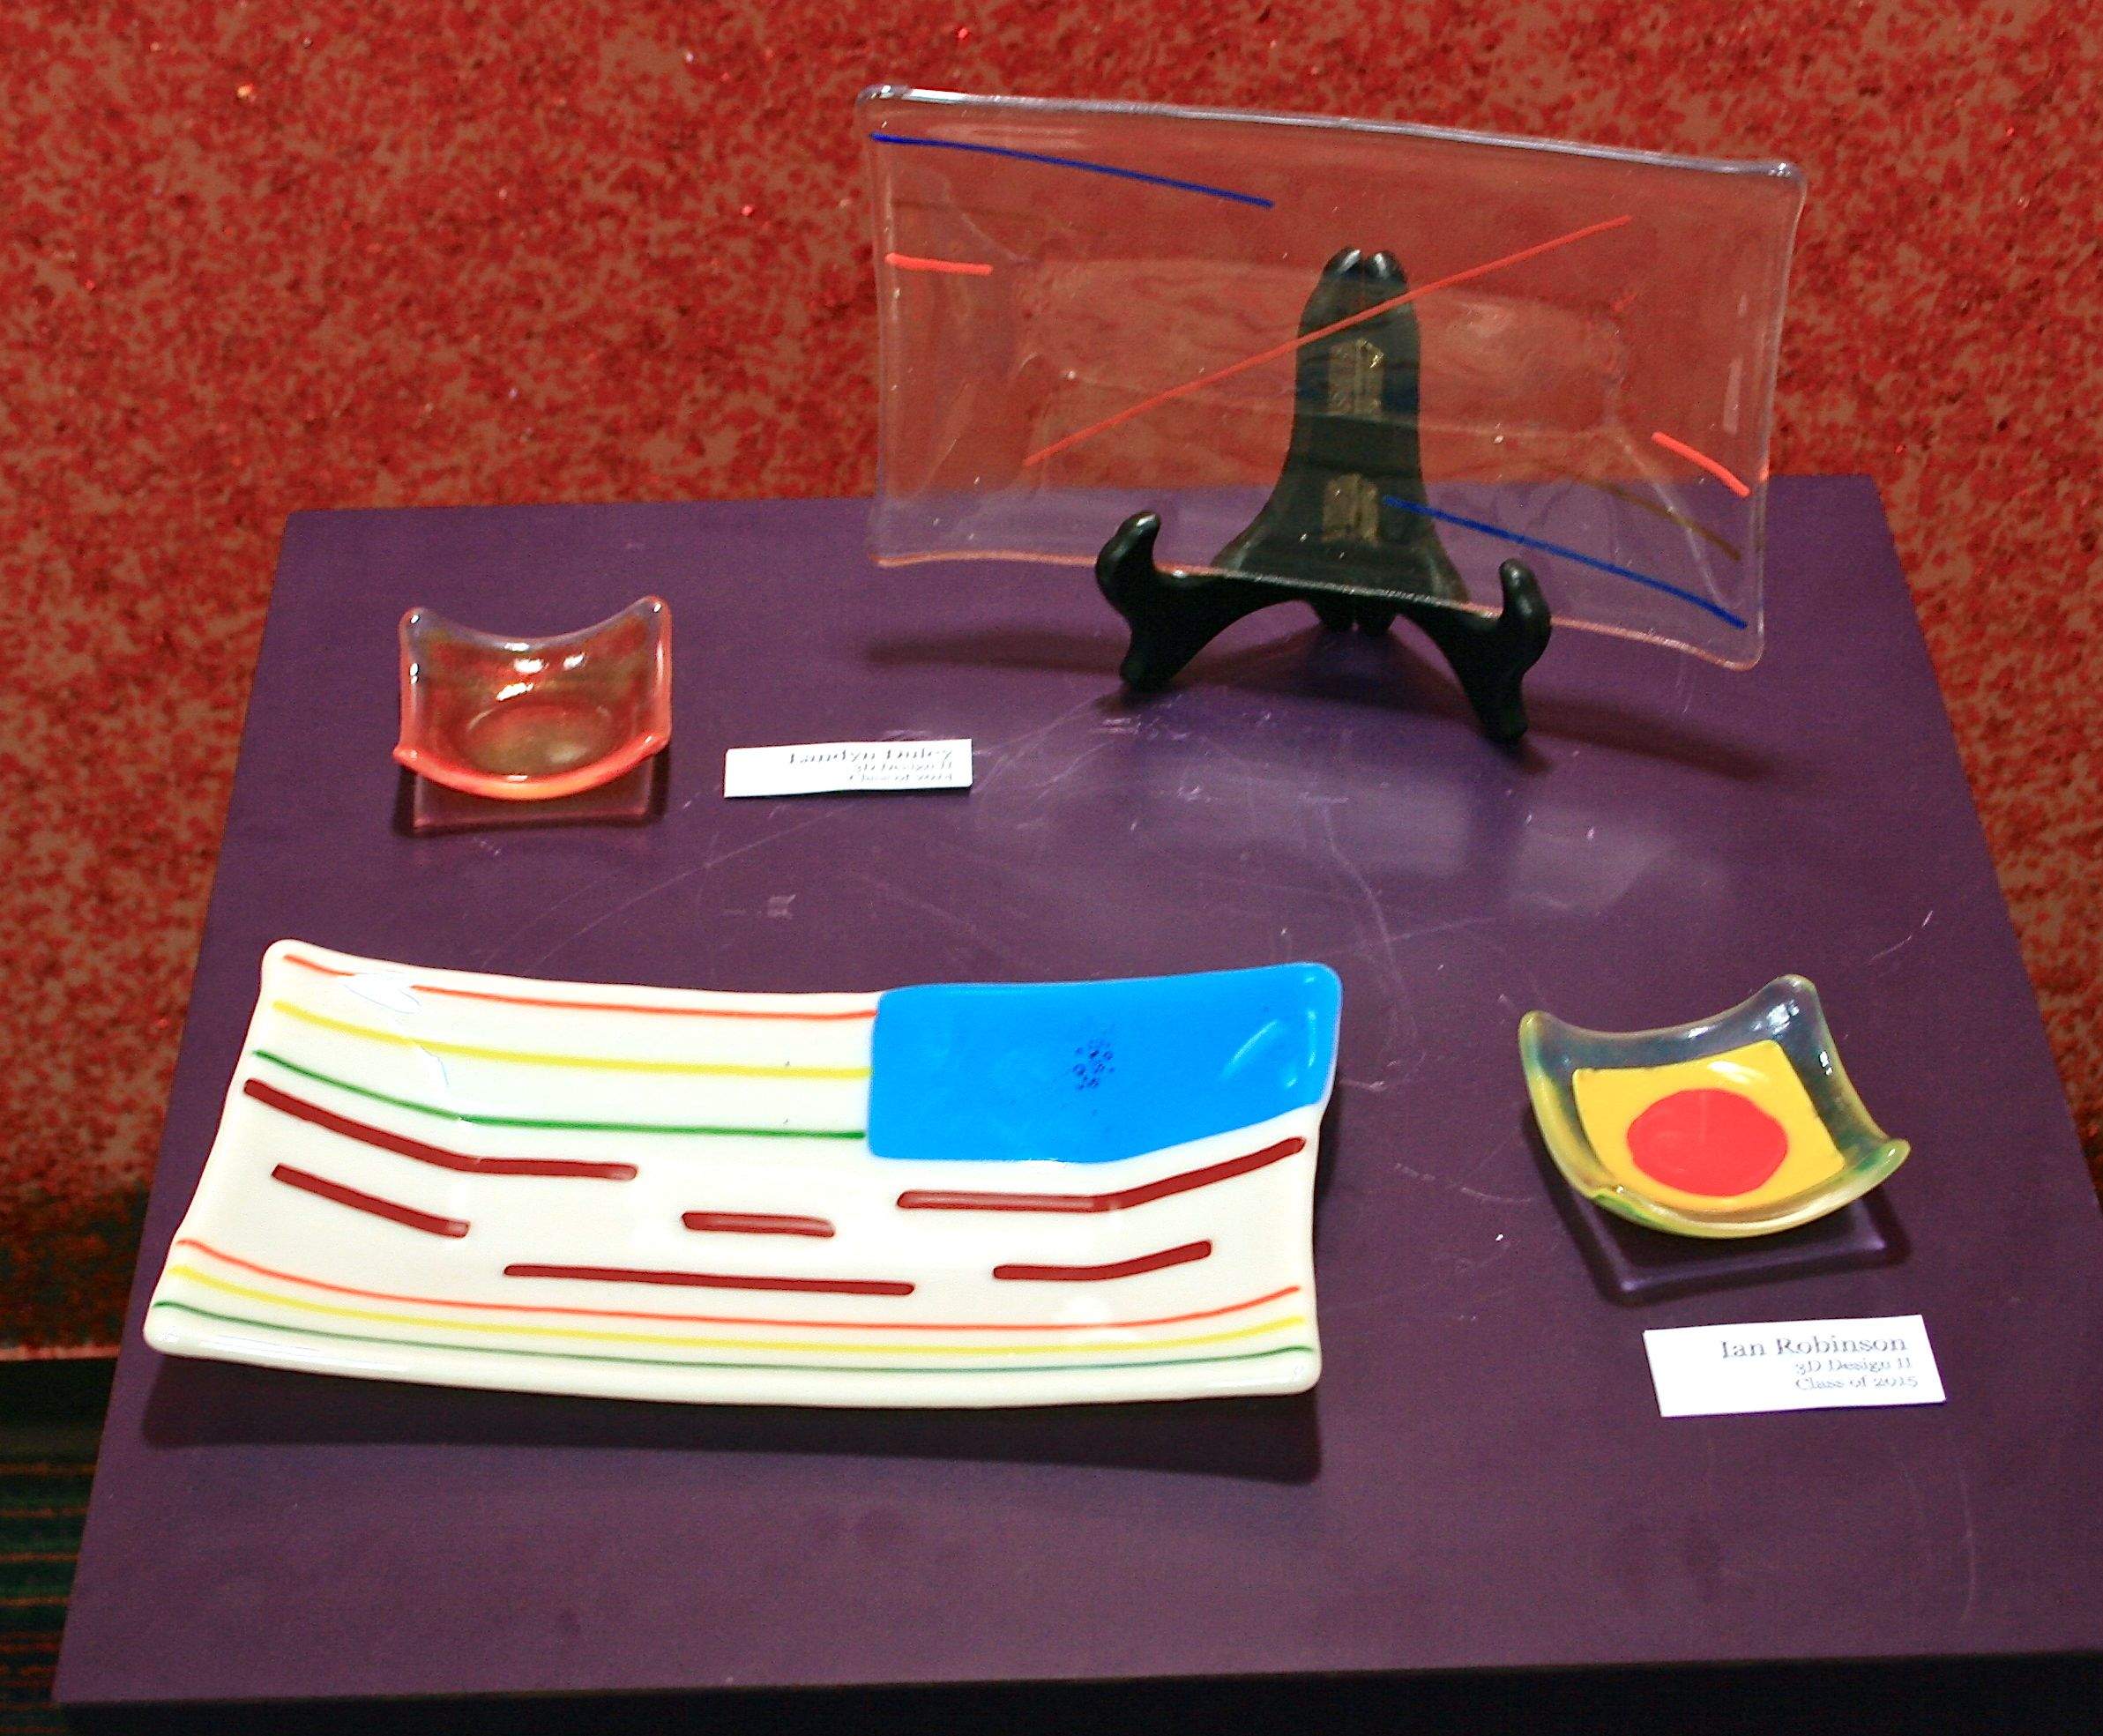
For the glass fusing lesson, I begin with a PowerPoint explaining the process. What glass fusing is, how it’s done, and what our assignment is. I left the requirements very loose. Each student had to create one plate or bowl, using a clear sheet of glass as a base, and add color pieces on top to create their design. I am glad it is open-ended because it gives them the chance to push themselves to come up with an interesting design.
Once I completed the PowerPoint I demonstrated how to use the tools and went over a few tips when working with glass. Glass wants to be 1/4 of an inch thick. If you fire one sheet of glass, without adding to it, it will shrink in order to get to a 1/4″ thick. Stack two layers of glass and it will stay about the same thickness. If you stack more than two it will spread to 1/4″ thick. Put two layers in one area and leave another area with just one layer, and you may end up with an uneven edge because of the shrinking and spreading.
- You can’t stack more than three sheets of glass together, I recommended they stick with just two layers.
- When you layer glass together you run the risk of trapping air pockets
- If you fire the sheet of clear under the colored cut pieces the cut pieces may end up with more rounded edges. If you fire the clear glaze on top it prevents the cut pieces from spreading as much, and you get much cleaner lines
STEP ONE
Once they understood the assignment and process they began working on their sketches. I require students to create at least three, and they have to be full color. I wanted them to consider the color and placement of the pieces before they began cutting to reduce the amount of wasted glass. After I approved their design they got to work.
STEP TWO
They began by measuring the mold they wanted to use and drawing it on a sheet of clear using a sharpie. This is done at their seat to reduce the amount of traffic at the cutting station.
STEP THREE
Once they are ready to cut, they move to the cutting station. Here they make their cuts and breaks then take it back to their seat. Once their base is cut we use hand sanitizer to remove the sharpie lines. Any alcohol-based cleaning product will work. I just happened to have hand sanitizer, which reduced the number of germs floating around in the room.
STEP FOUR
After their base is cut they begin cutting the color pieces and creating their designs. After each piece is cut they use a couple of dots of Elmer’s glue to stick the color piece to the clear glass base. You only want to use enough to keep the glass from sliding when you place it in the kiln. If you use too much it will char in the firing and leave a gray mark. Rather than measuring the space the color piece was meant to go and then marking the piece based on the ruler, I have my student set the color sheets on their mold and mark where the edges needed to hit. This helped reduce the number of wrong cuts and mismeasuring.
STEP FIVE
Once their design is complete we place them in the kiln and full fuse them. You can only put one shelf layer of glass in at a time, you can’t stack shelves like you can with ceramics. So, this process can take longer if you have to do multiple firings. Once they are fully fused we place them in the molds and slump them!
THE FIRING PROCESS
I have a Skutt electric ceramic kiln. To complete this glass fusing lesson I use the “ramp/hold” option on my kiln. The following are firing schedules I currently use, and have had success with. To program them into my kiln I press “ramp/hold” enter the number of segments. Hit enter, and enter the rest of the data (temperature rise per hour, goal temp, hold time, for each segment). I then hit “review.” It runs through my program, and at the end, I hit the “on” button, it’s very easy!
- Tack fuse (glass will have a raised texture)
- 5 segments (or ramps)
- Ramp 1: 400/HR, 1100 degrees, HOLD 5 minutes
- Ramp 2: 75/HR, 1250 degrees, HOLD 5 minutes
- Ramp 3: 9999 (as fast as possible), 1380 degrees, HOLD 10 minutes
- Ramp 4: 9999, 950 degrees, HOLD 10 minutes
- Ramp 5: 100 HR, 800 degrees, 0 HOLD
- Full fuse (glass will be smooth)
- 5 segments (or ramps)
- Ramp 1: 400/HR, 1100 degrees, HOLD 5 minutes
- Ramp 2: 75/HR, 1250 degrees, HOLD 5 minutes
- Ramp 3: 9999 (as fast as possible), 1450 degrees, HOLD 10 minutes
- Ramp 4: 9999, 950 degrees, HOLD 10 minutes
- Ramp 5: 100 HR, 800 degrees, 0 HOLD
- Slump (Glass is just warm enough to take the form of your mold)
- 6 segments (or ramps)
- Ramp 1: 150/HR, 300 degrees, HOLD 15 minutes
- Ramp 2: 300/HR, 1100 degrees, HOLD 20 minutes
- Ramp 3: 150/HR, 1250 degrees, HOLD 25 minutes
- Ramp 4: 400, 950 degrees, HOLD 60 minutes
- Ramp 5: 150 HR, 800 degrees, HOLD 10 minutes
- Ramp 6: 300/HR, 100 degrees, 0 HOLD
Don’t forget, if you want to hit the easy button and get everything I use to teach this glass fusing lesson with a presentation, lesson plan, and handout formats check out my lesson pack here. This lesson is also part of my semester curriculum pack for a sculpture and ceramics class. Check it out on my TPT here or on my website shop here.
I hope you can use these tips if you are looking to try glass fusing in your classroom. Feel free to comment or email me with questions, concerns, or thoughts in general. Check out more education resources on my website shop here and TPT shop here. Don’t forget to follow me on Instagram, TikTok and Facebook. Subscribe here to get updates and info straight to your inbox. Until next time! Thanks for stopping by!
2 responses to “Glass Fusing Lesson: Easy, Fun Project”
Leave a Reply
Related Posts


Great post! I am trying to prepare a budget for a Glass Fusing Project for 36 fifth graders. I read you posted $600. for your project. How many students? Did that include the molds? Help please!
That did include molds, but I was estimating for a class of 15 or so. You could still get by on a $600 budget, you may just have to go smaller with what they create. You could also skip the mold and just have them do flat glass designs to hang in the window, use as coasters, etc. I hope that helps. Good luck!