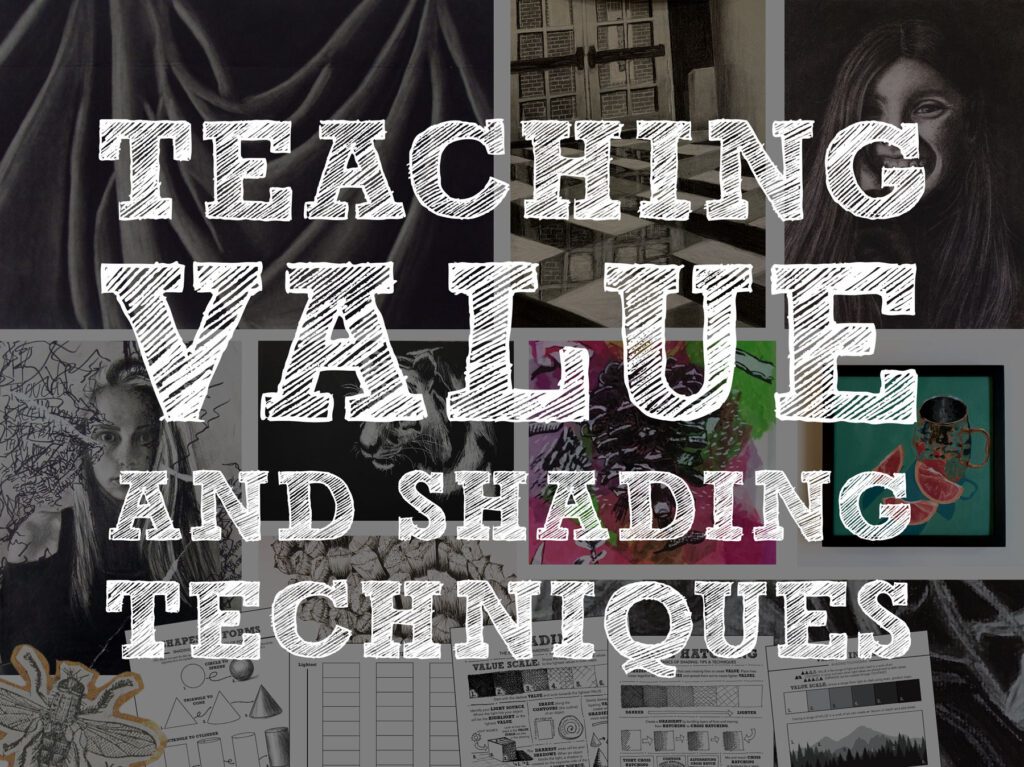
Teaching students how to create a range of value in a work of art is incredibly important in any art program. Students need to understand the basics of value and shading in art to create successful works of art. The most important part of teaching value and shading in art is scaffolding techniques, building on students’ understanding as the techniques get more complex. Check out how I teach value and shading in art class, from intro to art all the way to advanced art.
Starting with the Basics
In my intro-level art classes, we begin learning about value and shading in art through quick shading studies. These build into longer projects that focus on line quality and shading through hatching, cross-hatching, and stippling to create value. You can get everything you need to teach shading and value in intro to art in my shading unit or my complete Intro to Art curriculum.
Quick Studies
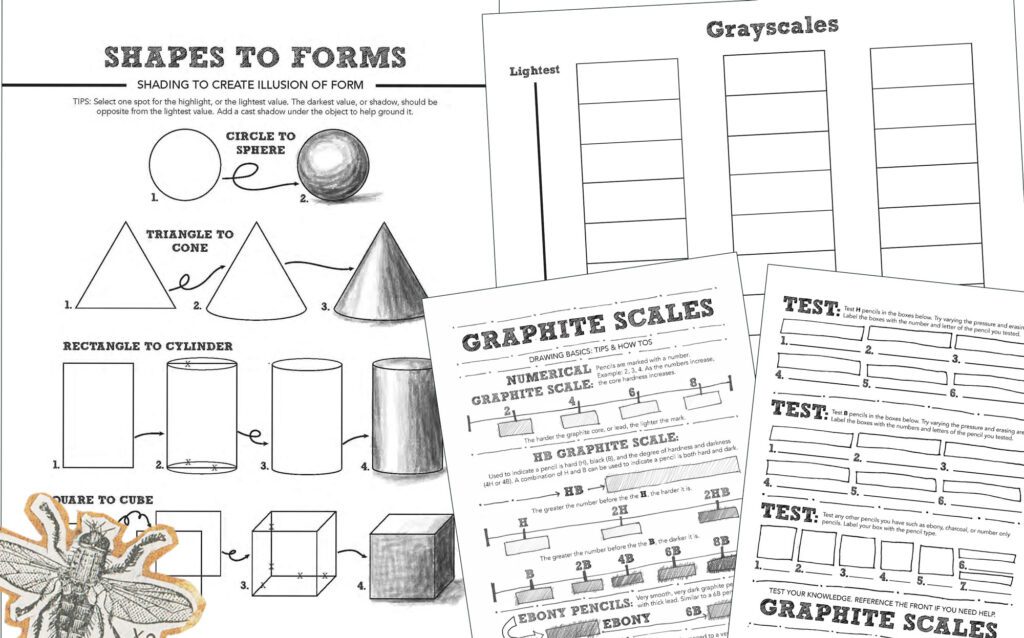
My Art 1 students start with a traditional grayscale activity. I emphasize using hatching, cross-hatching, and stippling to add value rather than blending. At this level, students tend to over-blend, creating gray, fuzzy drawings rather than crisp, clean drawings with strong contrast. Don’t let them blend until they have the basics down.
After the grayscale activity, students learn about different types of pencils to use for darker and lighter values by completing a graphite scale activity. We finish our value and shading introduction by drawing simple shapes and adding value. I like to have them draw cylinders, cones, spheres, and cubes.
Longer Value-Focused Projects in Art 1

Once students have the basics down, it’s time to apply them to a longer project. We start with an object study. They pick the object and draw it realistically, adding value. They then fill the space behind the object with line quality lines that reflect the object in some way. I love bringing line quality in early because it can add interest and energy to a work of art when it’s incorporated into shading.
The final value and shading-focused project is a scratchboard project. Students choose an animal to recreate on a piece of scratchboard. Animals are a great subject because fur is easy to replicate on scratchboard. This is the final project because blending to create value isn’t an option! They must use hatching, cross-hatching, and stippling to show value. This project pushes students to practice and master these shading techniques.
You can get everything you need to teach the line quality object study here and the animal scratchboard project here (both of these plus the handouts are included in the shading unit and Intro to Art curriculum above!)
Building Off the Basics
In my intermediate classes, we continue to learn about value and shading in art and build on techniques. At this point, students should have a base understanding of creating value in art, so I like to review their knowledge and introduce new techniques.
Shading Review Activities
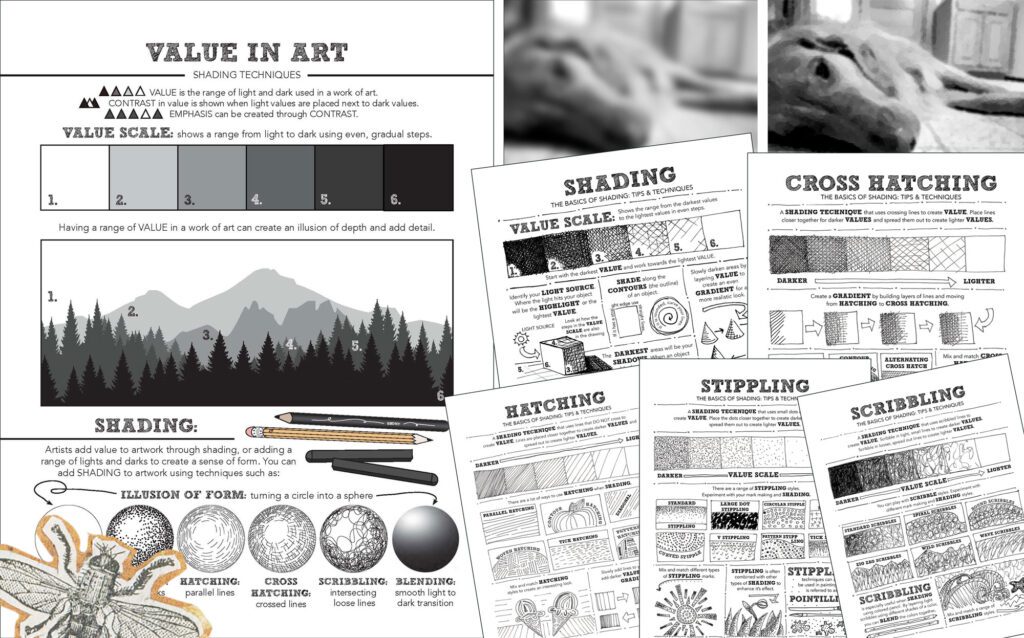
Similar to Art 1, I review value and shading in intermediate art classes through quick activities. In my intermediate classes, we go in-depth into each shading technique—hatching, cross-hatching, stippling—and we add blending and scribbling (check out my shading review worksheets here!). Students fill in handouts to practice techniques and work in their sketchbooks.
To wrap up their shading review, I like to do a blurred-to-in-focus drawing activity. I start with a picture of a dog that is blurred out, and students add value where they see it. Slowly, I show images that are clearer, and students crisp up their shading, push contrast, and add details as the image becomes more defined. Finally, they should see the dog appear on their paper. Check out the lesson for that activity here.
Longer Value and Shading Art Projects

Once students have reviewed and practiced shading techniques, it’s time to apply them to a longer project. In my intermediate-level art classes, I like to start with a traditional drapery drawing. Because I don’t start teaching blending techniques until the intermediate level, this is a great intro project to teach that technique. I set up a drapery for students to draw in class. They cover their paper with charcoal, then erase highlights, build shadows back in, and blend between the two.
Next, my students complete a nature study. Students select an object in nature to recreate in three ways. One is a traditional charcoal study that uses blending to create value. The second work of art uses pen to create the drawing with a focus on hatching, cross-hatching, and stippling. The third work of art is mixed-media focused, allowing students freedom to choose how to reflect value while also incorporating color.
The final in-depth value and shading art project at this level is a charcoal architecture study. This project pushes students to use all the shading techniques they have learned to this point to create a realistic, detailed drawing. By now, they have all the tools and knowledge they need to complete this project successfully.
You can get all of my intermediate shading activities and projects in my Drawing I semester curriculum and my Drawing II semester curriculum. Hit the easy button and get everything you need to teach these classes every day!
Value and Shading in Art: Advanced Level
Once students reach advanced-level art classes, they should have a solid grasp of value and shading in art. Because of that, we typically jump straight into longer projects. Students practice techniques with warm-ups in their sketchbooks before diving into their projects. These sketches are quick studies and directly relate to their projects.
Advanced-Level Projects

The first value and shading art project my advanced students complete is an altered self-portrait. They can use any material, creating their portrait in color or black and white, and only need one realistic feature included in their portrait. The rest of the portrait can be altered in any way they choose. To warm up, they create thumbnail sketches of ideas in their sketchbooks. I love seeing the creative ideas in this project!
After practicing some realistic facial features in pencil, students are pushed to create a fully realistic portrait using charcoal. To warm up, they practice drawing eyes, noses, mouths, and ears in their sketchbooks using charcoal. They then have to create a realistic self-portrait based on a six-word memoir they wrote. Contrast is king in this project! These works of art are absolute showstoppers.
Advanced-level art students should be able to apply their understanding of value and shading to color as well as black and white. This understanding is demonstrated through a realistic food study. To make their studies look realistic, they need to show an illusion of form, which requires an understanding of value. This is the final project that pushes a focus on value and shading in art.
Teach value and shading in art at the advanced level with my semester-long Advanced Drawing curriculum or get this plus painting projects in my year-long Advanced Art curriculum.
Value and Shading in Art:
Teaching value and shading is the key to a successful art program. It’s important to slowly introduce students to techniques and scaffold as you go to make sure students grasp the concepts. If students can understand value and shading, you will have some incredible artists by the time they reach your upper-level art classes.
Don’t forget to follow me on Instagram and TikTok for weekly visual journal demos and other project ideas. Subscribe here to get freebies, project tutorials, and more straight to your inbox. Until next time!
0 Comments