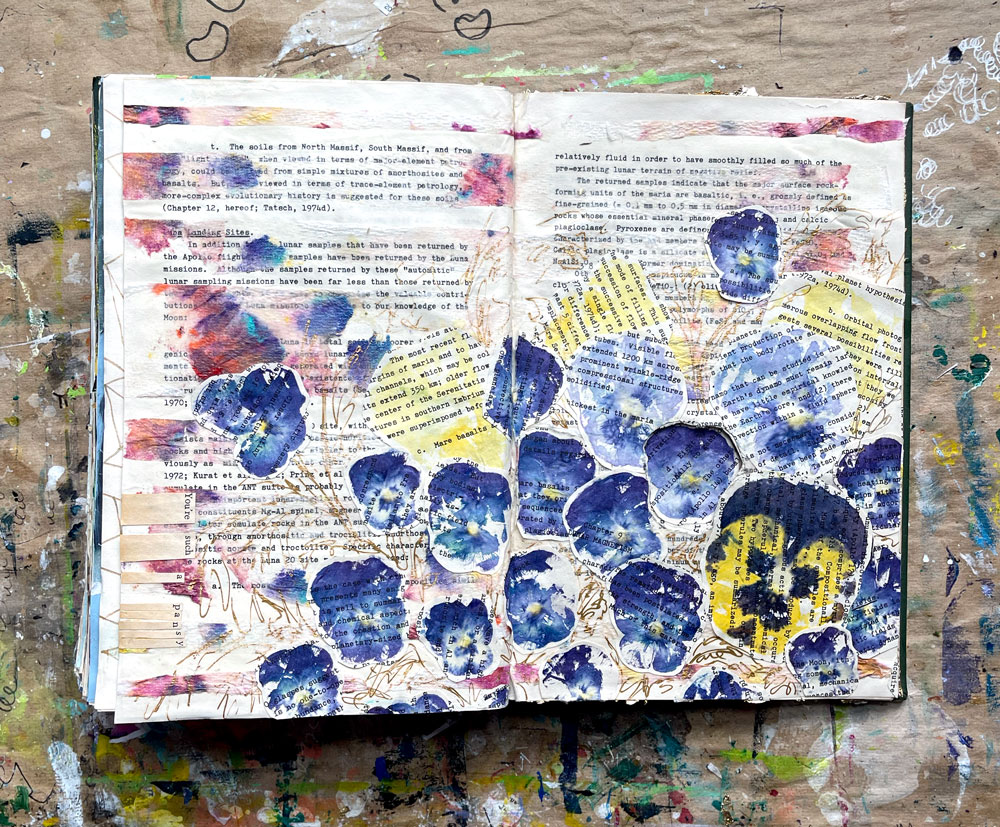
It’s the perfect time of year to pick a handful of pansies and create beautiful pansy prints to use in your visual journal or other works of art. This technique is very nostalgic, it’s something my Mom and I did together most years towards the end of winter. She always planted pansies, and before they were swapped out for her annual impatiens, we would use the pansies to make beautiful prints. She also taught this technique to her elementary art students, and I know middle school art and high school art students would love it too. Check out what you need to do for this technique below and how I pulled it all together in my visual journal:
SUPPLIES

It doesn’t take many supplies to create pansy prints. All you need is:
- Fresh pansies
- Hammer
- A few sheets of paper
If you are using them in your visual journal, I recommend:
- Visual journal pages
- Glue (Mod Podge or Elmer’s glue is ideal)
- Scissors
- Additional materials to jazz up your page such as colored pencils, paint pens, or to get really fancy, gold leaf. I also used paint-dyed paper towels from a previous project on my visual journal page.
STEP ONE

Once you have your pansies collected, grab a few sheets of paper. I opted to rip a page from my visual journal, I like having the text showing through the flower. However, plain paper works just as well. To see the vibrant colors I recommend white or neutral-tone paper.
Place a sheet of paper under the flower and one on top. Grab your hammer and hammer away! I hit it until I see the color bleeding through the top sheet of paper. You can lift the paper to see if you missed a spot and lay it back down to continue hammering.
When you are finished, peel up what remains of the flower and toss it in the trash. Hammering the flower causes the pigment to transfer from the petals to the paper creating beautiful pansy prints.
STEP TWO
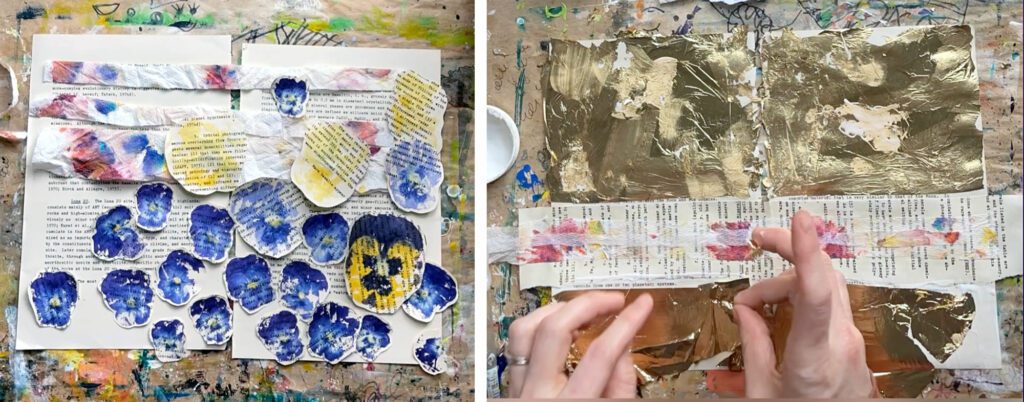
After smashing pansies all over ripped-out book pages, I cut them out. For a more collaged look, I opted to leave a thin border around each flower as I cut them out. Next, I began playing with the layout. I layered dyed paper towels from a previous project on the background, with overlapping pansy cutouts on top. I decided I wanted to cut a hole through this page, revealing another pansy design spread when you flip the page.
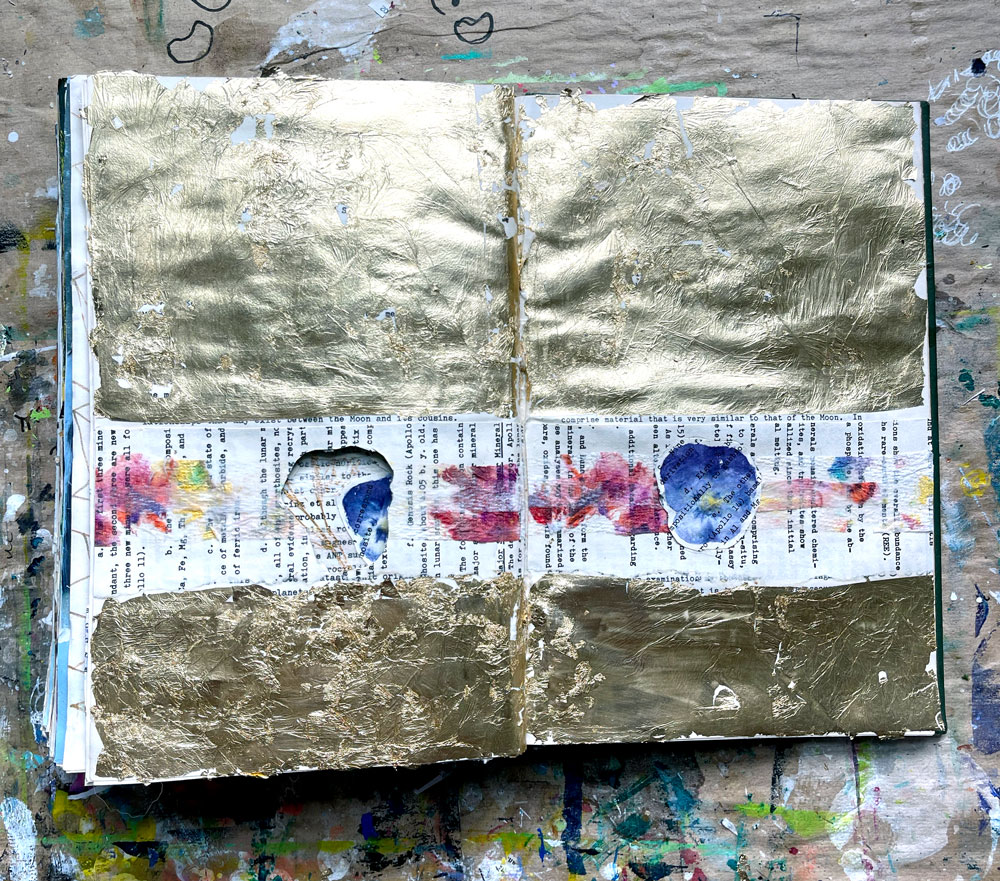
On the second spread (or two facing pages) I layered a ripped-out book page and a thin strip of dyed paper towel. I glued one of my hammered pansies to the right page. I added gold leaf covering the page around the strip for a dramatic look. To protect the gold leaf I painted it with a layer of watered-down Elmer’s glue.
I always work on pages ripped out of my visual journal book, then glue them back in when they are done. This helps prevent pages from wrinkling or paint bleeding through multiple pages. Before I cut out my cut-through hole, I glued the pages back into my book.
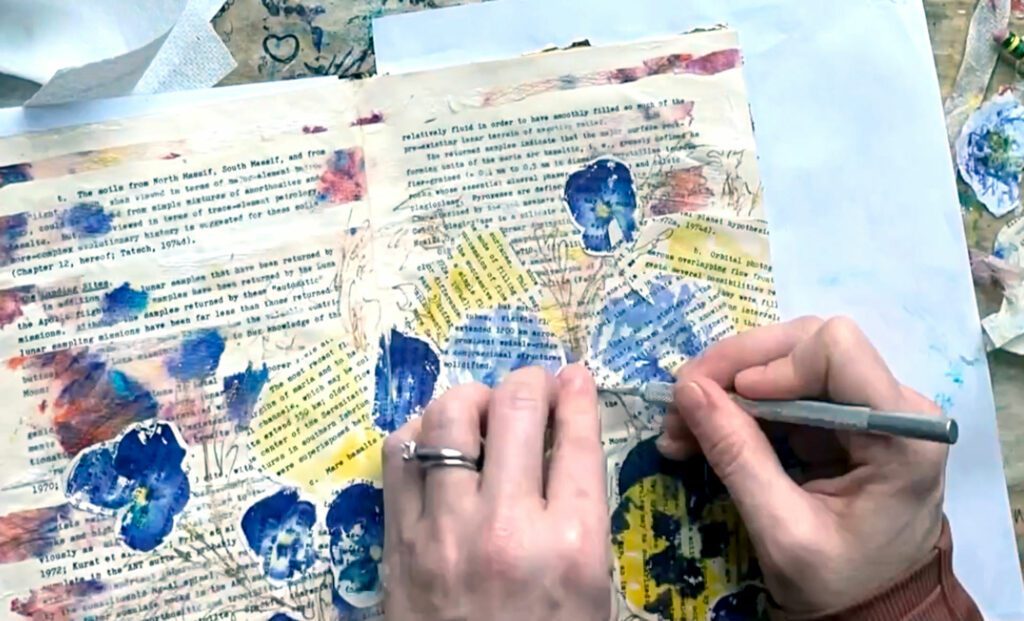
To make sure the cut-out blended in with the first spread, I placed the pansy cut-out on top of the first spread and traced around it. I used an Xacto knife to cut out the hole. I then glued the pansy down in line with the cut-out on the next spread.
STEP THREE
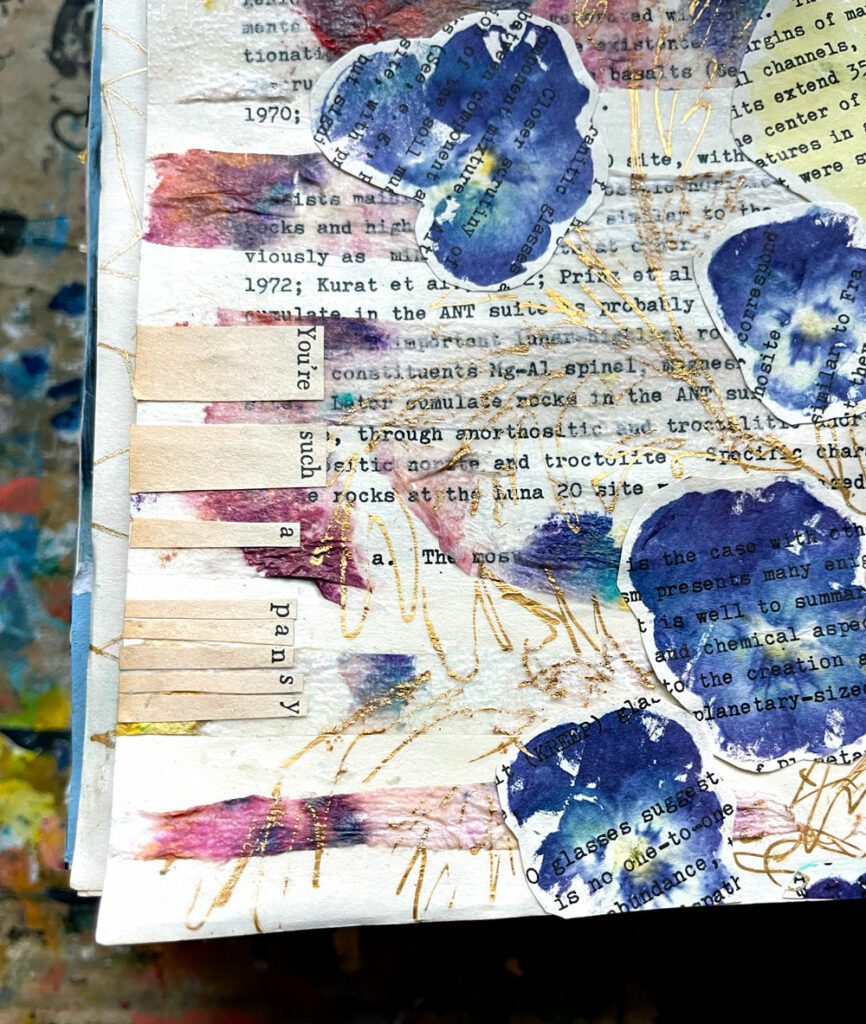
To finish off the page I added the words “you are such a pansy” cut from an old book. I have always been struck by this phrase and how it’s used in a derogatory way towards effeminate people or the gay community. I find this phrase so strange because pansies are incredibly hardy! They grow in the middle of winter, with beautiful, vibrant colors, while everything else is dead or hibernating. Pansies are the least “sissy” plant there is.
I love the cut-out connection and I especially love the gold leaf. It elevates the look of the pansy and contrasts with the typically derogatory phrase, “you are such a pansy.” I’m going to start using that phrase to describe all the strong, badass people I know.
CHALLENGE
Try this technique in your visual journal this week. If you don’t have access to pansies, try another flower. Look for petals with a lot of color, you need the vibrant pigment to transfer to your paper.
Check out a full-time-lapse demo on my Instagram here.
Thanks for stopping by! Check out more visual journal blog posts here. Shop my education resources here. Don’t forget to follow me on Instagram and TikTok for weekly visual journal demos. Until next time!




Leave a Reply