PROJECTS FOR EVERY GRADE LEVEL
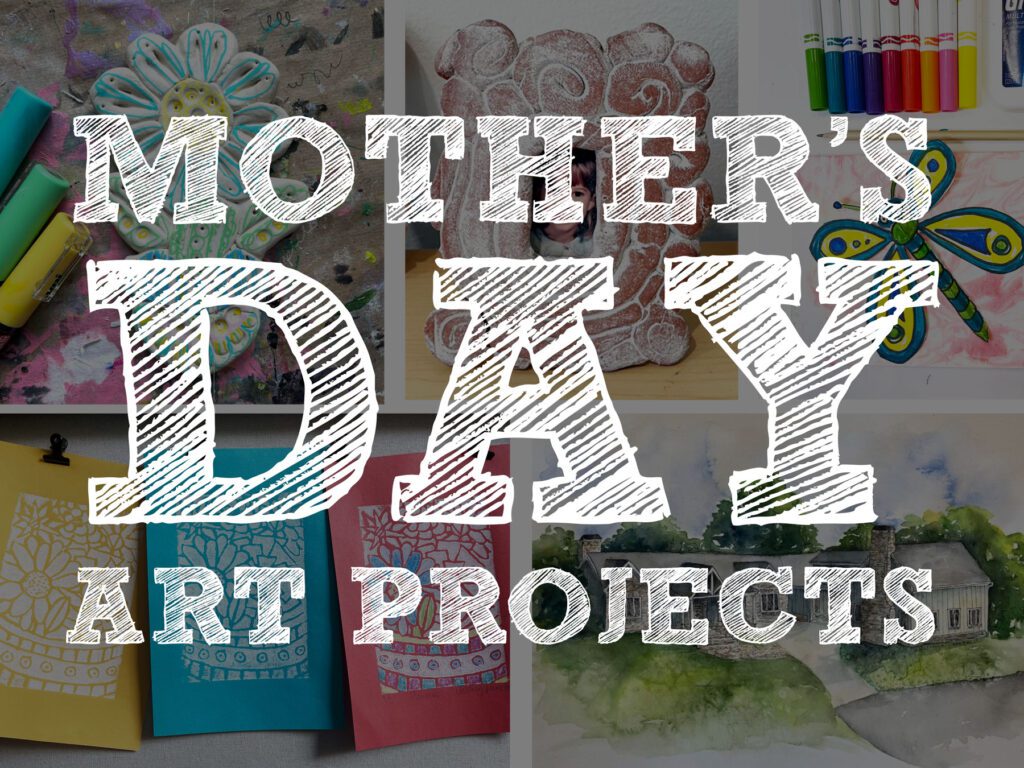
Mother’s Day is quickly approaching, and there’s no better time to plan a heartfelt art project that students can gift to their loved ones. Whether you teach lower elementary, upper elementary, middle school, or high school art, these Mother’s Day art project ideas offer the perfect blend of creativity, skill-building, and sentimentality. Check out supply lists and step-by-step instructions for each project below.
1. A Flower That Never Dies (Lower Elementary – Upper Elementary)
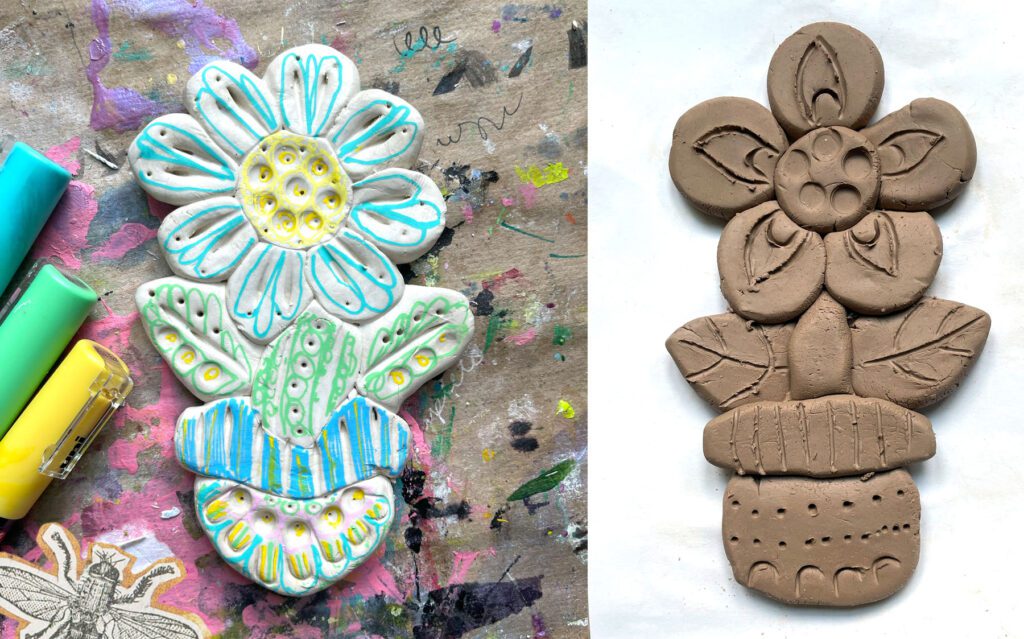
A fun project for pre-k and older art students is my clay flower project. Students can gift their mom a beautiful clay flower that will never die. You can complete this project whether or not you have a kiln, using standard clay, or don’t have a kiln, use air-dry clay. Students decorate their finished pieces with Sharpie, if using standard kiln-fired clay, or acrylic paint pens, if using air-dry clay. Grab my ready-to-go lesson pack with a template here and read more details below.
Supplies Needed:
- White clay (or air-dry clay)
- Wire cutter
- Pencils
- Drawing paper
- Plastic bags
- Masking tape
- Large paper clips
- Popsicle sticks
- Large shallow trays or cardboard boxes
- Paint brushes
- Fine point permanent markers
- Low-fire clear glaze or Mod Podge
- Paint pens (for air-dry clay projects)
- Optional: White paper lunch bags, crayons for gift wrapping
Day 1: Build the Flower and Pot
Teacher Prep:
Cut clay into fist-sized cubes. Prepare a clay flower example and templates.
Introduction and Demo:
- Show students how to form basic 3D shapes (spheres and coils) and gently blend them to create a flower and pot.
- Emphasize pressing lightly to keep decorative lines visible on the front side.
- TIP: Create a template that students need to stay within to keep their flower designs from getting too large.
Student Steps:
- Write names on template papers.
- Form flower centers, petals, stems, and pots using spheres and coils.
- Attach pieces securely by blending and smoothing the seams.
- Carefully flip their design over to show the lines on the front.
- Add textures using paperclips, popsicle sticks, or pencils.
- Have students raise their hands for project checks before clean-up.
Optional: Add a small hole at the top of the flower for hanging later.
Day 2: Paint and Protect
After drying and/or firing, students will:
- Apply glaze (for kiln-fired) or Mod Podge (for air-dry) to seal their flowerpots.
- Decorate paper lunch bags with crayons to create gift bags.
- Paint a second coat of glaze when dry for best results.
Day 3: Final Touches and Gift Wrapping
Once fully dry or glaze-fired:
- Students add final details with permanent markers or paint pens.
- Optional: Attach a string through the hole or add a magnet to the back!
- Wrap in tissue or bubble wrap and tuck into their hand-decorated gift bags.
2. Coil Clay Frame (Upper Elementary – High School)
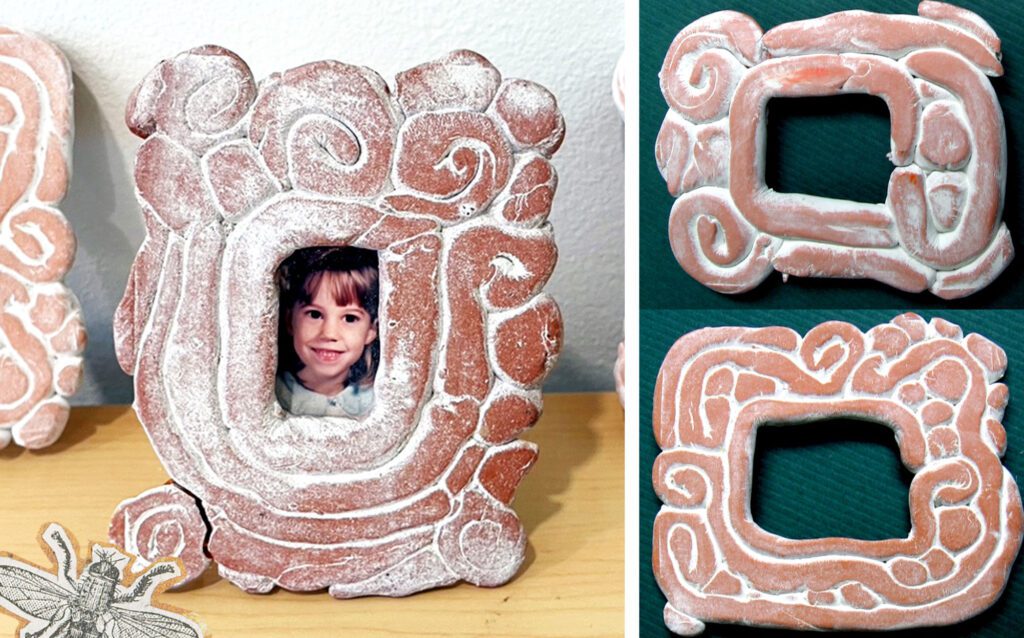
Looking for Mother’s Day art project ideas that students can personalize? A coil clay frame with a photo is a wonderful keepsake that moms will love. Grab my lesson pack here, and a version that uses polymer clay here.
Supplies Needed:
- Terra cotta standard clay or terra cotta air-dry clay (use polymer clay for a colorful version)
- Wire cutter
- Pencils
- Drawing paper
- Paint brushes
- Clear glaze or diluted white tempera paint
- Mod Podge to seal air-dry clay
- Thin cardboard or matboard for backings
- Hot glue gun, printed student photos
- Optional: Gift bag materials
Day 1: Create the Coil Frame
Teacher Prep:
Cut clay into cubes and create a sample frame.
Introduction and Demo:
- Teach students how to roll and shape coils.
- Place coils around a small rectangle to form the frame’s opening.
- Fill gaps with spirals, balls, or creative coil patterns.
- Blend the back smooth to secure the structure while keeping the front design intact.
- Students write initials on the back before drying.
Day 2: Painting the Frames
After bisque firing (or full drying for air-dry clay):
- Use diluted white tempera paint: Paint and wipe to highlight textures.
- OR glaze the frames: Apply two coats of clear or colored glaze.
- Take pictures of students or cut copies of their school pictures.
Day 3: Assembling the Frames
After glaze firing or after the frames are dry:
- Add the picture to the frame.
- Hot glue the cardboard or matboard to the back.
- Package the frame up in a decorated bag.
A Bouquet of Flowers that Never Die (Middle & High School)
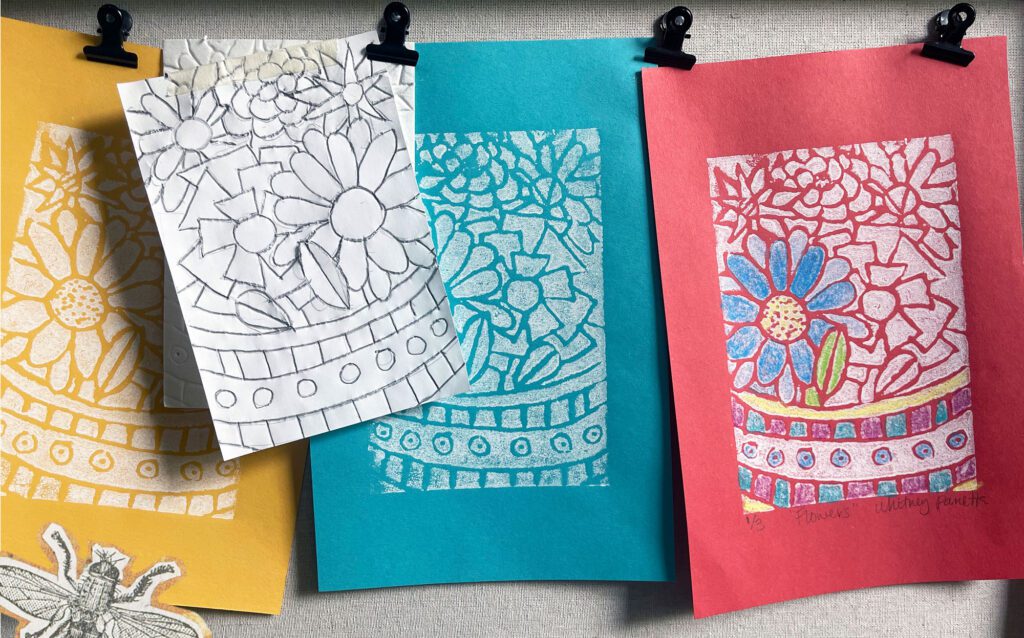
Have your middle school artists learn about printmaking through this scratch foam printmaking lesson. Students use line, shape, and pattern to create beautiful floral designs. After printing with white ink, they hand-color the prints with colored pencils, resulting in colorful artworks perfect for their moms and loved ones. Grab my lesson pack here and get everything you need to teach this lesson. Read more details below!
Supplies:
- Scratch Foam board cut into 4”x6” pieces
- Lightweight copy paper cut into 4”x6” pieces
- Pencils, erasers
- Dull pencils for drawing on scratch foam
- Masking tape
- Scissors
- Block printing ink
- Acrylic sheet (8”x10” or larger)
- Soft rubber brayer (6” wide)
- 6”x9” construction paper
- Scrap paper, 6”x9” or larger
- Crayons, colored pencils, or markers
- Drawing paper (9”x12”)
- Trash can for the printing area
- Paper towels
Steps:
Day 1: Introduction and Drawing for Print
- Discuss what a print is and what a matrix is.
- Introduce Clementine Hunter’s artwork, focusing on zinnia paintings.
- Teach size, placement, and overlapping for creating depth.
- Students create initial drawings on 4”x6” paper.
Day 2: Transfer Drawing to Scratch Foam
- Demonstrate how to transfer their design to their scratch foam.
- Place the drawing on top of the scratch foam.
- Using a dull pencil, trace over the lines to press the design into the scratch foam.
- Go over all the lines 2 times.
- Students transfer drawings to foam using dull pencils.
- Students finalize lines on the scratch foam.
Day 3: Paper Selection and Preparation
- Students select construction paper for printing.
- Continue finishing scratch foam work and start filler projects (artist pack, pattern practice, or coloring).
Day 4: Printing
- Teacher or partners assist with printing.
- Demonstrate proper printing procedure with brayer, ink, and acrylic sheet.
- Students print and dry artwork.
Day 5: Hand-Coloring and Edition Signing
- Demonstrate hand-coloring techniques (color inked areas only).
- Students number their editions and color their prints using colored pencils (white ink works best for hand coloring prints).
Watercolor House Painting (High School Students)
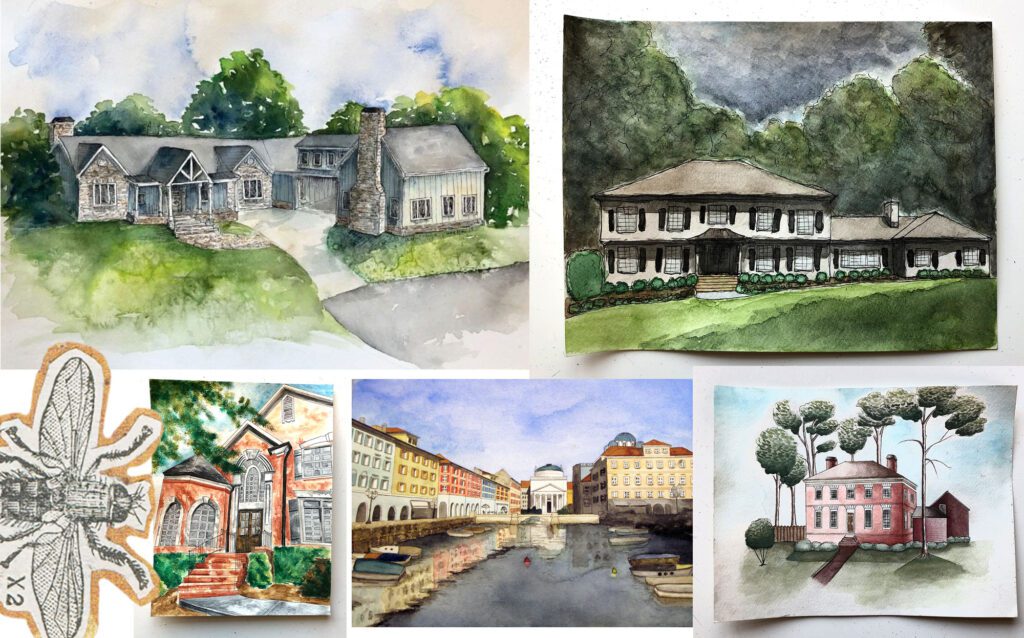
Give your high school art students the chance to create a heartfelt work of art by painting their home, a family member’s home, or a meaningful location. This beautiful watercolor project is a thoughtful Mother’s Day gift and a great way to teach watercolor painting techniques. Get everything you need to teach this lesson (including warm-up activities) here, read a blog post on teaching watercolor here, and read an overview below.
Supplies:
- Sketchbook
- Watercolor paper (8”x10” to 11”x14”)
- Watercolor paintbrushes
- Watercolors
- Palettes
- Water/water cups
- Salt
- Tissue
- Rubbing alcohol
- Masking fluid
- Waterproof pens
- Pencils and erasers
Steps:
Day 1: Introduction
- Introduce James Whistler and watercolor techniques.
- Demonstrate watercolor and landscape techniques.
- Students begin an artist research sheet and choose an architectural subject.
Day 2: Watercolor Technique Practice
- Students complete 10 watercolor techniques and 7 landscape techniques in sketchbooks.
- Students create sketches and test watercolor techniques on small sections.
- Practice sections of the architecture they will be creating.
Day 3–9: Painting Production
- Students draw, ink (if needed), and paint.
- Layer from background to foreground.
- Focus on painting in layers for depth.
Day 10: Critique
- Display finished paintings with artist statements.
- Complete written critiques or participate in a group discussion.
Mother’s Day Cards (For Any Grade Level)
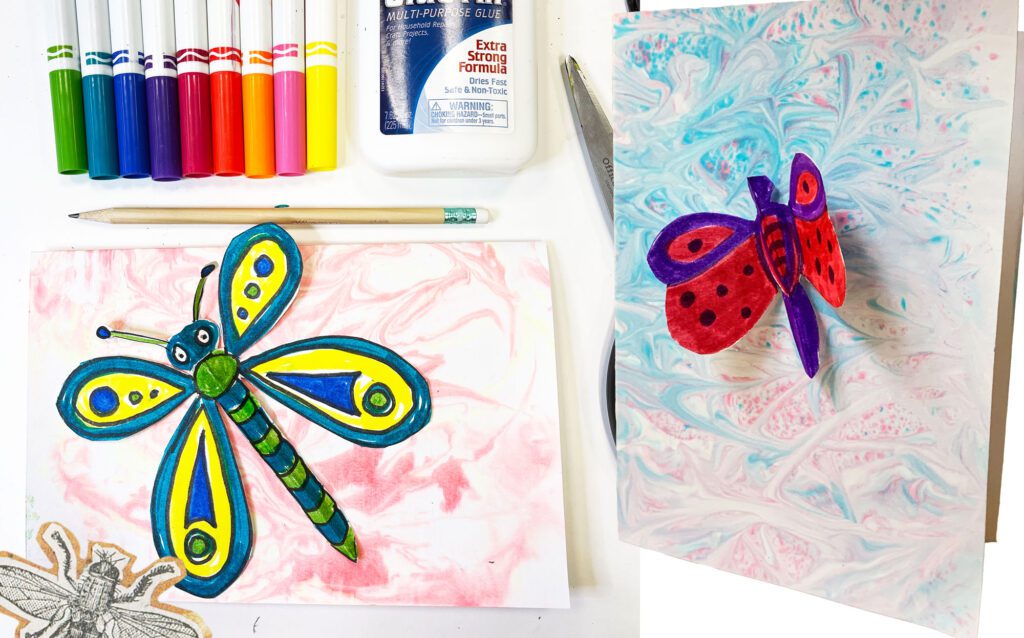
A simple yet meaningful Mother’s Day art project idea for all grade levels is creating a card. Students create dragonfly or butterfly-themed Mother’s Day cards. Turn this into a fun art day by using marbleized shaving cream prints to create the card background. Get my drop-in ready lesson pack here and read an overview below.
Supplies:
- Heavy paper or cardstock
- Pencils and erasers
- Scissors, glue
- Crayons, markers, colored pencils
- Optional: glitter, sequins
Additional Supplies for Marbleized Paper (Optional):
- 4.25”x5.5” sheets of white paper
- Shaving cream
- Liquid watercolors or food coloring
- Trays
- Spray bottles (optional)
- Toothpicks or pencil tips
- Plastic rulers or similar for scraping
Steps:
Day 1: (Optional) Marbleized Paper Activity
- Demonstrate marbleizing process with shaving cream and liquid watercolor.
- Students create prints using swirled designs.
- Press the paper into the shaving cream/liquid watercolor.
- Lift the paper and scrape the shaving cream off with a ruler.
- Put the shaving cream in the trash.
- Allow papers to dry overnight.
Day 2: Card Assembly
- Students draw, color, and cut out dragonfly or butterfly designs.
- Assemble cards with marbleized or regular paper backgrounds.
- Students write personal letters to their moms or loved ones.
Why These Mother’s Day Art Project Ideas Work
These Mother’s Day art project ideas go beyond simple crafts, they teach important art skills like coil construction, elements of art and principles of design, printmaking, drawing, and watercolor techniques. Plus, they allow every student to create a meaningful, personalized gift their loved ones will treasure for years to come.
Final Tips for Successful Mother’s Day Art Projects
- Plan ahead: Prep materials and create examples ahead of time.
- Demonstrate clearly: Visual learners benefit from live demos in addition to PowerPoints.
- Celebrate individuality: Allow students room for creative choices in their works of art
- Make it personal: Include student photos, handwritten notes, and choice subject matter for an even more special gift.
- Wrap it up: Have students decorate bags to wrap up the final works of art so they are ready to gift.
Are you ready to try these thoughtful Mother’s Day art project ideas in your art room? Which one are you most excited about? 🌸 Let’s highlight our art program and celebrate moms by sending home beautiful, thoughtful works of art for Mother’s Day.
Looking for other project ideas? Check out my blog post with spring art project ideas here.
Don’t forget to follow me on Instagram and TikTok (I have a few tutorials of these one-day art projects already in my feeds) for weekly visual journal demos and other project ideas. Subscribe here to get freebies, project tutorials, and more straight to your inbox. Until next time!
0 Comments