Low-Prep, Low-Supply, Fun Projects for K–5
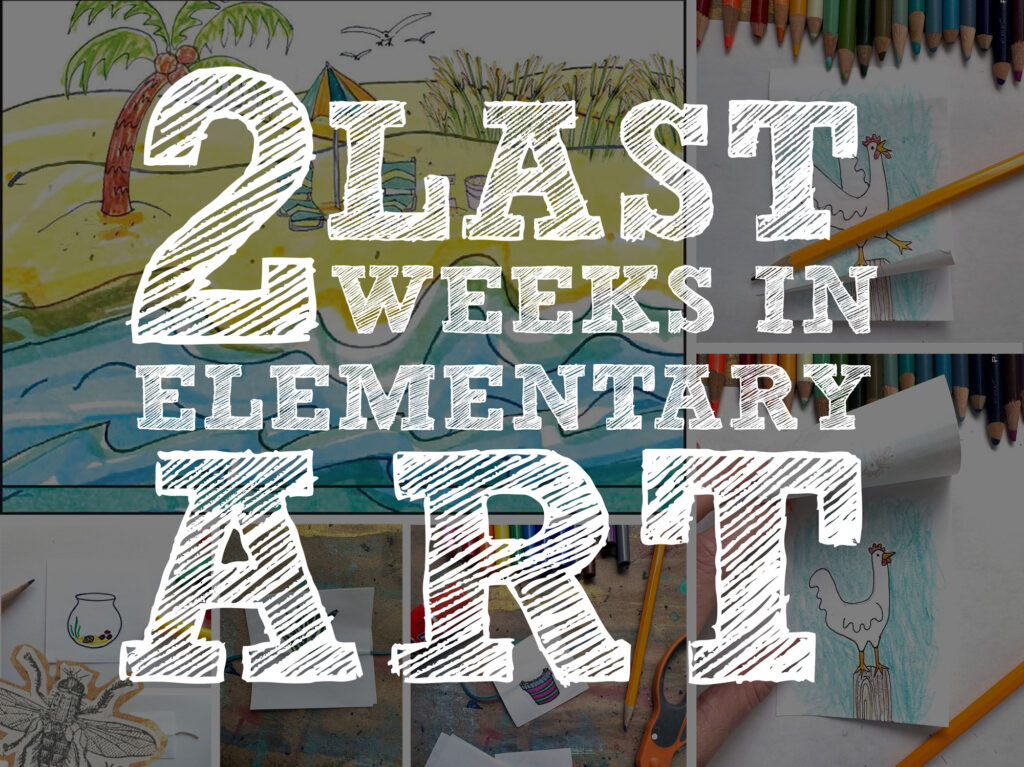
The end of the school year is quickly approaching, and you have to squeeze a few more projects in these last couple of weeks. With end of year elementary art lessons, prioritize low supplies, low mess, and independent art activities. You have a TON to do these last couple of weeks to wrap up the school year, get your students started on projects they can do on their own so you can focus on your to-do list.
Here are three end of year elementary art lessons that are fun, engaging, and just open-ended enough to be reusable every year. My main tip is to use the same lesson across all grade levels. This saves planning time and keeps your last two weeks manageable. I’ve collaborated with my mom to share the lessons she always taught these last couple weeks. She has many years of experience under her belt. Check out what worked for her below.
End of Year Elementary Art Lessons, Last 2 Weeks
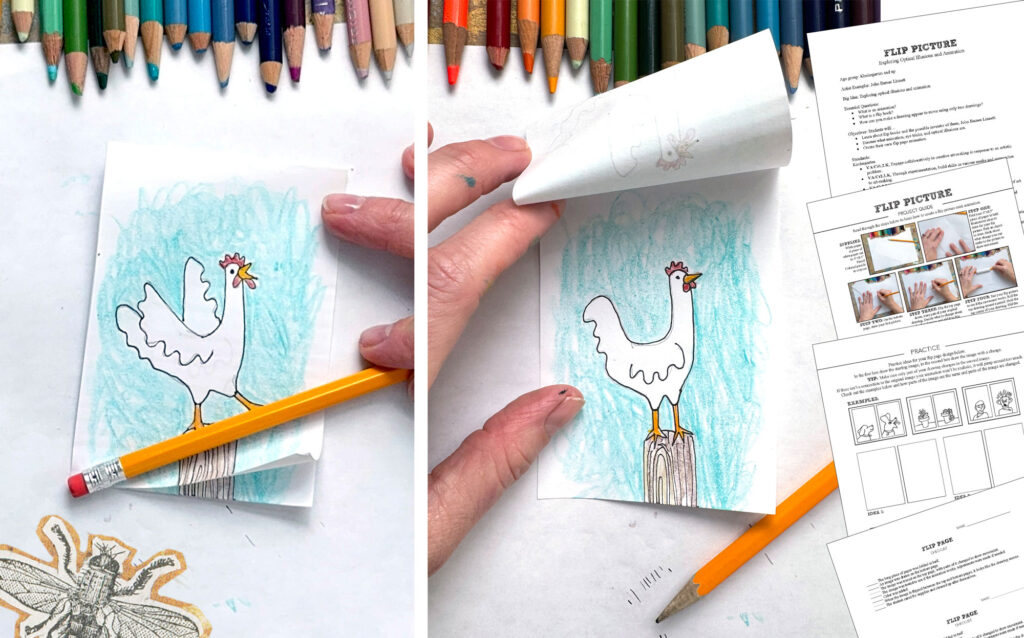
✨ Flip Picture Animation Activity (Second to last week of school)
Introduce students to the magic of animation with this simple but fun flip picture activity. It’s a great way to explore animation using just two pictures. During the spring semester, my mom completes a stop motion animation lesson with every grade level. The second-to-last week, she showed her classes the movies made in the other classes while they created a flip picture design. Even if you don’t teach stop motion animation in your class, this activity gives students a glimpse into the world of animation. Check out her stop motion animation lessons for K-5 here.
Supplies:
- Strips of lightweight paper (copy or notebook), 8.5” x 3”
- Pencils and erasers
- Thin-tip markers
- Colored pencils
Steps:
- Classroom Setup:
- Seat students quietly at their tables.
- Keep supplies in the center but out of reach to avoid students starting early.
- Teacher Demo and Introduction:
- Talk about John Barnes Linnett, credited with patenting the first flip book (then called a “kineograph”).
- Define key vocabulary: optical illusion, persistence of vision, animation.
- Explain that students will make a two-frame flip page (not a full flip book) that shows an object in motion.
- Project Instructions:
- Fold a long paper strip in half.
- On the bottom half, draw an object in its starting position (e.g., a chicken on a fence post).
- Place the top half over the bottom and trace the object, making slight changes to suggest movement (e.g., the chicken flapping their wings).
- Test your creation by rolling the top page around a pencil, and let it loosen up.
- Hold the top corner of the page with your finger, roll the pencil at an angle up and down to watch your drawing come to life.
- Adjust the drawings if needed, then color in with markers or colored pencils.
- Work Time:
- Leave a project checklist on the board for students to reference.
- Students who finish early can make a second flip page.
- Wrap-Up:
- Use the last few minutes for cleanup.
Get everything you need to teach this lesson using my lesson pack here or grab from TPT here. Watch a video showing the steps here.
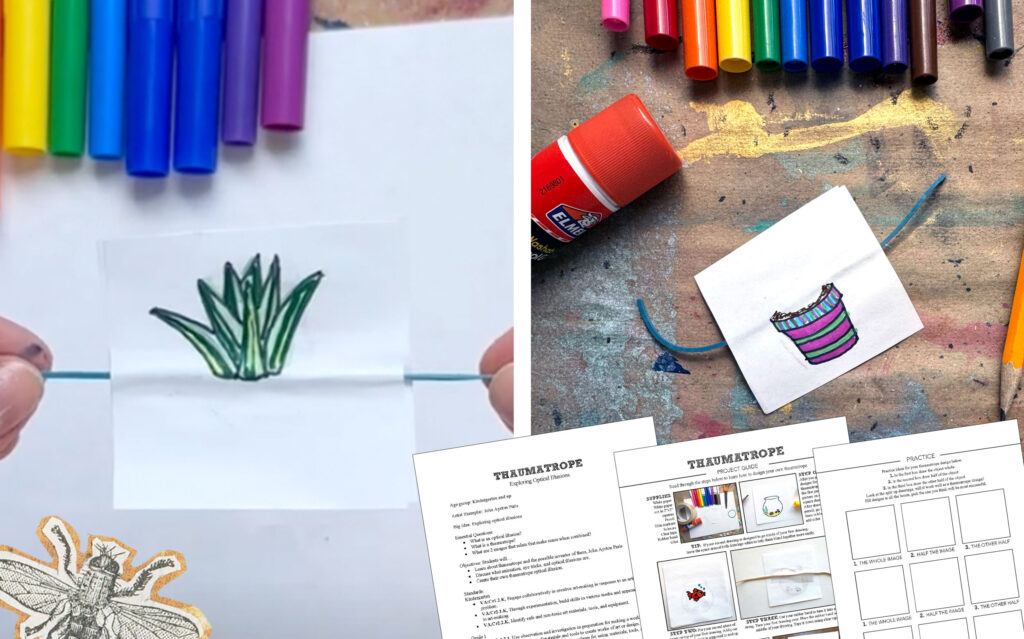
🎨 Thaumatrope Optical Illusion (Last Week of School)
Wrap up the final week with another fun op art project. Have students create a thaumatrope, a simple design that spins to blend two images into one through motion. This is another example of how animation works.
Supplies:
- Lightweight copy paper squares, approx. 2”x2”
- Pencils, erasers
- Thin-tip markers
- Rubber bands, with the circle cut
- Clear tape
- Scissors
- Glue sticks or bottled glue
Steps:
- Classroom Setup:
- Seat students quietly at their tables.
- Keep supplies in the center but out of reach to avoid students starting early.
- Teacher Demo and Introduction:
- Share info about John Ayrton Paris, inventor of the thaumatrope.
- Define key terms: optical illusion, persistence of vision.
- Show examples of thaumatropes in action.
- Drawing Instructions:
- Choose a design where two elements can combine into one such as
- Fishbowl + fish
- Birdcage + bird
- Ice cream cone + scoop
- On the first square, draw one half of the picture (e.g., birdcage).
- Trace with marker.
- Place a second square on top and draw the second part (e.g., bird).
- Trace and color both images.
- Choose a design where two elements can combine into one such as
- Assembly:
- Cut a rubber band and tape it across the back of the first square.
- Glue the second square on top, image side facing out and upside down.
- Press the papers together firmly.
- Watch the magic!
- Spin the thaumatrope by twisting the rubber band.
- Watch the images combine into one!
- Troubleshoot: If it doesn’t work, check that one drawing is upside down.
- Early Finishers:
- Create a second thaumatrope design or help classmates.
Get everything you need to teach this lesson using my lesson pack here or grab from TPT here. Watch a video showing the steps here.
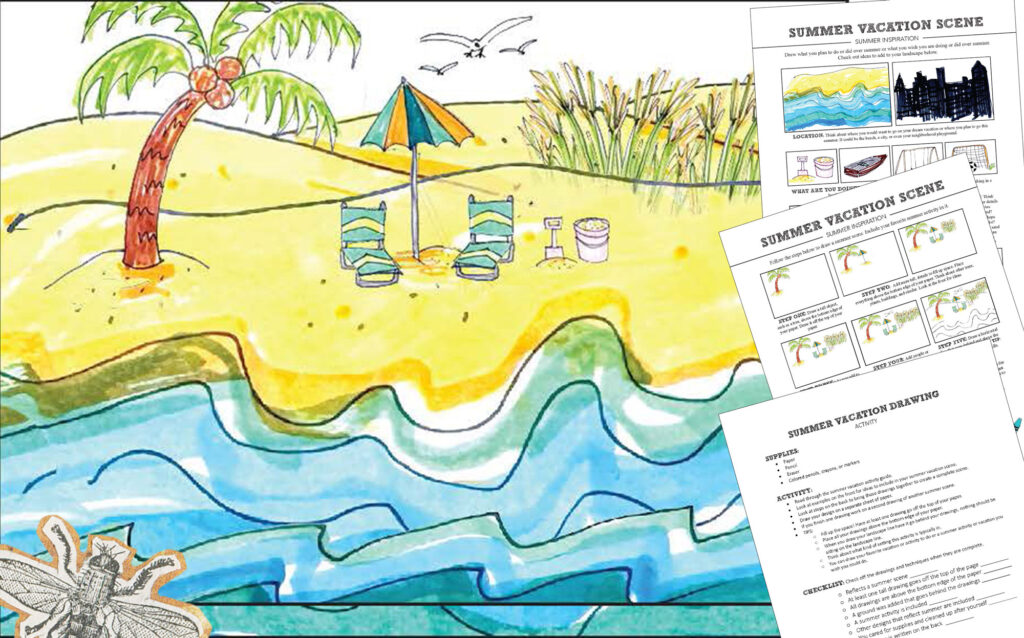
☀️ Bonus: Summer Drawing
Need an even simpler option for last-day activities or early finishers? Have students use crayons, colored pencils, or markers to create a drawing of what they want to do or are going to do this summer.
Supplies:
- White drawing paper
- Pencils, erasers
- Colored pencils, markers, or crayons
Steps:
- Have students draw a summer scene, either real or imagined.
- Ideas: beach days, camping, amusement parks, swimming pools.
- Encourage students to:
- Fill the page (drawings should go off the edge!)
- Avoid placing everything at the bottom of the paper.
- Add a background that supports the scene.
- Use vibrant colors and thoughtful details.
- If students finish early, they can draw a second scene or assist with classroom tasks.
Get everything you need to teach this lesson using my lesson pack here or grab from TPT here.
📝 Teacher To-Do List (While Students Work)
While your students are busy with their end of year elementary art lessons, here’s what you can tackle:
- Clean up and organize your classroom.
- Inventory and store supplies.
- Hand back student artwork.
- Take down bulletin boards.
- Sort and file student portfolios.
- Prep storage areas for next year.
- Order supplies for the first few projects next school year.
Pro Tip: If students finish projects early, have them help! They can sharpen pencils, stack chairs, wipe tables, or organize materials. It gives them responsibility and helps you wrap up your year.
🎉 Celebrate the End of the Year
The final two weeks are a whirlwind. These end of year elementary art lessons are designed to ease your workload, keep kids engaged, all while still learning about art.
Keep the lessons simple, use the same ones across grade levels, and enjoy the last few days with your students before heading into a well-deserved summer break.
Did you enjoy these end of year elementary art lessons? Looking for post-planning tips? Check out a blog post here. Looking for end of year recommendations in middle or high school art? Check out a blog post here.
Don’t forget to follow me on Instagram and TikTok (I have a few tutorials of these one-day art projects already in my feeds) for weekly visual journal demos and other project ideas. Subscribe here to get freebies, project tutorials, and more straight to your inbox. Until next time!
0 Comments