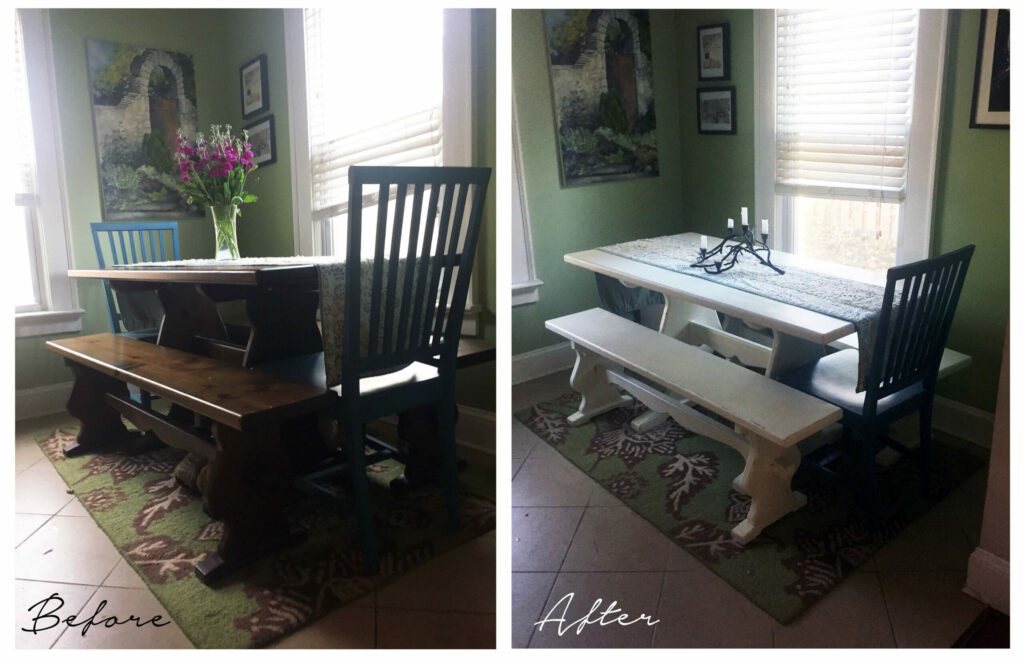
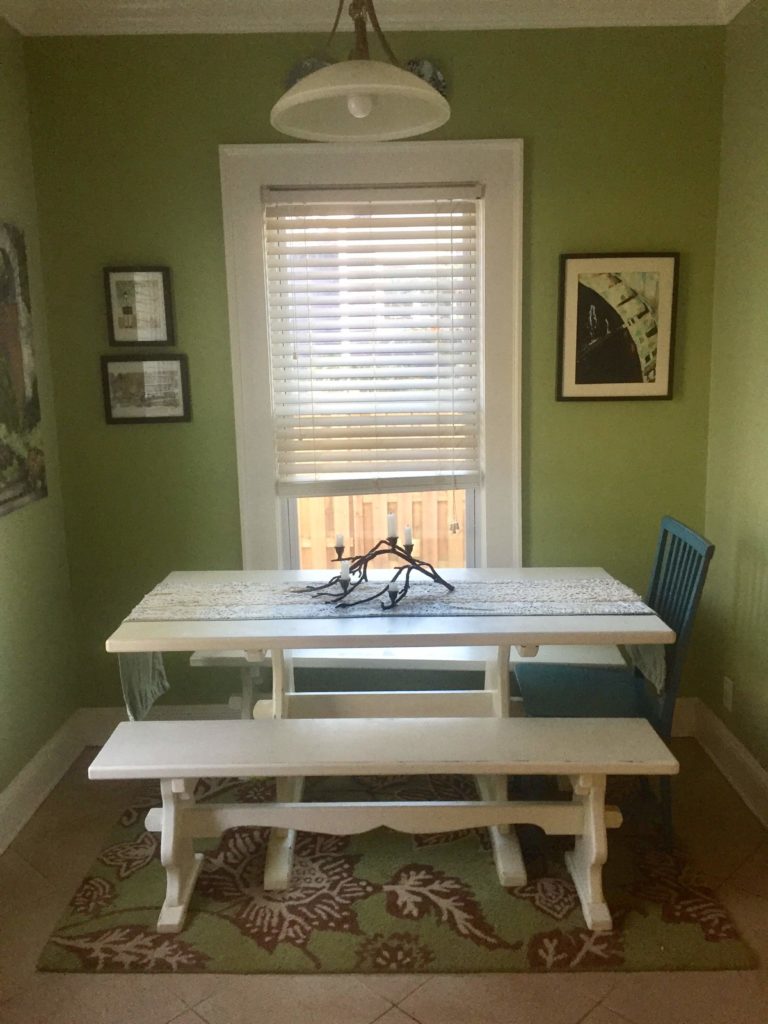
Check out how I transform this dining set with a simple table repaint. Details below.
THE STORY
I have always wanted a bench, a farmhouse-style table, and years back I got my wish. My Uncle’s Mom had one they needed to find a new home for while prepping their house to sell. I immediately jumped on it, and brought it home to complete our dining room. Although the finish was darker than what I planned, it worked well in our small, and very bright dining room. However, once little man Cooper came in the picture, things began to change.
As Cooper hit his milestones, smiling, laughing, sitting up, crawling, and walking, our house felt smaller and smaller. His toys began taking over our small living room and I began brainstorming some alternatives. I eventually decided it was time to say goodbye to our sweet dining room. We rarely ate in there, only when we entertained guests, and it wasn’t the best use of the space. It has since been transformed into Cooper’s playroom. It was the perfect solution. It’s situated right off our living room, and we can easily gate the doorway, to keep him in and dogs out. It was tight as a dining room, it was converted form a porch to a room years before we purchased the house, but it’s the perfect size for an almost two-year-old and his things.
The loss of the dining room meant I had to move around and store some of my beloved furniture. If you read my blog, you know I collect pieces of furniture like people collect jewelry. Each piece is special, important, and carefully selected. My beautiful, white, round kitchen table is now living in our attic. Hopefully, that is a temporary spot, once I have a studio space or larger kitchen it will come back out to the light of day. Our farmhouse table was moved to take the spot my kitchen table used to occupy. I decided this was the better choice, since this offered more seating. The dining table is slightly large for the space, it must be pulled out if we ever have enough people to seat around it. But, it gives us a place to entertain and eventually have family dinners.
The dark wood that once worked in the dining room suddenly felt very outdated and heavy in our little kitchen nook. I decided I needed to take a risk and try painting it, shockingly something I have never done on a larger piece of furniture. I did some research, collected my supplies, and got to work. It was time for a table repaint.
SUPPLIES:
- Furniture to refinish
- Heavy duty cleaner like Trisodium Phosphate (or decent cleaner)
- Chalk paint, for this size project I used 2 quarts of paint.
- Paint brushes
- Rollers
- Paint tray
- A lot of paper towels or rags
- Drop cloth
- Sandpaper
HOW TO:
Step one:
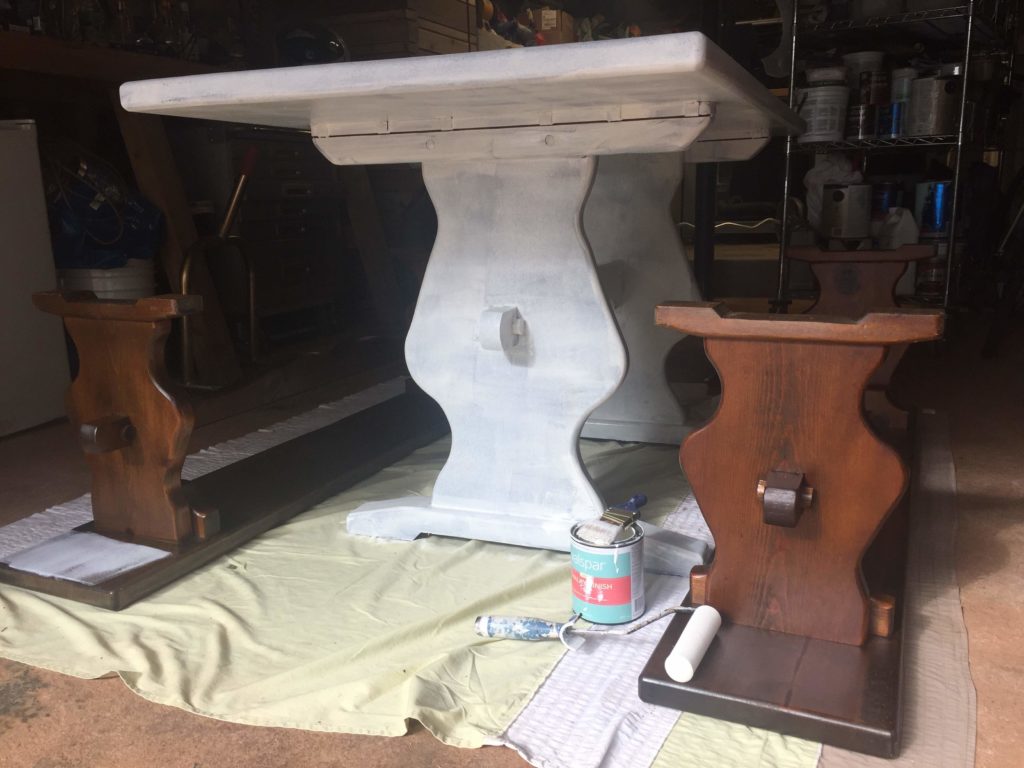
I live with hairy animals, so I knew this was a project that couldn’t be completed in my house. I moved the table and benches down to our garage. I laid out a big drop cloth, set everything on top and got to work cleaning.
Step two:
Thoroughly clean the furniture. I recently refinished my kitchen cabinets and used the cleaner, Trisodium Phosphate. It’s a harsh chemical that is not environmentally friendly or health friendly, but it does the trick. I decided it’s better to use it for these types of projects since I am doing it on such a small scale and so infrequently. I didn’t use it for my table, and I wish I had. Instead I used my standard cleaners and did my best cleaning the dust, etc. It worked well enough, but there are spots I think the paint would have stuck better if I was more thorough at this stage.
Step three:
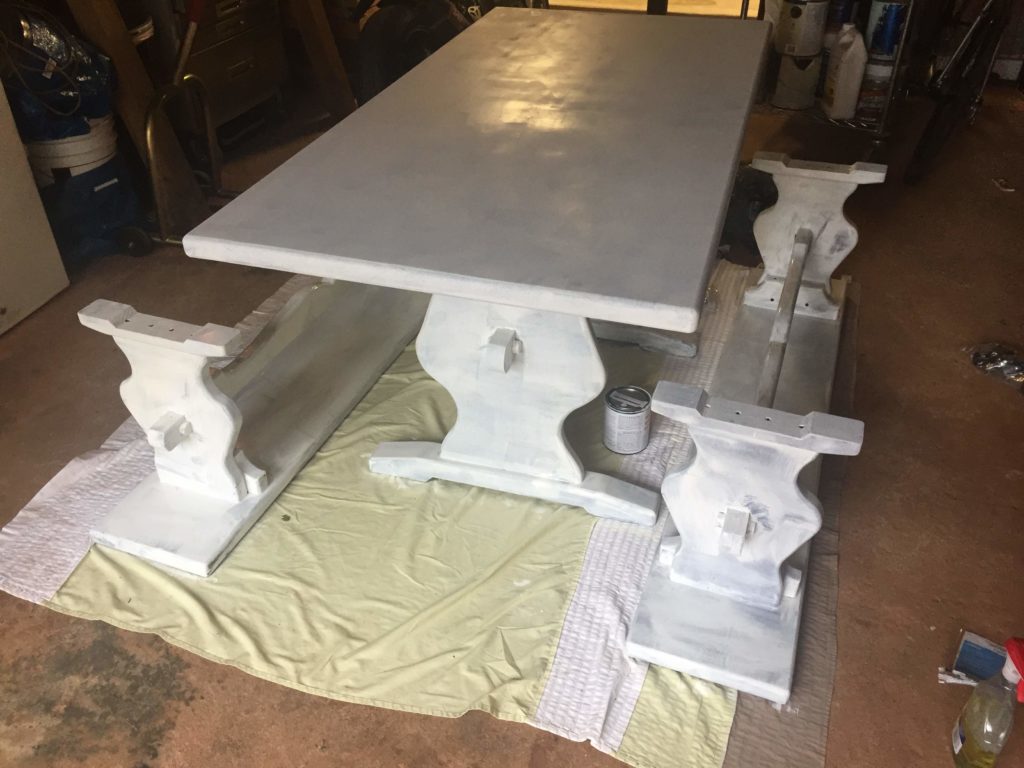
Start painting! With chalkboard paint there is no sanding or stripping required, which is why I chose to go that route. Paint a solid coat, let it dry for 24 hours, and add coat number two. This project took awhile because I was covering such a dark piece it took 3 coats of paint. I also had to rotate the piece so I could get underneath and between all the decorative sections.
Step four:
Once you have the coverage and look you want, you are done! Move it back into the space and enjoy. For this, my step four was adding a clear coat. I wanted a smoother, slicker finish, which the chalkboard paint doesn’t offer. However, the clear coat I used ended up turning a yellowish color so I do not recommend doing this.
Optional step five:
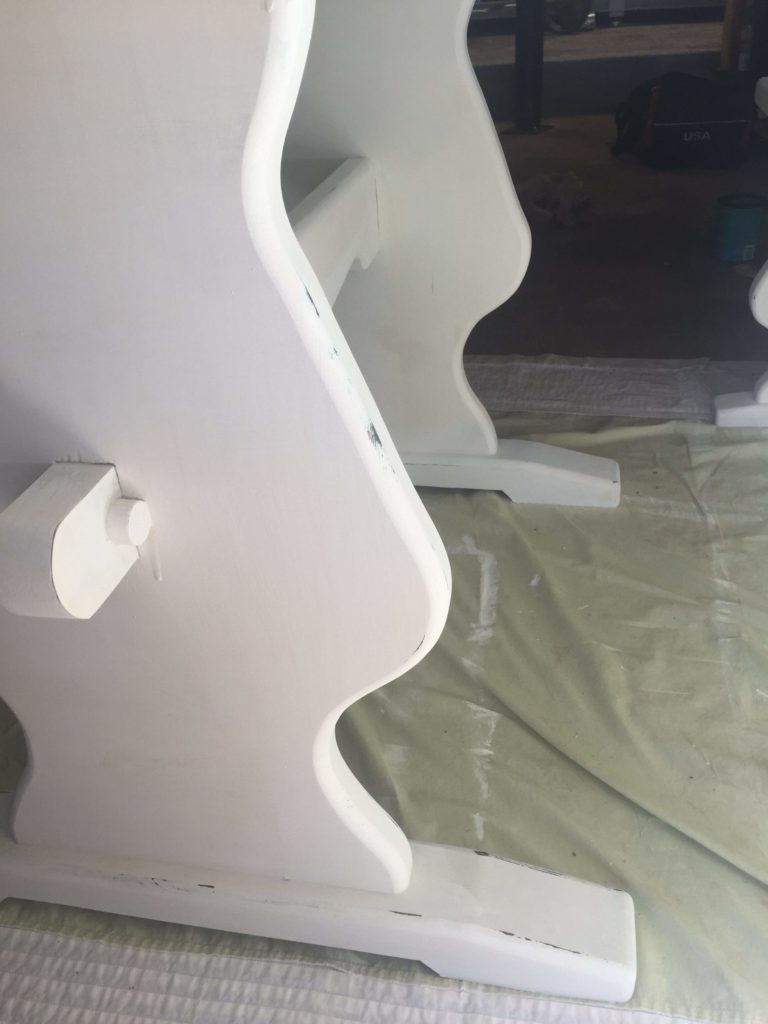
I opted to go back in with sandpaper to rough up some of the edges. I didn’t go crazy with sanding, since the wood beneath is so dark I was worried it would compete with the white if I let too much show through. I hit the edges in a few spots with the sandpaper, just enough to show a little dark through the white paint. I also had to sand down the many drips I ended up with.
I am very happy with my finished table repaint product. The fact that the table really is too large for the space is downplayed now that the table is a lighter color. I also love the way my beautiful, blue Crate and Barrel chairs look with the white finish. Please excuse the missing chair, it also has to serve the purpose of high chair holder for Cooper when we don’t have guests over, and I didn’t even realize it wasn’t there for my final picture.
Thanks for taking the time to check out my blog! Help me spread the word about crafting, DIY, art making, etc. by sharing on your social media site of choice. Check out more visual journal blog posts here. Shop my education resources here. Don’t forget to follow me on Instagram and TikTok for weekly visual journal demos. Until next time!








Leave a Reply