I recently hosted a baby shower for my sister, in celebration of her baby-girl-to-be, Payton Grace. I was thrilled to host such an important event for her, but these days there is a lot more pressure to throw a dressed to the nines party. With amazing sites like Pinterest, Craftgawkers, and Etsy on the rise there are endless how to guides and decorating suggestions. It seems like I can’t attend a wedding, baby shower, or any other event without Pinterest inspired projects hitting me from left to right. As an art teacher myself I felt even more pressure to do this shower up, and do it right.
Unfortunately with recent large and unexpected car repairs on both my husband and my cars, I didn’t have a lot of money to work with. This created more of a challenge, but I was ready to take it on and depend on my creative brain to make this shower perfect.
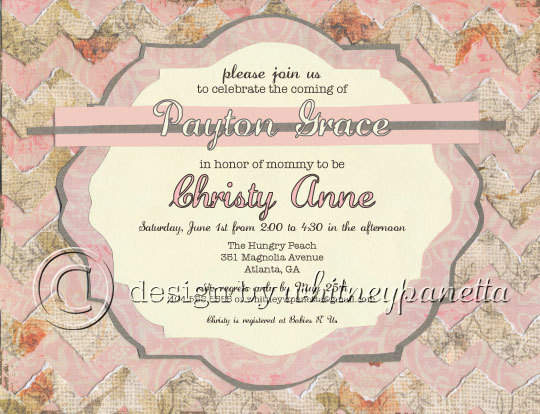
I didn’t go with a specific theme, other than girly. As I was designing the invitation I ended up choosing light pink and gray patterned paper, and decided to carry this color combination throughout the shower. To create the invitation I used scrapbook paper to piece it together. Once it was finished I scanned it into my computer and added the text. I had them printed postcard style, with a picture of my sister and her husband on the back. By designing them and having them printed myself I saved a lot of money.
I sent the invitations out in light pink envelopes. I used a silver pen to write the addresses, and found a very cute flower stamp to stamp the back of the envelope with silver ink. I think invitations set the tone for the shower. I wanted this to be a classy, southern, dresses and heels shower, and I needed the invitation to convey that. If you love this invitation and want your own version of it, check it out on my Etsy shop here!
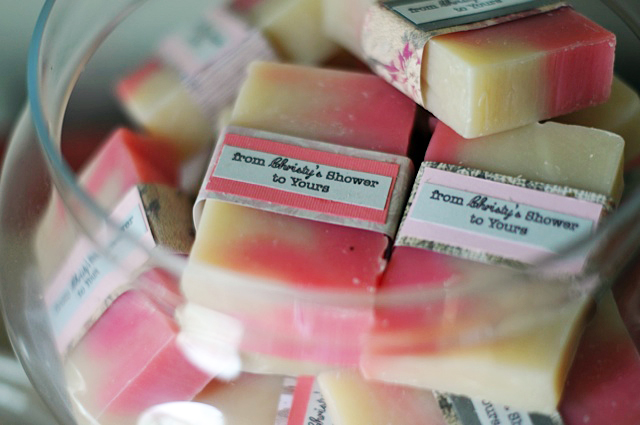
After the invites went out, my focus went to the party favor. This is a newer trend with showers, and something I wanted to provide for my sister. After doing a lot of research I decided to go with handmade pink and creme soap. I loved the idea of labeling them with “from Christy’s shower to yours”, it was too cute, and this was my splurge item. The best deal I found was from a seller on Etsy, I love nothing more than supporting my fellow Etsians! Check out her soap here.
She set up a personalized listing and the soap turned out amazing, they looked good and smelled good. I used the same scrapbook paper I used for the invitations to create the labels. I simply glued two rectangular stripes of paper together, one slightly smaller than the other, and hot glued it around the soap. I then glued a small pink rectangle on top, and printed “from Christy’s shower to yours”, cut it out, and glued it on top. I placed the soap in a glass jar I already had on hand by the front door.
After sending out the invitations, approximately three weeks before, I started on decorations. Since I used scrapbook paper, purchased at 50% off at my local Hobby Lobby store, I was able to easily purchase more and use the same patterns and colors in the rest of the decorations.
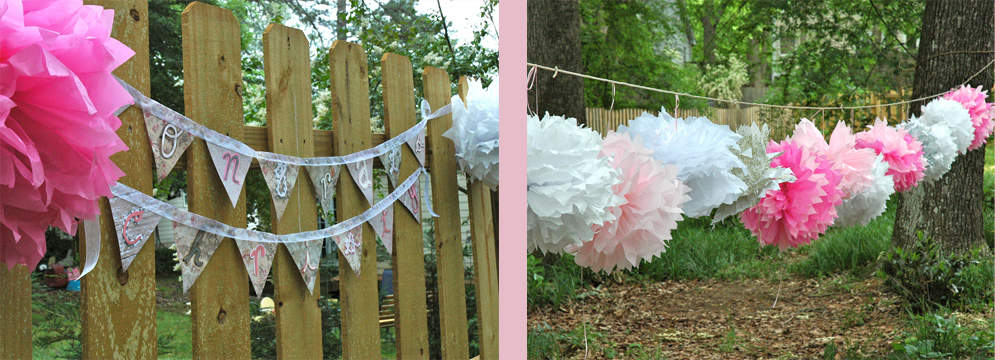
I decided to use scrapbook paper to create banners to decorate the inside of my house. They are very easy to make, and have a cute, vintage feel to them. I bought all of the scrapbook paper and the ribbon from Hobby Lobby, and both were half off. By making them myself I saved a ton of money, and once I got started I went crazy! I ended up making “beverages” and “booze” banners for the drink and mimosa areas, “sweets” for the dessert table, “grub” for the food table, “gifts” for the gift area, “welcome” to hang outside of my front door, and “congrats Christy” to hang outside. To learn how to make these cute, paper banners check out my how to here!
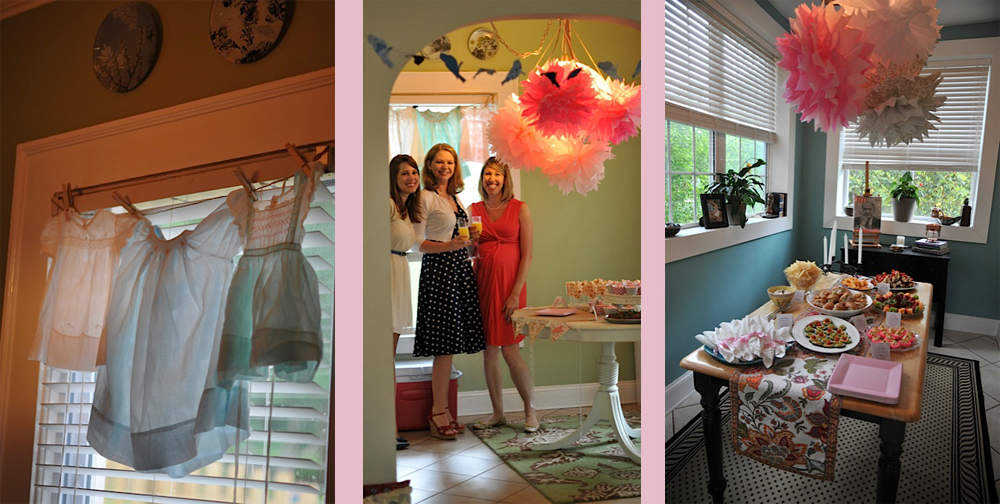
In addition to the paper banners I also made A TON of tissue paper puffs. These are an amazing way to decorate on a dime. I bought A TON of pink, white, and gray tissue paper, once again from Hobby Lobby for a dollar or two per pack. I hung the puffs from my fan and lights above the desserts and food tables, as well as outside.
The puffs added an extra ambiance and festive feel to the inside and outside of my house. I loved the way the light shone through them (although I wouldn’t leave the light on for a long period of time, tissue paper is flammable!). To learn how to make these easy and cheap decorations check out my how to here!
While planning the shower with my Mom she gave me a box full of dresses she made for us as babies, and a handful she wore as a baby. The majority of the dresses were made by my Mom and Grandmother, and I knew I had to some how incorporate them into the decor. After some brainstorming I decided to hang them from the windows in my kitchen using string and clothespins. It was easy to do, and I had all of the materials on hand already.
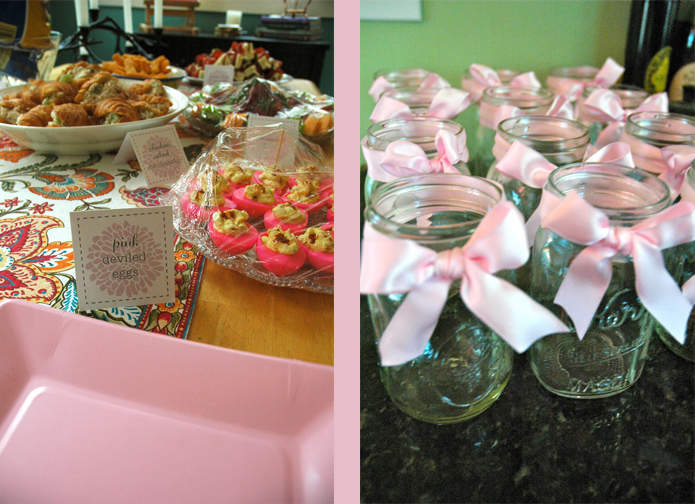
Luckily I had a ton of help from my amazing Mom, she cooked the majority of the food, and I handled desserts and decorations. Together we collected enough mason jars to use as glasses, and I tied pink ribbon around them to make them even more baby girl shower appropriate. My mom found cute, nice, pink paper plates at a reasonable price, and she bought heavy duty plastic flatware, wrapped them up in napkins, and tied it with a bow. This was the perfect way to dress up paper products.
In addition to pink ribbons and plates we also had pink deviled eggs. They are surprisingly easy to make, check out the how to here. To decorate the food and dessert tables even more I made labels for the food. I found an image of a chrysanthemum on google, simplified it into a flat object on photoshop, turned it pink, and added text on top. I printed three per sheet on card stock, cut them apart, and folded them in half so they would stand up. Anyone can learn how to use programs such as Photoshop or Illustrator, it just takes a good bit of time and patience, but once you have the basics down, it’s a piece of cake!
Since I have a kitchen table and dining room table I decided to make one a dessert table and one the main food table. I went a little crazy with the desserts, but I had so many good recipes I couldn’t resist trying them out. I made toblerone dipped strawberries, simply melt the toblerone, mix in a little heavy cream, and dip the strawberries while it’s melted. I also made sweet, pink popcorn, which was a good idea in theory, but came out a little chewy. If you want to try it out for yourself check out the recipe here. To serve the popcorn, since it was so sticky, I decided to put it in individual, plastic wine cups. They are only a few dollars, you can find them at any grocery store, and although they are cheap, they looked too cute with the pink popcorn in them.
Last but not least I made pink lemonade cupcakes, which turned out amazing (you can find the recipe here). I already had a good icing tip on hand, so once I made the icing I loaded it into a freezer bag, with the tip pushed through a hole at the corner, and very easily iced each cupcake. To top them off I bought pink vanilla wafers and pink pearl sprinkles from Hobby Lobby, once again for a very good price. To make them a little extra fancy I found the gray chevron and pink polka dot cupcake wrappers on amazon, for $7.00 for a pack of 12 (buy your own here). The dessert table was topped off with a “sweets” banner and tissue paper puffs.
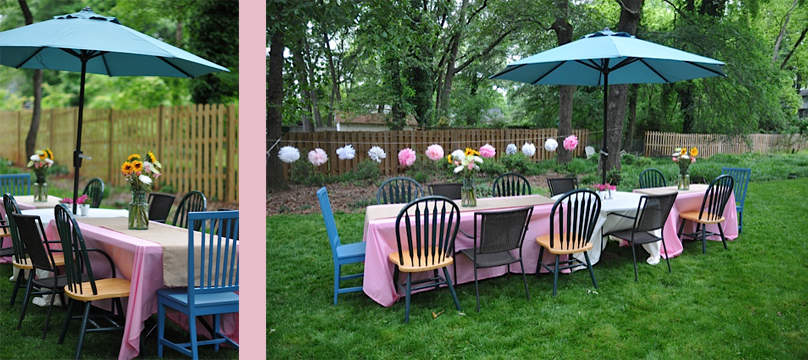
The move I think I am most proud of was having the majority of the shower outside. I love my 1940’s house, but it is a small city home, with little space to seat a large group of people. With the food taking up both of my tables inside, I had to get creative. I drug my round patio table to my large, flat backyard (thank goodness I have that!) and added a plastic fold out table on either side. Luckily my Mom and I both had one, and together they created the perfect amount of space.
I struggled with finding table clothes for awhile. I knew I wanted fabric, no cheap, plastic table covers were going to make an appearance at my sister’s shower. After searching for a couple of weeks, at my wits end I headed to Wal-Mart to see what they had. To my dismay all I could find were the plastic coverings from my nightmares, until I stumbled into the sheets aisle. For the bargain price of $4.00 each I bought Double size flat sheets, which they sell individually. They were perfect and I didn’t feel bad about cutting a hole in the creme one to allow the deck umbrella to be incorporated. To top of the tables my Mom cut burlap runners and we added fresh flowers.
I love the look of all my mismatched chairs, and the tissue paper puffs created a sense of space. My biggest fear was rain, and it did rain that morning, but cleared out by the time the shower started. The rain brought cool weather, which was perfect for an end of May shower in Georgia.
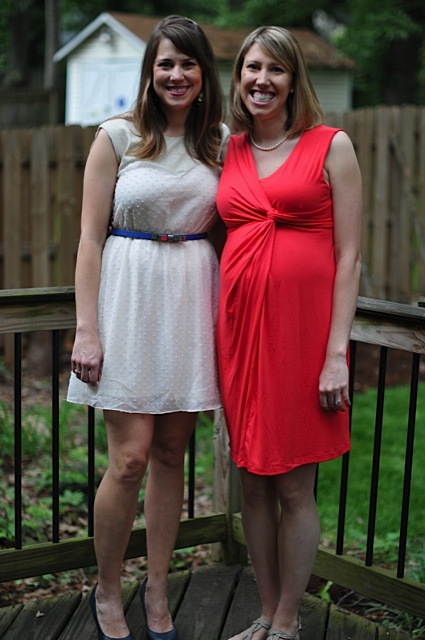
Congrats Christy, I can’t wait to meet my baby girl niece. We are going to have so much fun!!
I hope you were able to find some good tips and how tos to use for your next baby or bridal shower! If you have any comments, questions, or suggestions please share! Thanks for stopping by!
[subscribe2]


Whitney,
You did such an amazing job on my baby shower!! It is the most beautiful shower I have ever attended. You managed to pull off a flawless event that was classy, girlie, and southern! Payton Grace is lucky to have such an incredible Aunt!! =)
I did get a lot of compliments on it! I think it was a great addition, and honestly it was probably my fault it didn’t 100% turn out. I’m hoping my readers will give it a go! PS I love your website! I have it bookmarked!!