Do you need engaging art class projects? Teach your students about book binding and save money by having them make their own sketchbooks! Sketchbooks are a great way for art teachers to save money from their budget while having students gain valuable art practice. Keep reading this blog post to find out more about these fun art projects and the best way to implement them with any grade level!
SKETCHBOOK OVERVIEW
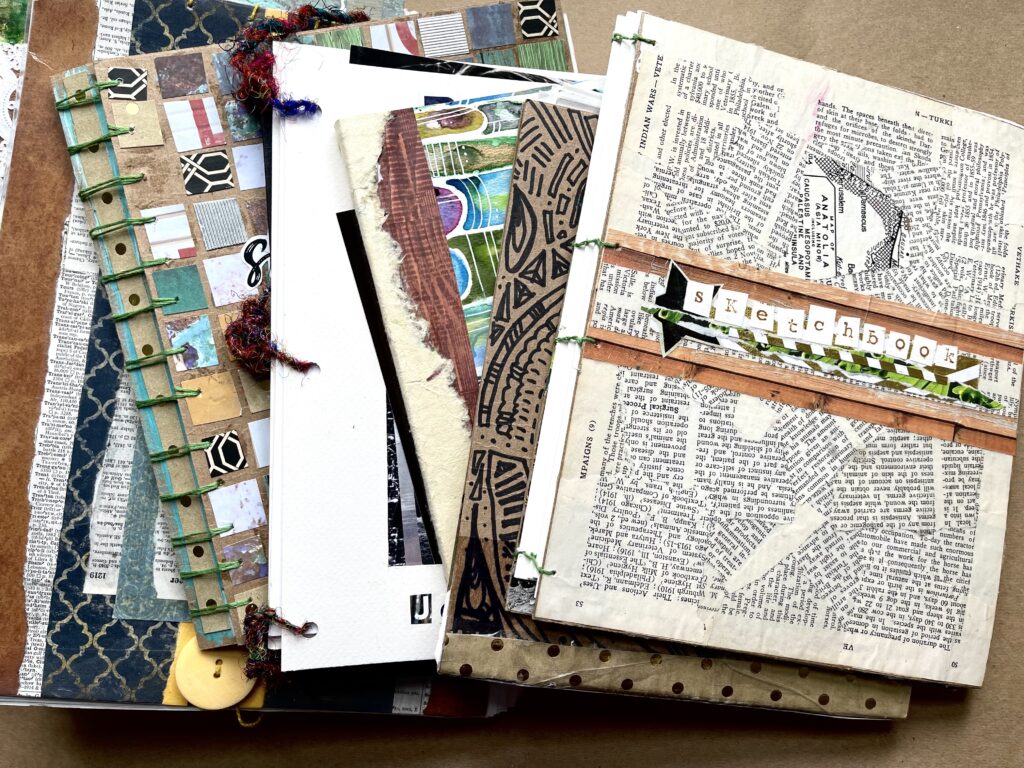
In twelve years teaching I have had every single class make their own sketchbook. This not only teaches them about bookbinding, but it also saves money from your budget. Sketchbooks are an incredibly valuable part of an art class from kindergarten through college. Their sketchbooks are a place to practice techniques and plan their projects to give them to confidence to start an assignment.
Each semester and year, our very first project is to make a sketchbook. The process of decorating and tailoring a sketchbook to their aesthetic gives students buy in when they start working on their sketches. The best part is, it also gives me insight into their artistic ability and skill level. I allow them full access to supplies and art materials in my art room when they decorate their cover. They get to pick the subject, materials, and overall look. Right off the bat, I have a great idea of what materials they are comfortable with, what their artistic style is, and where potential weakness may lie.
To avoid monotany, I teach a different bookbinding technique in every class. As they move through the art courses, the binding techniques become more complex. Check out the range of styles I have taught below, as well as some tips on implementing a sketchbook in class at the end of the post.
FOLDER TO SKETCHBOOK
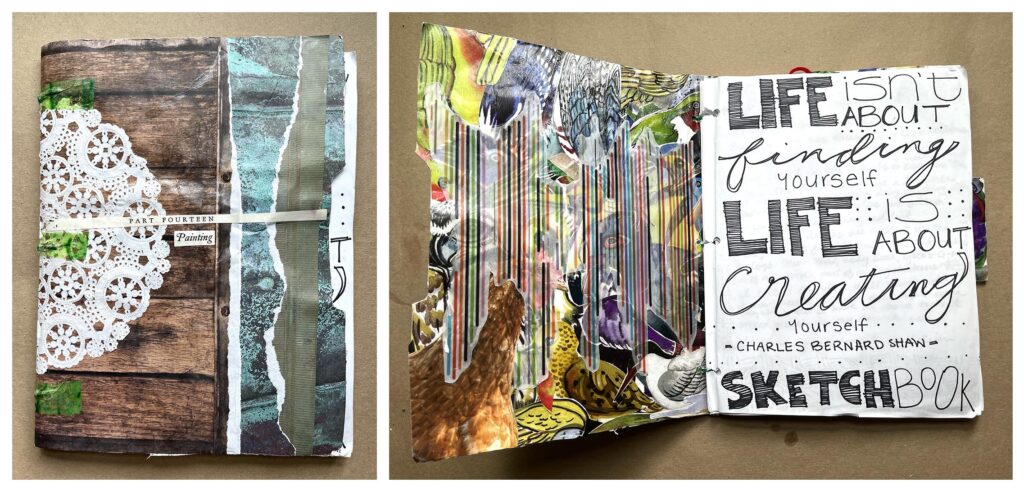
The quickest, cheapest, most basic sketchbook style I teach is the folder to sketchbook. I use this in my introduction to art class because the focus is less on tedious bookbinding techniques and more on decorating. This is an easy art project to do with young kids as well.
For this assignment, each student gets a manila folder, they have access to a range of art supplies and materials from paint to tissue paper to Sharpies to magazine collage material. Students have to completely cover the Manila folder, inside and out, and pick a quote, song lyric, or similar to write on the first page.
Once their folder is decorated, a stack of white paper is added and stapled inside the folder.
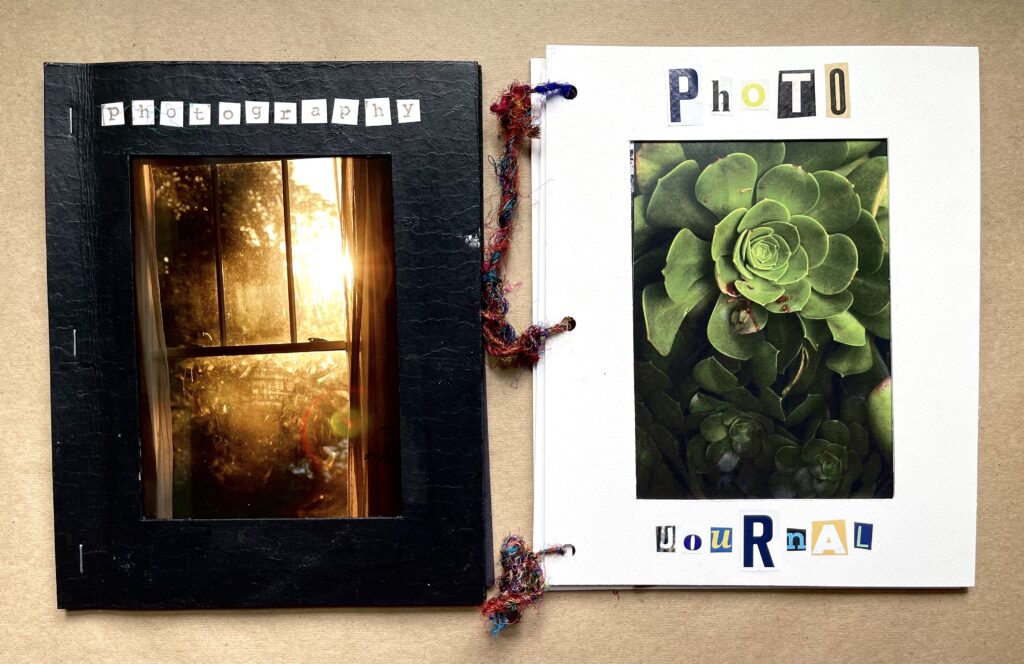
PHOTO WINDOW SKETCHBOOK
A very simple sketchbook I recommend for photography classes is a stapled or hole punched booklet with a window cut out out to add a photograph.
For this sketchbook style I recommend using matboard for the front and back. Cut mat board down to 8”x10” pieces. Using an Xacto knife or box cutter, cut a 4”x6” or 5”x7” window from the front cover. Cut down white piece of paper to fit between the pieces of mat board. Either staple the matboard and paper together using a heavy duty stapler or hole punch the stack and tie the booklet together.
For this style sketchbook I recommend keeping the design simple, especially for a photography class. Keep the mat board white or paint it black. Tape a photograph to the inside of the front cover to display through the window of the sketchbook. This sketchbook is a great opportunity for students to add favorite pictures from the course, take notes on lighting, timing, and camera settings.
ACCORDION SKETCHBOOK
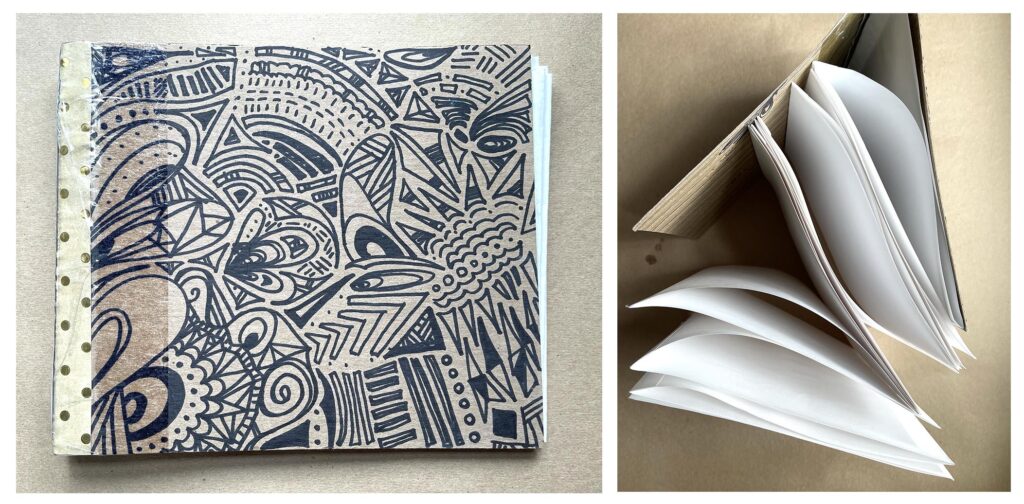
In my ceramic and sculpture classes I like to teach them the accordion sketchbook technique. Because the paper pulls out of the sketchbook like an accordion or fan, it has a more sculptural feel.
For this book, they decorate sheets of cardboard. The decide if they want their sketchbook horizontal or vertical, then fold a flap on each cover to create a spine. Once they are finished decorating the front and back cover, they overlap the flaps and glue them together using hot glue. To add paper, they fold a flap at the edge of each sheet of paper to glue it to the next sheet of paper. After they have a long line of glued paper, they fold it back and forth like an accordion. The final flap is glued into the spine. The paper sits in a stack between the front and back covers.
PERFECT BOUND SKETCHBOOK
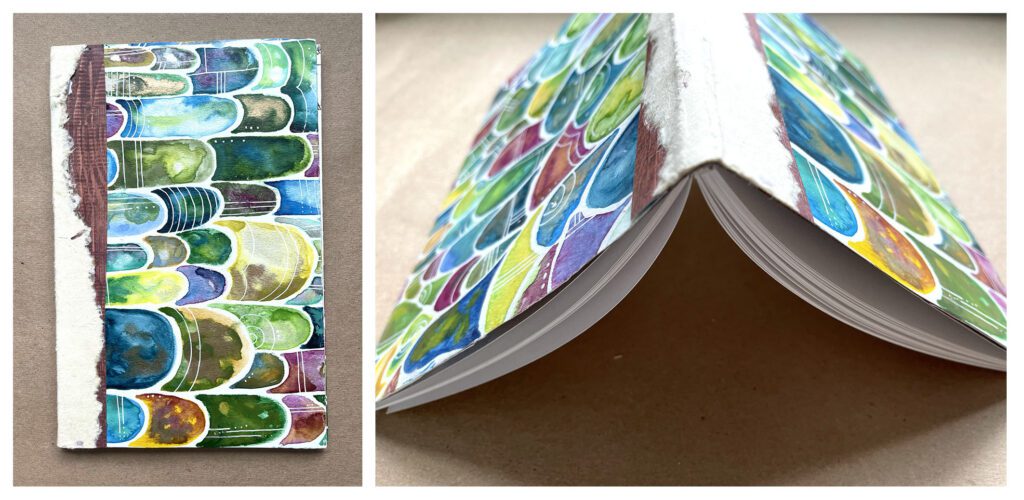
One of my favorite styles of sketchbook is the perfect bound sketchbook. It looks like a book you can buy at a store and younger and older students are always impressed with the professional looking end product with these art class projects. Plus, it is so much fun to create!
To create this sketchbook students are given two sheets of cut down poster board. The students decide if their sketchbook will be vertical or horizontal. Next, they fold a flap on one side of the poster board to overlap to create the spine. They then decorate the poster board inside and out.
Once their sketchbook cover is ready, they overlap the folded flaps and glue them together. Next, they line up a stack of paper, select the side that will be glued into the spine, and coat the edge with glue. Repeat this step 2-3 more times, allowing the layers of glue to dry in between. Once there is a solid layer of glue holding the paper together, a final layer of glue is added. The paper stack is placed inside the cover, with the paper pushed up to the spine. TIP: weigh down the sketchbook to ensure everything stays in place.
COPTIC SKETCHBOOK BOOKBINDING
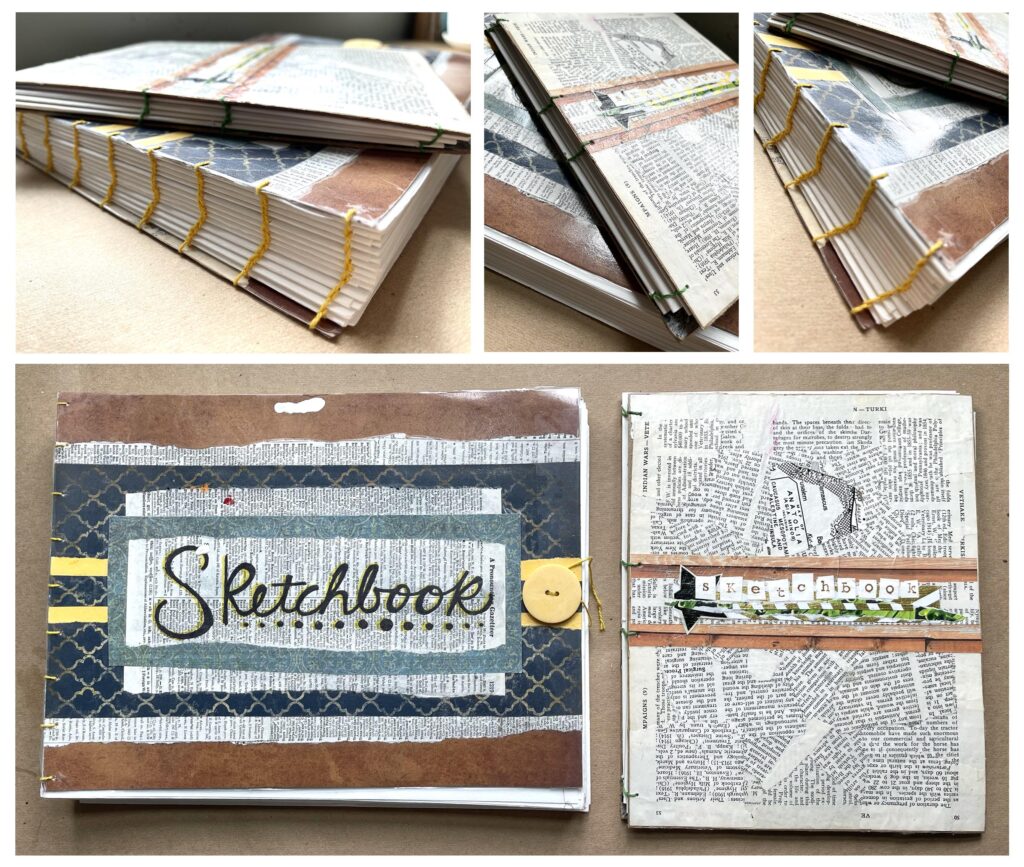
I love teaching Coptic style sketchbook because it gives students a good understanding of bookbinding. In addition, the sketchbook lays flat when open and overall it is a sturdy book.
I typically plan for sketchbook making to take the first week of class. However, the Coptic style takes two, possibly three weeks to complete. It’s a more complicated process that involves decorating the front and back cover, folding paper together, hammering holes through each paper stack, and stitching the cover and paper sections together.
Despite the complex process, it’s worth the final result. The stitching makes a beautiful pattern and shows through the center of each paper section. I show demonstration videos, work with students one and one, and pass out how to sheets for them to reference as they work through the steps. You can check out my lesson pack for these art class projects with all the resources here.
SECRET BELGIAN BOOKBINDING
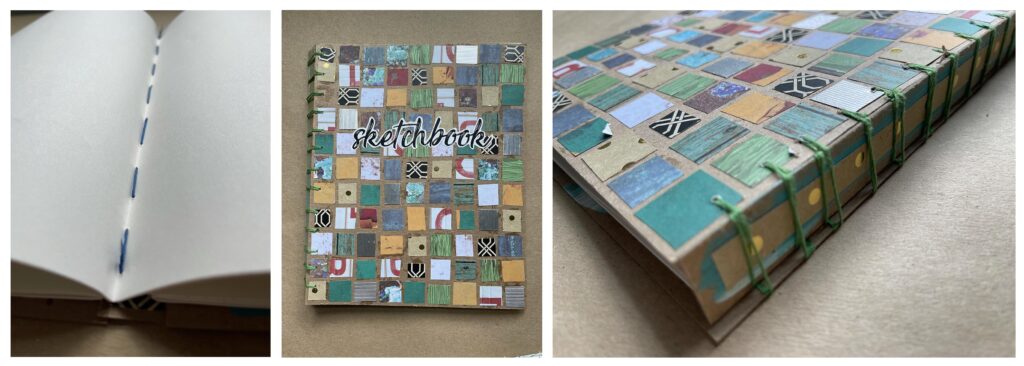
The secret Belgian bookbinding technique is similar to the Coptic bookbinding technique. Students decorate the front and back cover, stack and fold sections of paper, hammer holes through each paper stack, and stitch the paper and the cover together.
What I like about this technique is the addition of a decorated spine. This bookbinding technique is also a simple way to build off of the Coptic bookbinding techniques because students now have to stitch through the paper and wrap the string around the spine to hold it in place.
Like the Coptic sketchbook, the Belgian technique requires much more hands on assistance with students. I have an amazing art lesson pack that includes a demo video, how to handouts, and step by step instructions for students to follow as they create their sketchbook. Check it out here.
SKETCHBOOK BOOK JACKET
In my AP levels classes I like to give them a nice, hardback sketchbook. They have reached the highest level of the art program and they deserve a heavy duty sketchbook.
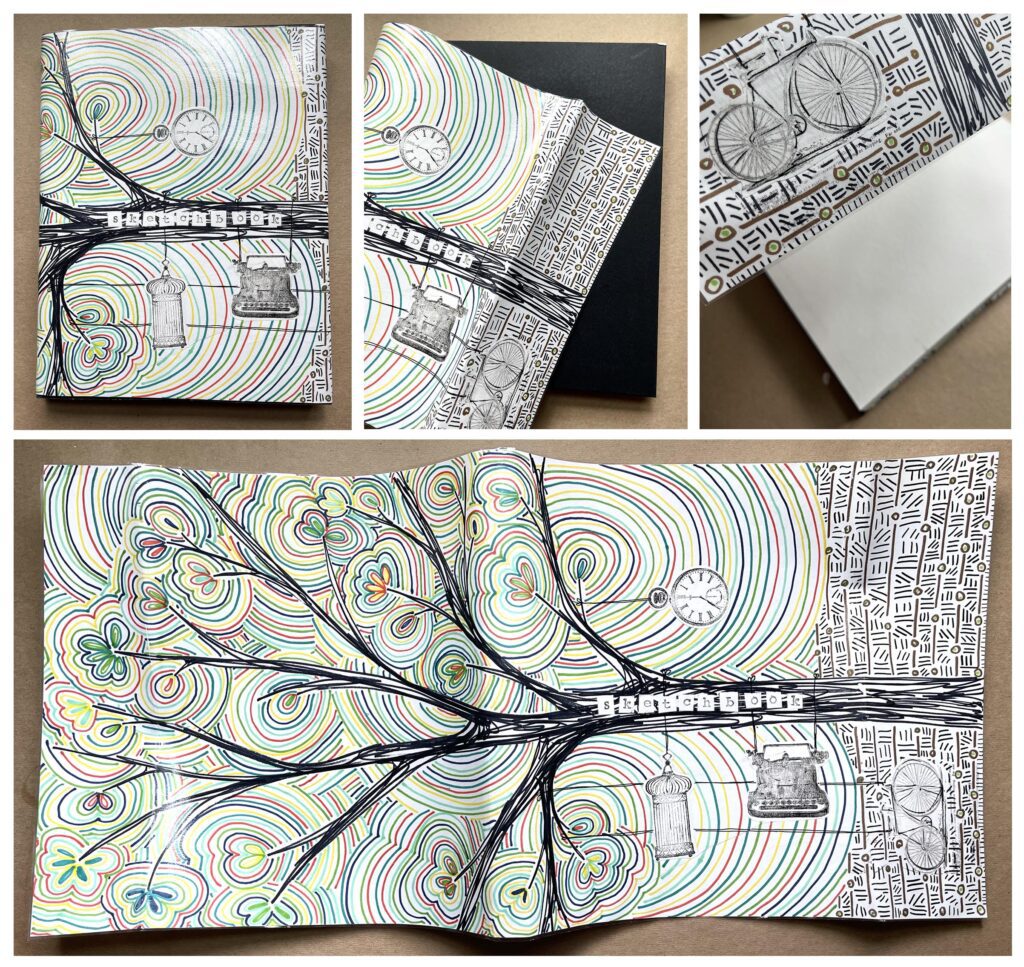
Since they aren’t making their own sketchbook, they instead decorate the sketchbook I give them. They have the option of decorating directly onto the hardback book or creating a book jacket. To make the book jacket, they take a large sheet of drawing paper and fold it around the book. Flaps are folded inside the cover to keep the cover on the sketchbook. Using scissors, students cut it to fit the sketchbook, leaving the flaps uncut.
Students can use any supply to decorate the cover or book jacket. The only requirement is they have to decorate the front, back, spine, and flap of the book jacket. If they opt for a book jacket design, I take their cover to laminate it to make it more durable.
USING SKETCHBOOKS
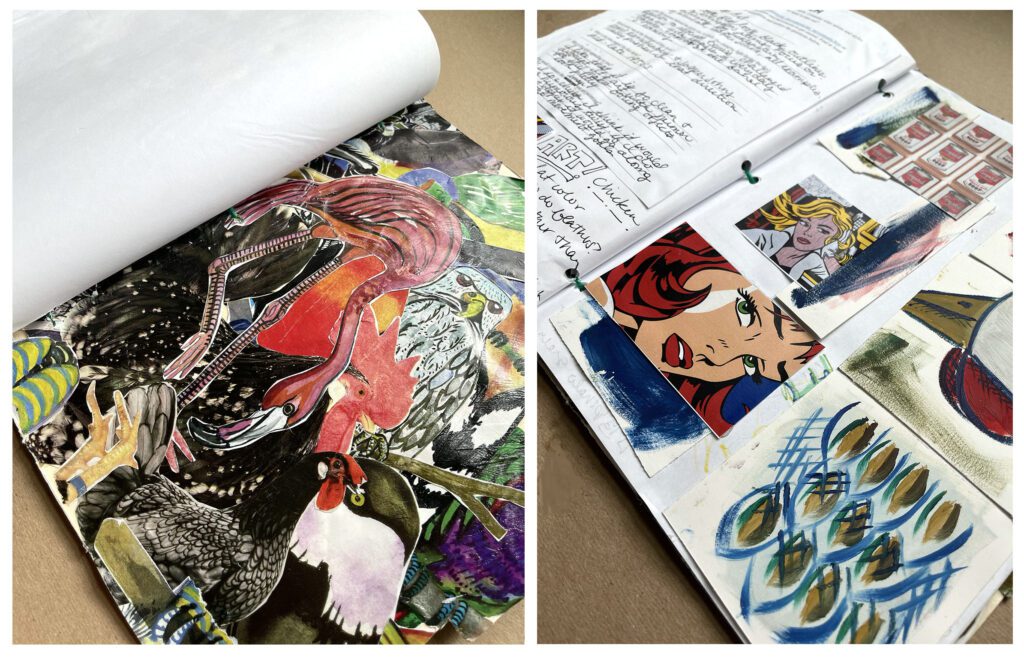
After teaching students bookbinding techniques it’s time to actually use their sketchbook. Although I primarily use them as a brainstorm space for projects, I also incorporate other activities, especially in beginner level courses for young artists.
For typical art class projects and art activities, students are researching famous artists, finding inspiration images, and creating thumbnail sketches. In my intro to art or drawing/painting courses in addition to project prep, they are also learning and practicing techniques in their sketchbooks. From color wheels, to color mixing, to shading techniques, the beginner level art students will walk away at the end of the year with a jam packed sketchbook.
Sketchbooks are also an amazing emergency sub plan option. I have a sketchbook prompt pack that includes a variety of prompts to get students inspired to work in their books. If you are in a pinch, have students randomly select a topic from a jar or a list and have them get to work.
Thanks for taking the time to check out my blog about art class projects! I hope you found inspiration for your art classroom or for your own sketchbook. Looking for a different way to engage students in your class? Check out information on visual journals here. Check out more items and art lesson plans in my shop here.


Curious, do you allow students to use their sketchbooks, across courses in the same year or even over multiple years if they have space?
Because I like to start every class with a new book binding technique they always start the course with a new sketchbook. However, they always have tons of space in their sketchbook so you could absolutely use them in multiple classes or over multiple years. I liked to give my advanced art students hardback sketchbooks and if they continued to AP Art they kept working in that same sketchbook.