
This is a painting I recently finished using oil paint, modeling impasto wax, image transfers, and fabric. If you are interested in learning how to make a mixed media work of art I would start with the materials you are most comfortable with and slowly add new materials from there. Mixed media is a form of art that uses 2 or more different material in a single work of art. The materials can range from paint and pencil to found objects, wood, glass, etc. Mixed media art can be tricky, because it involves combining materials, and one material can easily overtake another or the image as a whole. My best advice is to start with a basic concept, and have fun, don’t try to make it look exactly like the image in your head. As you practice you will get better, and it will get easier to turn your ideas into works of art!
If you have never used encaustic materials or wax before you can search youtube for tutorials, that is how I got started in the process. I don’t use the typical encaustic techniques in my artwork, I am really looking for the texture and marble look for my backgrounds rather than creating an entire image using wax. If you are using wax in your image you cannot use it on a canvas. Whenever the canvas flexes the wax will crack and there is a chance the heat gun will burn the canvas. I use plywood as my base, if you buy wood at home depot they will cut it for you. I have my wonderful husband add sides to it so it looks like a canvas.
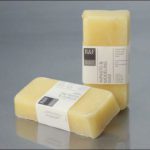
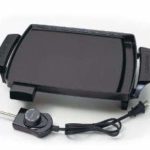
To start I paint a layer of oil paint on the background for a base. I then shave off pieces of the modeling impasto wax and melt it using a hot plate and old cake pan (make sure you keep the heat under 250 degrees to prevent burning and toxic fumes, always do encaustic in well ventilated areas). I use the impasto wax because it isn’t colored and it is the cheapest form of encaustic wax you can buy. It is typically used as a way to build up wax, but I use it to create a base to paint on. Once the wax is melted I drip it in the areas I want wax. Next, I use the heat gun to spread the wax out to an even layer. I then add another layer of oil paint, and use the heat gun to fuse the oil paint and wax. When the two layers are fused the oil paint should no longer be wet.
After I was satisfied with the background I began painting in the cage and hands. If the wax melted into sections I didn’t want it, I used an old credit card to scrape it off. I used oil paint to paint the image, make sure you use highlights and shadows to make your image look three dimensional. If you are new to oil paint I typically use odorless mineral spirits, whatever oil paint is on sale (typically Winsor and Newton and Gamblin), quick drying linseed oil, and quick drying glaze medium. My favorite oil paint colors are Naples yellow, pthalo blue, pthalo green, paynes gray, and titanium white.
To create the power lines I used a ruler and carved lines into the wax with a paperclip. Once I had a clean, straight line I rubbed oil paint into the line to make it stand out. Once you have the line carved be careful not to melt it closed if you use the heat gun again. I then added image transfers of the birds on the line and the power line posts. To do this you have to have an image printed on a laser printer or copied on a copier. I used images printed from a laser printer, I cut them out, used the heat gun to slightly heat the area I wanted to transfer the image to. After the area cooled, I placed the image face down, and burnished the back using scissor handles. I let it sit for a minute, then rubbed the paper off by wetting it and rubbing my fingers on the back. The end result should be the ink from the image sticks to the wax and all of the paper comes off. I use the heat gun again at the end to fuse the image and remove any leftover paper pieces. There is a great tutorial on youtube about this process click here. If you watch this tutorial you will need to watch tutorial #1, #2, and #3 to see the entire process.
After the background, painting, and image transfers were complete I attached fabric using a hot glue gun. After I am completely finished I always sign my paintings in the bottom right corner, in a color that won’t stand out too much. I hope you were able to get some tips on encaustic and using multiple media in one work of art! I will post more of my paintings and processes in the future! Thanks for visiting!

i love your work. I was wondering if you sell it? id love to purchase “Caged” depending on the price :p (broke college student(: haha) but id love to hear from you and maybe we could work something out. Also, if you could send me the size of the painting? I have the perfect spot for it, I just want to make sure it fits haha.
martinkelsey587@gmail.com
hope to hear from you!
Kelsey Martin
Thanks for reaching out. I’m glad you like the piece, but unfortunately it has sold already. I do sell my work, you can check it out at my Etsy shop here: https://www.etsy.com/shop/whitneypanetta?ref=shopsection_shophome_leftnav, maybe something else which catch your eye!