Printmaking is such an interesting and historic art-making process. My students especially love it because they have the ability to make multiple prints of one image. They often refer to the linoleum block in relief printmaking as a “stamp,” which I have an irrational hatred for. Somehow calling it a “stamp” lowers the artistic value for me. Or maybe I am just annoyed because they aren’t using their art vocabulary. Regardless, I always try to incorporate printmaking into at least one of my art classes, and relief printmaking is typically the way I go.
For this particular assignment, I use linoleum blocks and a number of printmaking-specific tools. However, there are a number of ways to incorporate the same basic concepts without the expense of the tools. One option for a simpler version of this is using natural materials you can easily find around your house to create designs to print with. Check out my supply list and how-to for this portrait-based relief printmaking project below.
SUPPLIES:
- Computer and printer to edit image and print it
- Pencil
- Graphite paper
- Linoleum block
- Linocutters and/or other carving tools.
- Brayer
- Baren (a wooden spoon also works very well)
- Printmaking ink
- Newsprint (for proofs)
- White paper and rulers, to create registrations
- Printmaking paper
- Colored pencils (Prisma colored pencils are my number one choice)
- Erasers
- Black paper to mount and display the finished works of art
RELIEF PRINTMAKING HOW TO
STEP ONE
For the first step, you need to select your image. For this particular assignment, my students focus on a portrait. I always encourage them to select someone they know personally. I have found that if my students can develop a personal connection to the assignment they become more committed to the end product. It is also a great way for students to express themselves individually within the constraints of a general topic.
STEP TWO
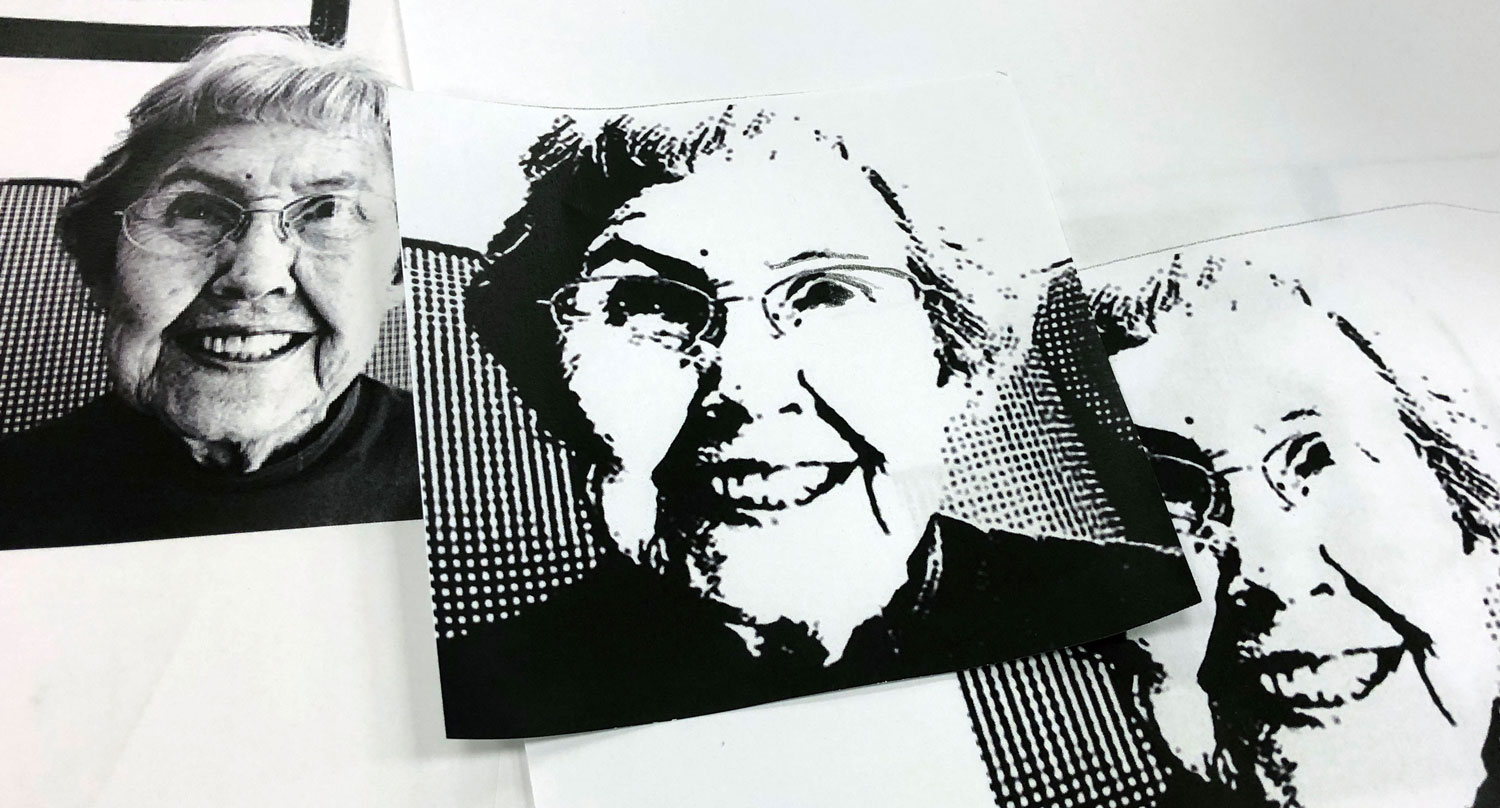
Once you select the image, you must simplify it. For this assignment, my students are creating prints with a single color, so they must simplify their image to just black and white. Not all images work well when converted to only black and white, so it is helpful to try editing at least three different options and select the most successful one.
For this step I use Photoshop. I open the image, and select “Image-Mode-Grayscale.” Next, you select “Image-Adjustments-Posterize” and set the number to 2. This leaves just black and white in the image. With printmaking, you are creating a mirror image of the original design. Therefore, it’s helpful for students to flip their images before printing (to do this go to “Image-Image Rotation-Flip Canvas Horizontal”). This is especially true when dealing with portraits. It’s shocking how different a person can look when you create a mirror image of them. Next, size the image to the linoleum block. These were smaller, so I sized my image to 4″x4″ and then printed a few copies out. SIDE NOTE: I have done 4″x4″ prints in the past, which saves money on linoleum, but with the colored pencil addition at the end, it is much more successful with a larger size such as 6″x6″ or 8″x8″
STEP THREE
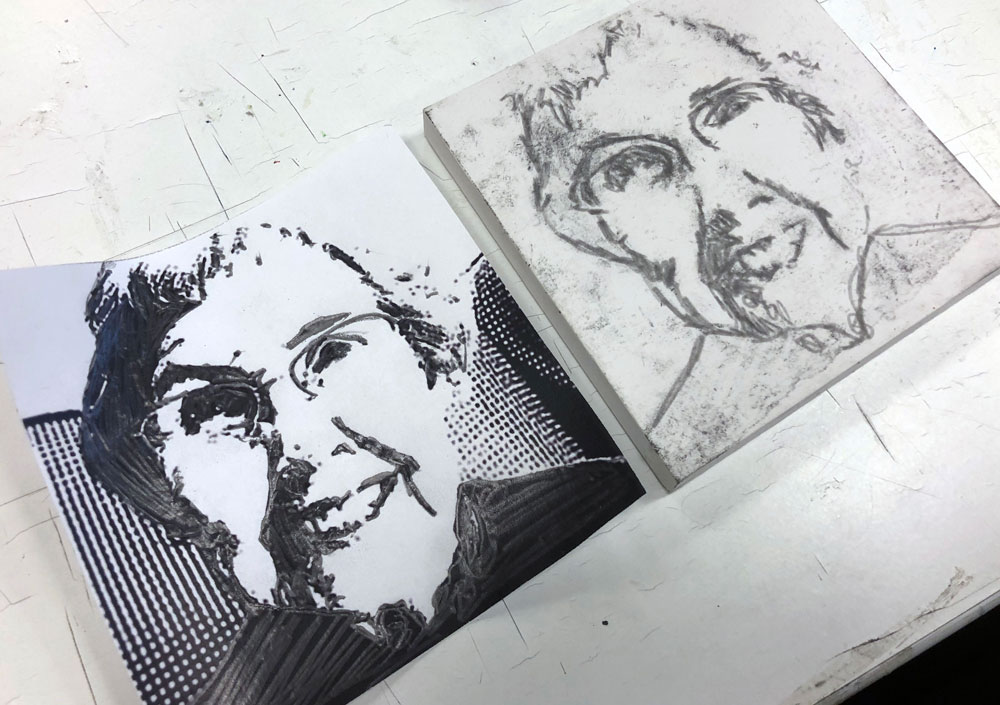
After your picture is printed and ready to go, you need to re-draw it on the linoleum block or transfer the image to the block. Because this is an introduction to printmaking I prefer to have students transfer the images. This frees up a lot of time for them to focus on the printmaking process. To do this, place graphite paper between the linoleum block and the printed image. Trace over the lines. TIP: tape the top of the image to the linoleum block. That way you can lift the image and make sure you didn’t miss anything without accidentally moving it. TIP x2: Fill in the areas you want to keep un-carved with a pencil, and leave the areas you want to carve blank.
STEP FOUR
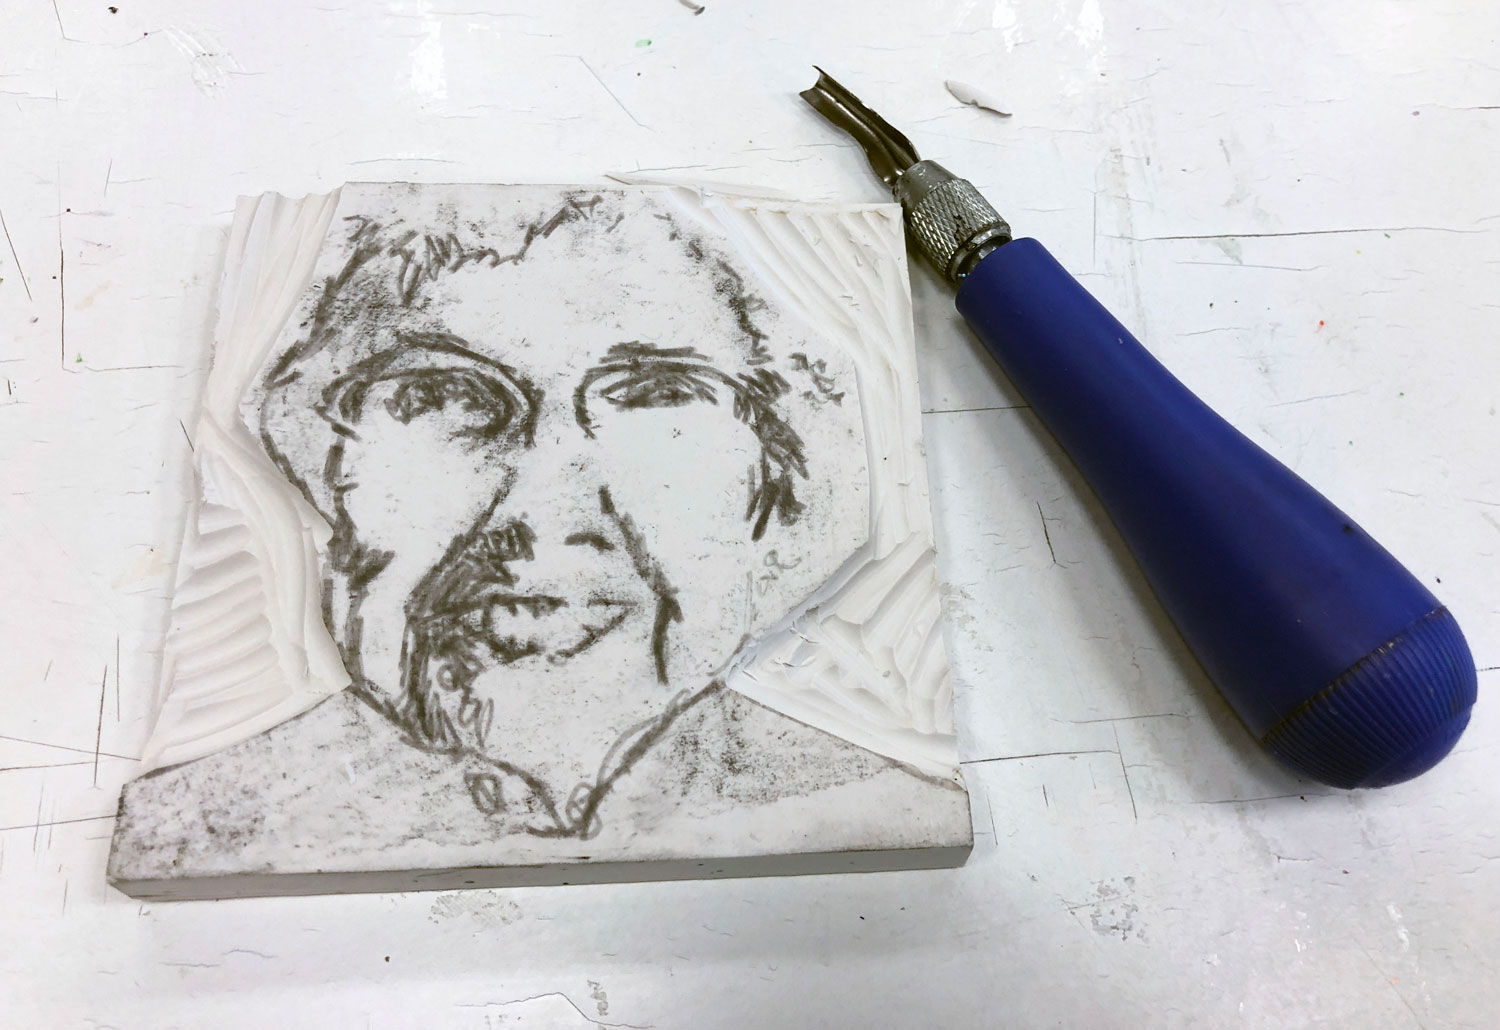
At this point, you are finally ready to start carving. Start with larger areas and make your way down to the small details. Switch out the lino cutter blades as necessary. ALWAYS cut away from your body and hands. It’s very tempting to cut toward your hand, but these suckers are sharp and it’s very easy to gouge yourself. As I tell my students, “please don’t make me fill out an incident report today.”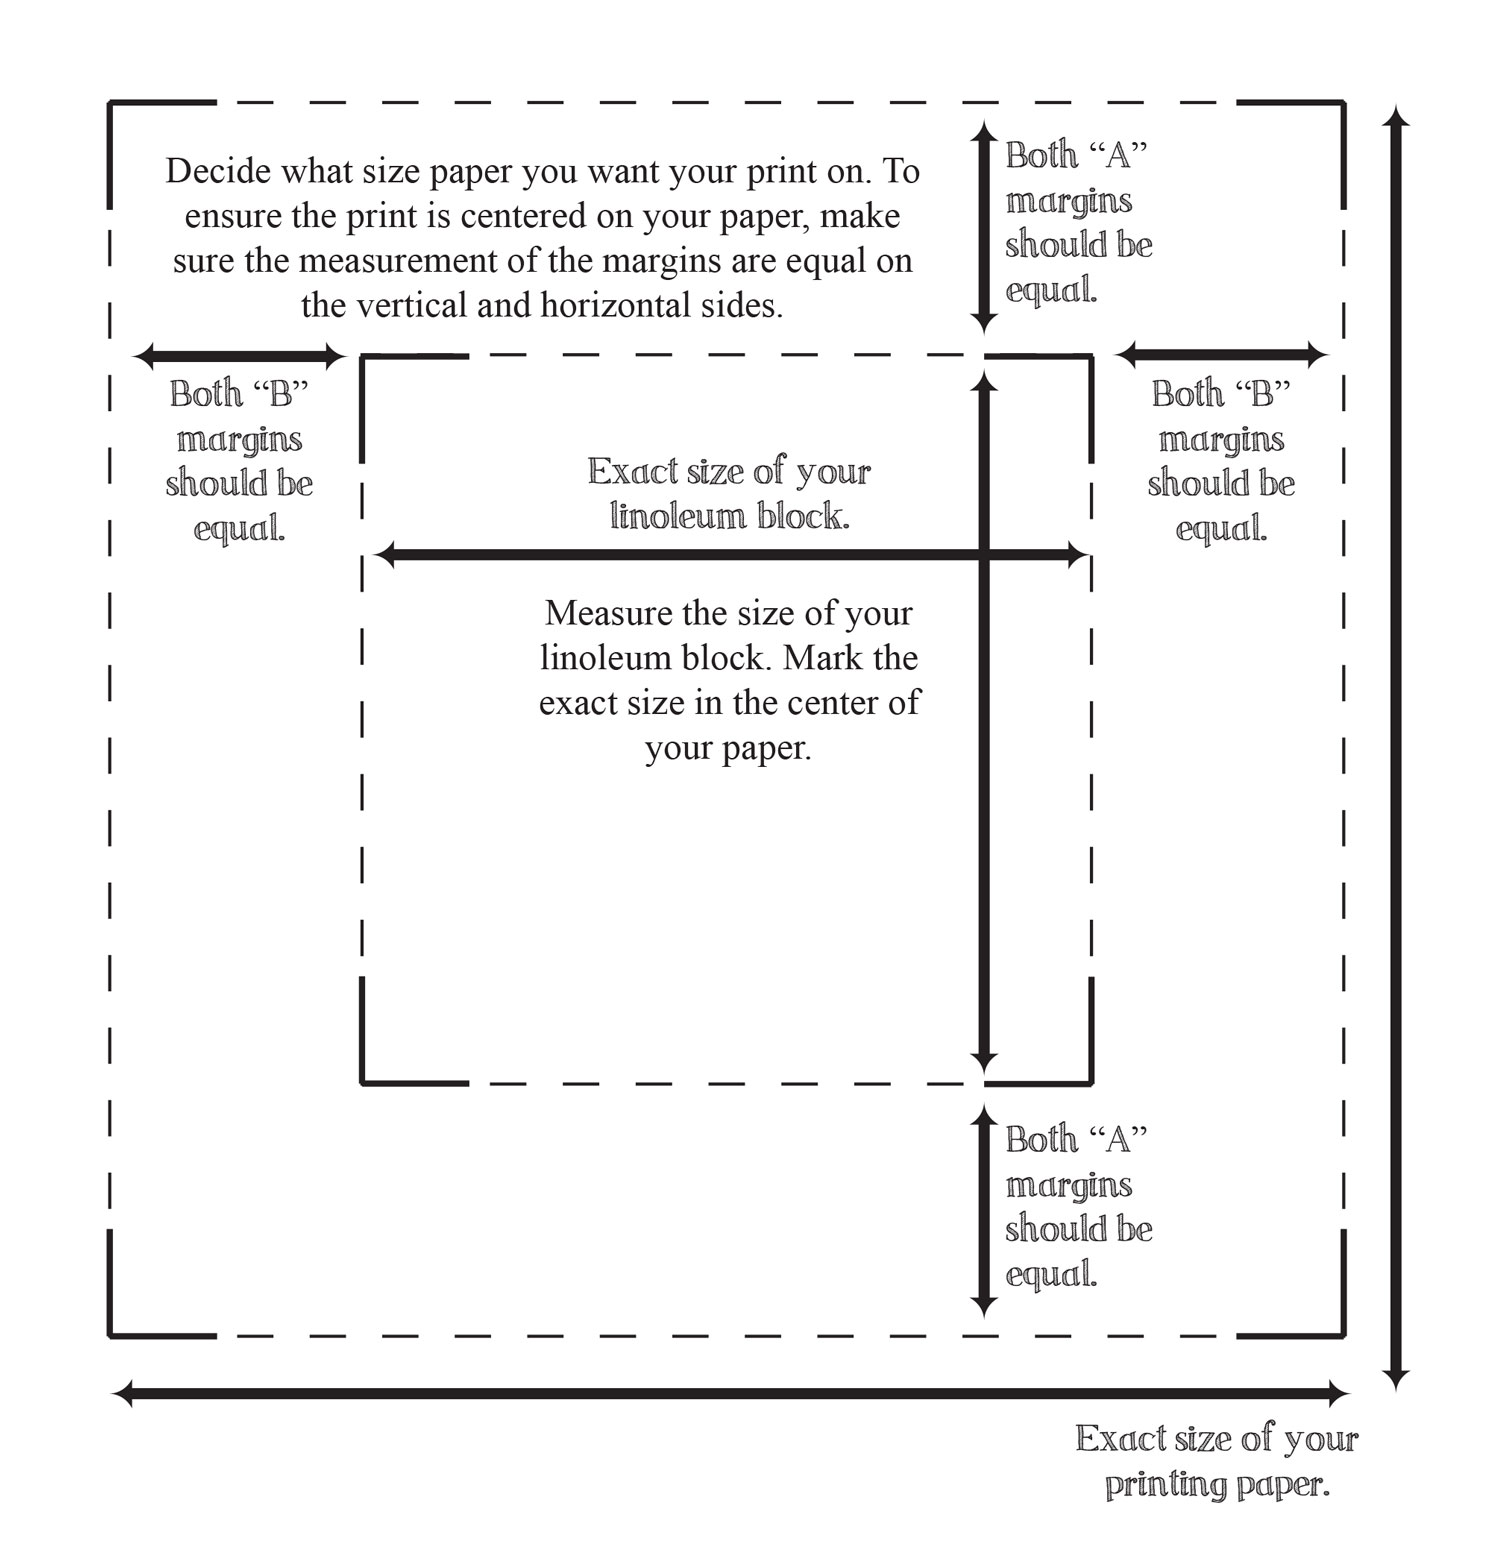
STEP FIVE
With this lesson you can either print onto a sheet of paper, without worrying about the placement and trim the edges later, or you can create a register to help you line up pre-cut paper and center your print in the printing process. I prefer the later because it also introduces a measuring and precision element to the assignment, which covers a different skill set and pushes them to think a different way during the assignment.
STEP SIX
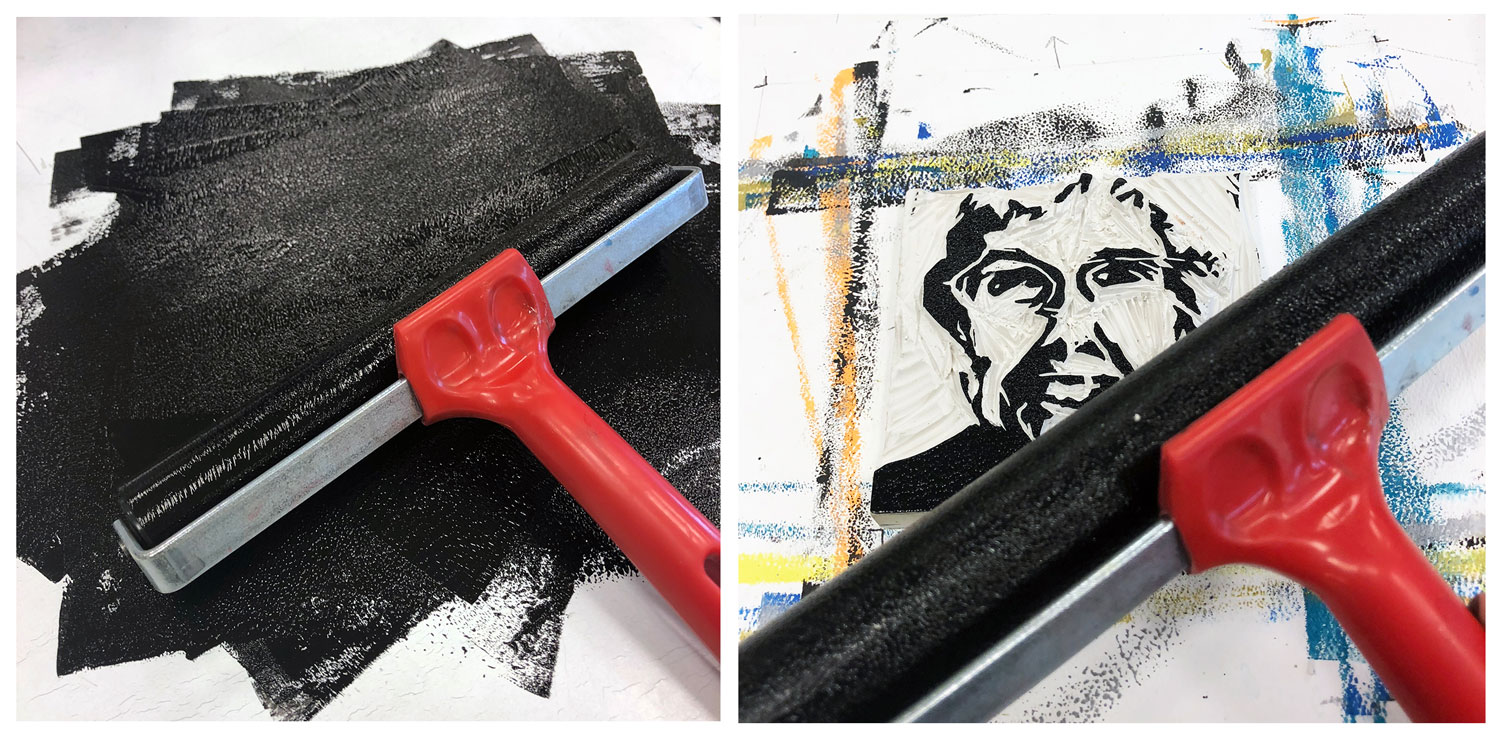
Once your image is fully carved out, it’s time to ink and print! I like to work directly on my tabletop for this, although a flat piece of tile would work well and be easier to clean. Place a small spoonful of ink onto your surface, and roll it out using the brayer until you have an even application on the roller. Roll the ink onto the linoleum block, make sure you cover the entire block and have even application. You may notice ink catching areas that aren’t carved low enough. This is why your first few prints are printed on newsprint. It’s cheap paper you can test your prints on until you have the carving just right.
STEP SEVEN
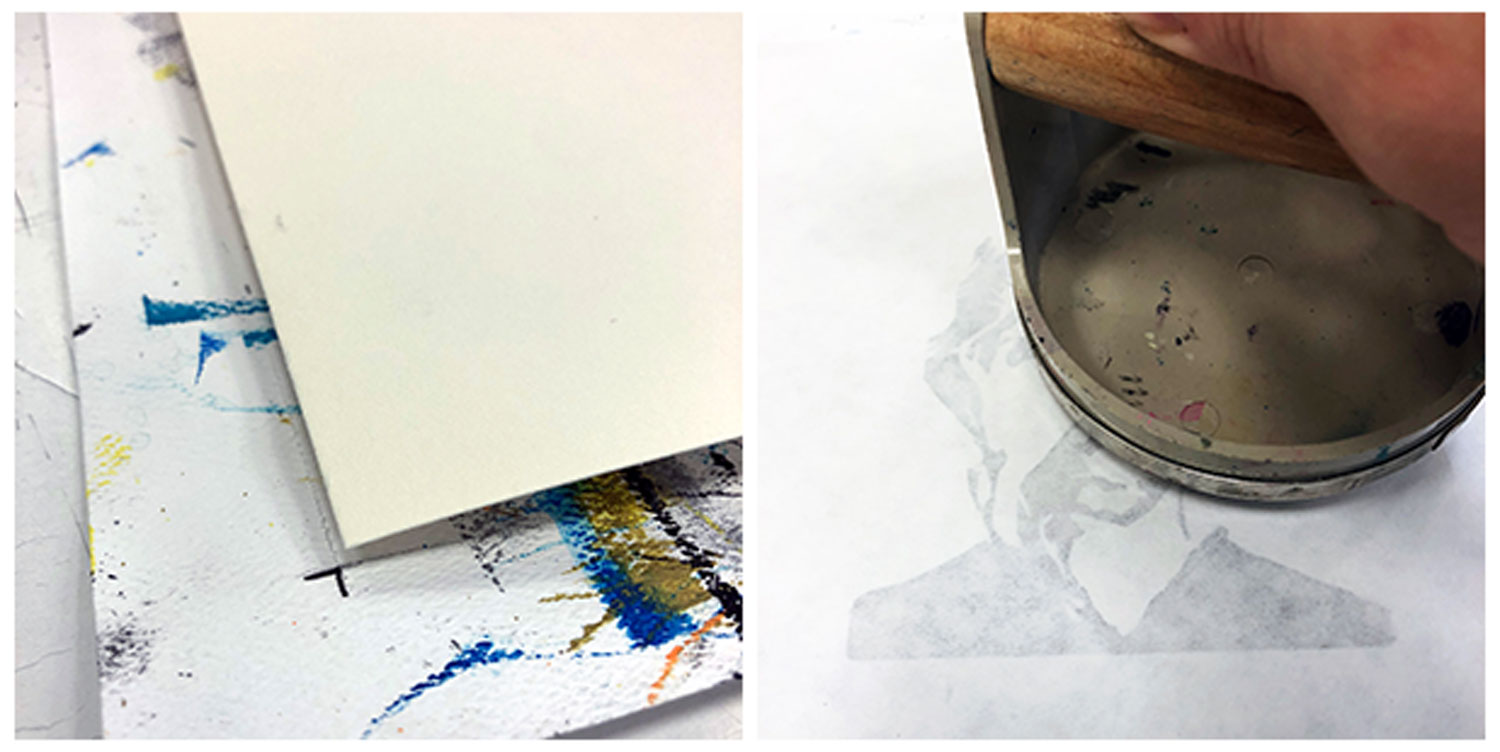
If using a register, place your block in the center and line your paper up with the outer lines. Use a baren (or a wooden spoon) to burnish the back of the paper. Press down and move in small circles hitting every section of the block. Carefully peel the paper off and admire your print!
STEP EIGHT
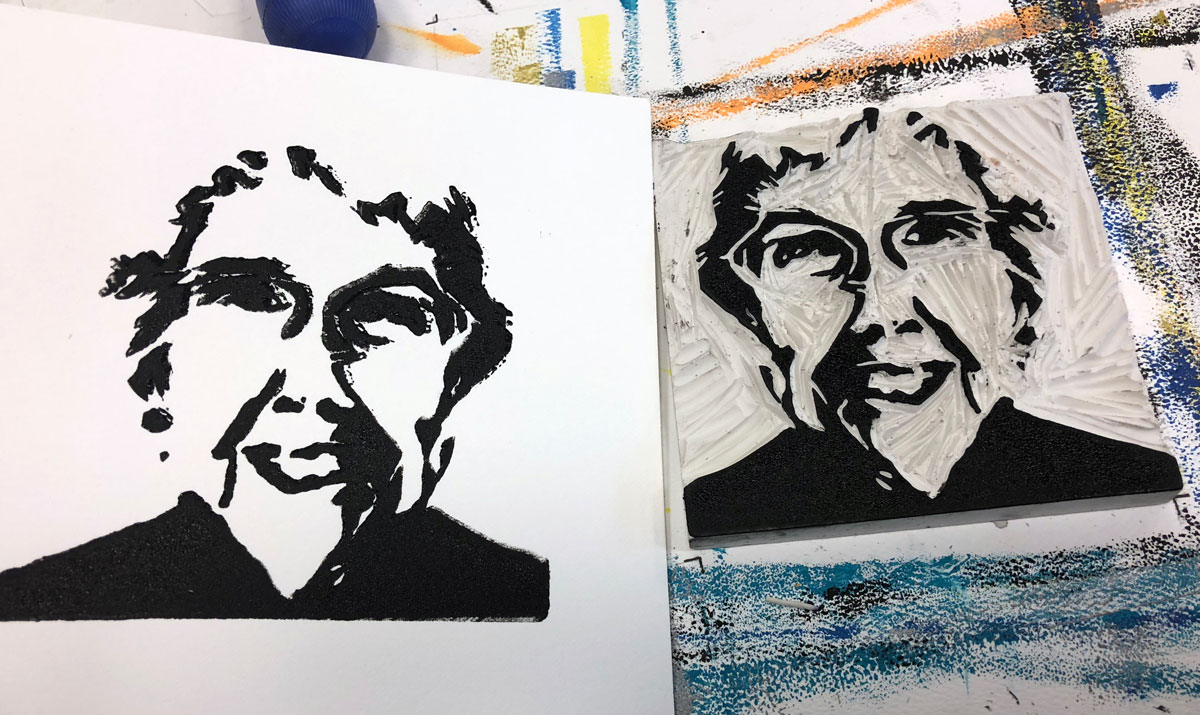
With the first few prints you are looking for changes that need to be made. I had many areas where I didn’t carve low enough and the ink kept catching small lines in the background. Go back, carve those areas down, and start the process over. Once you are satisfied with your print, start printing on printmaking paper.
STEP NINE
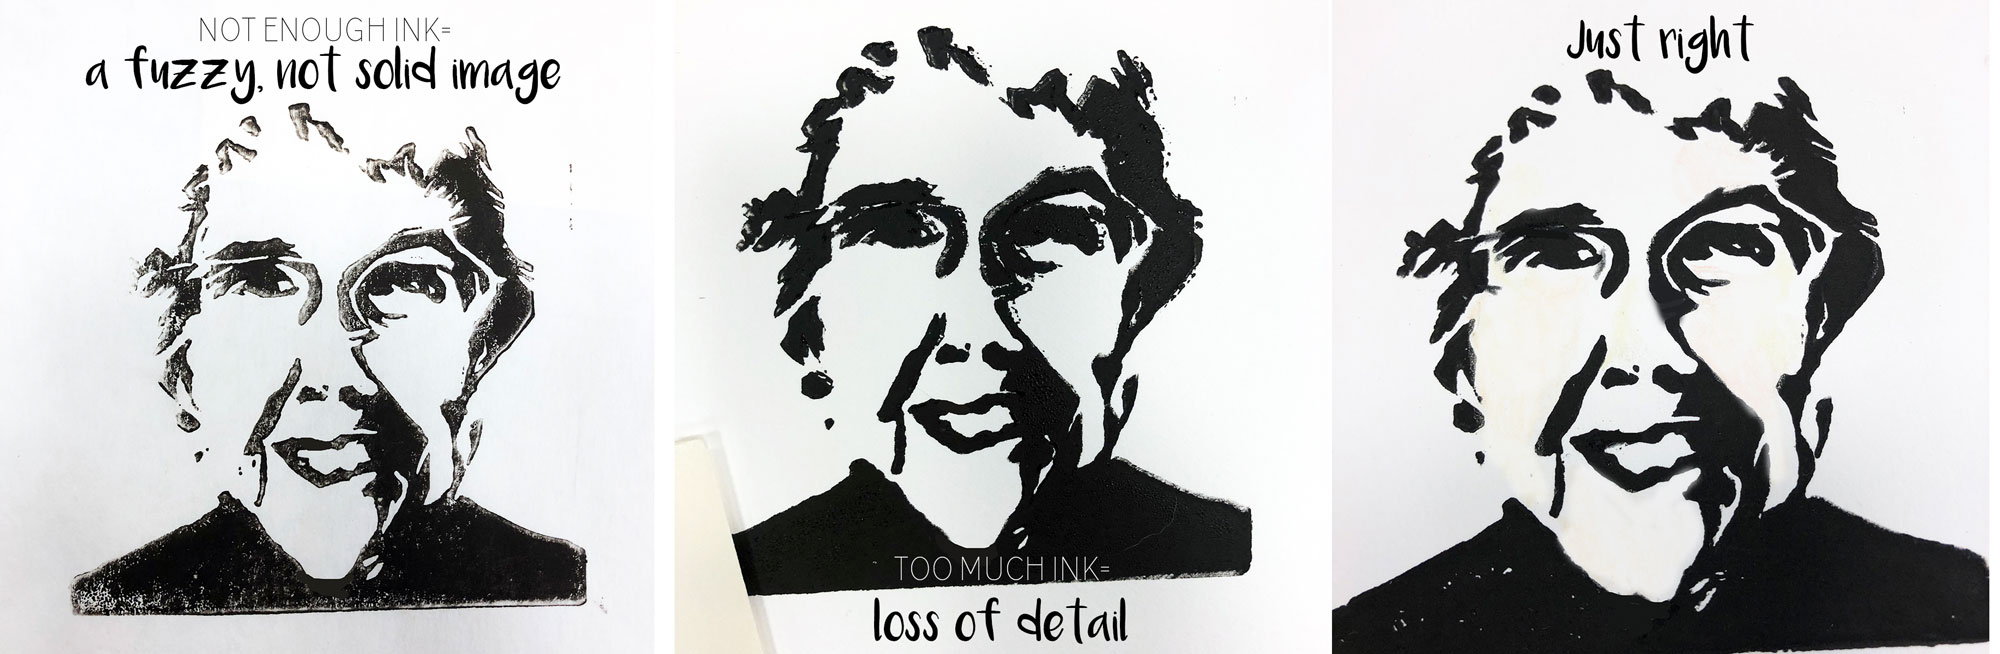
It will take a few tries to get the correct ink application. Keep printing until you get at least five quality prints. Make sure you aren’t going too light (a fuzzy, uneven look) or too heavy (small lines in your image are filled in with ink).
STEP TEN
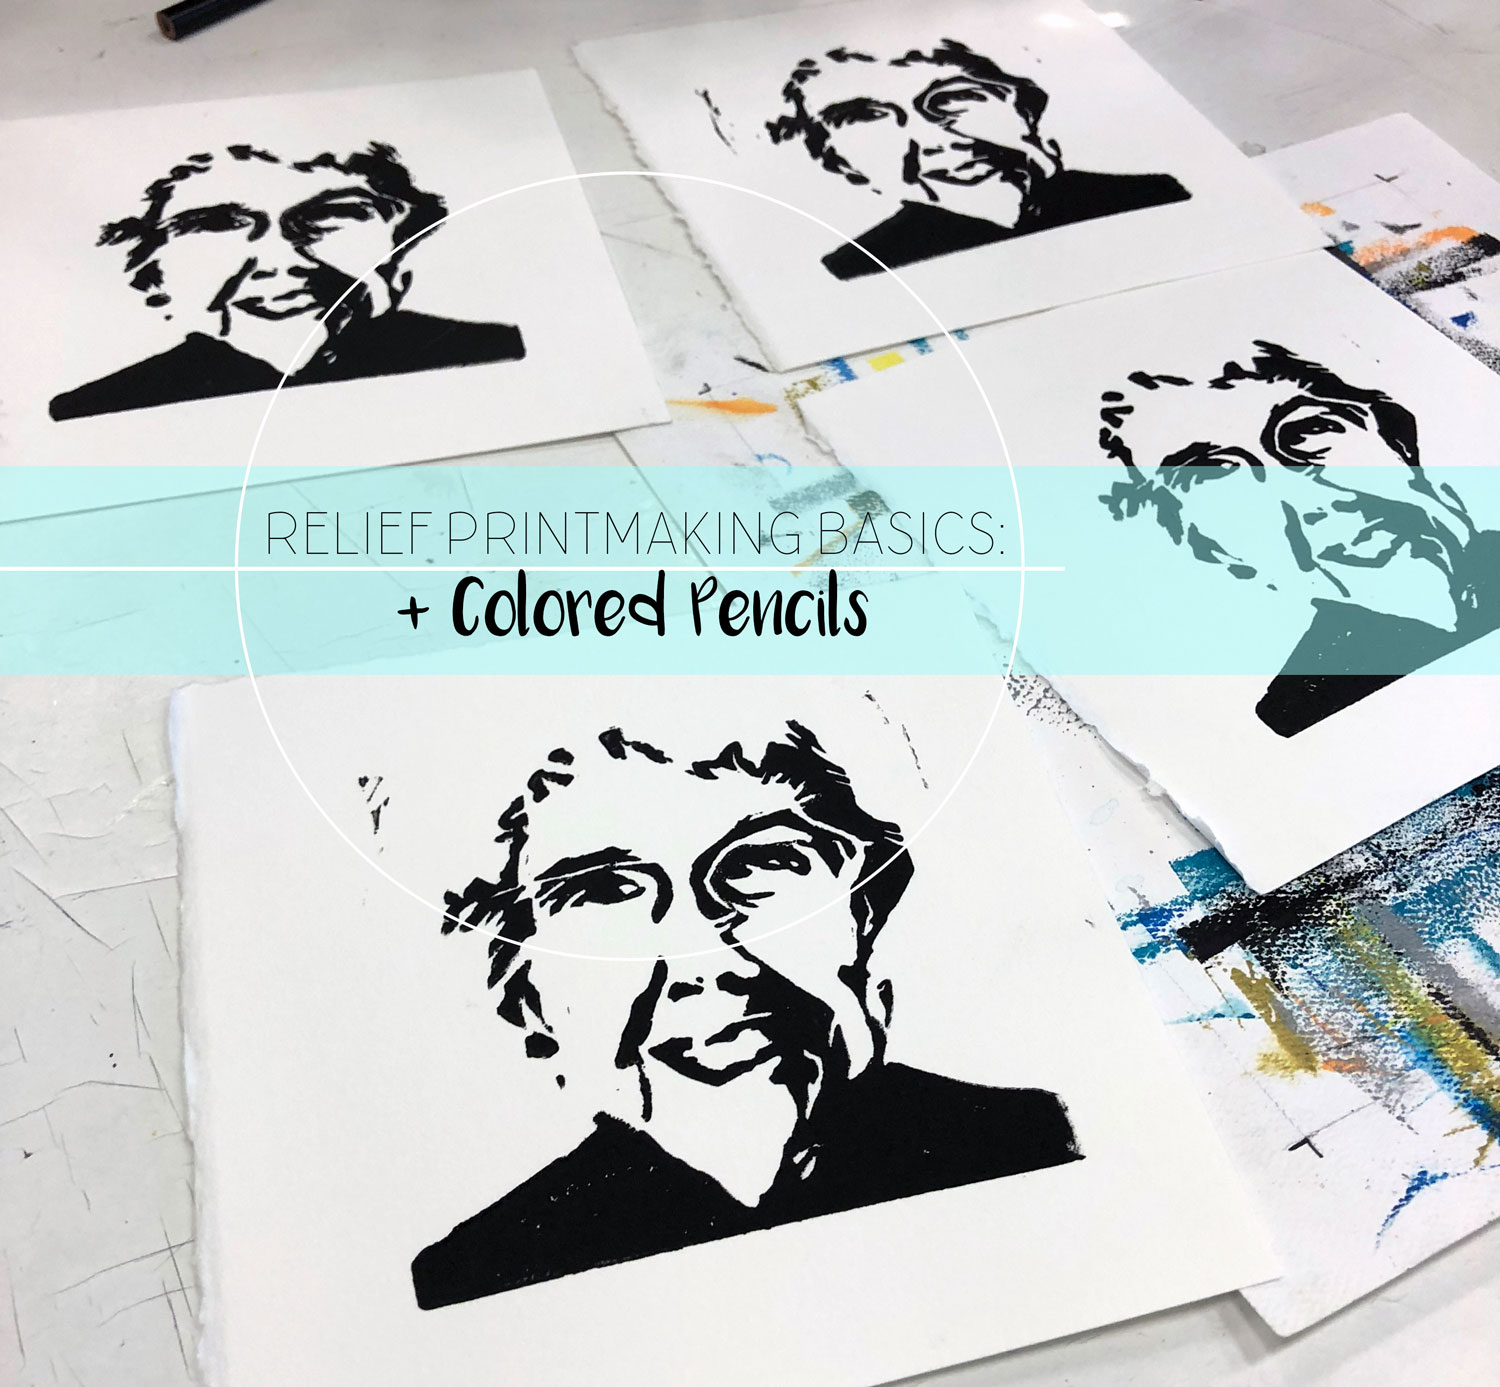
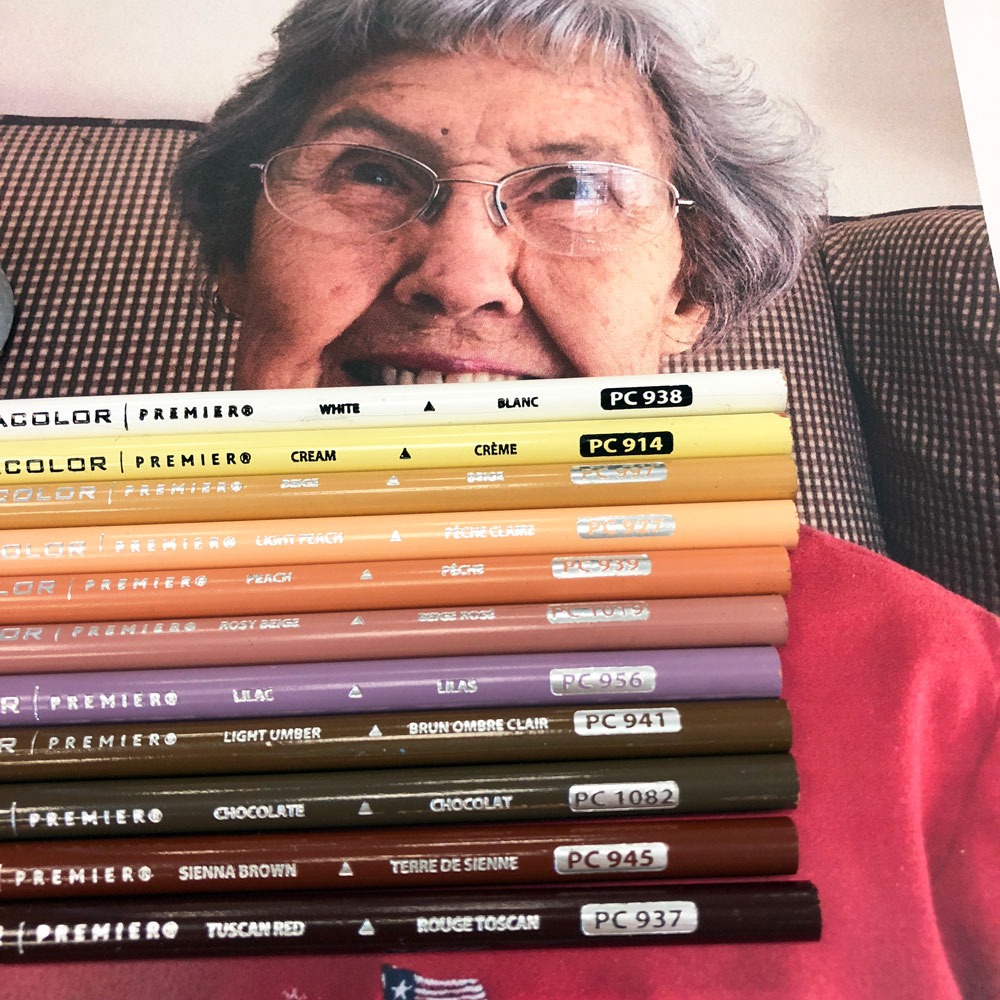
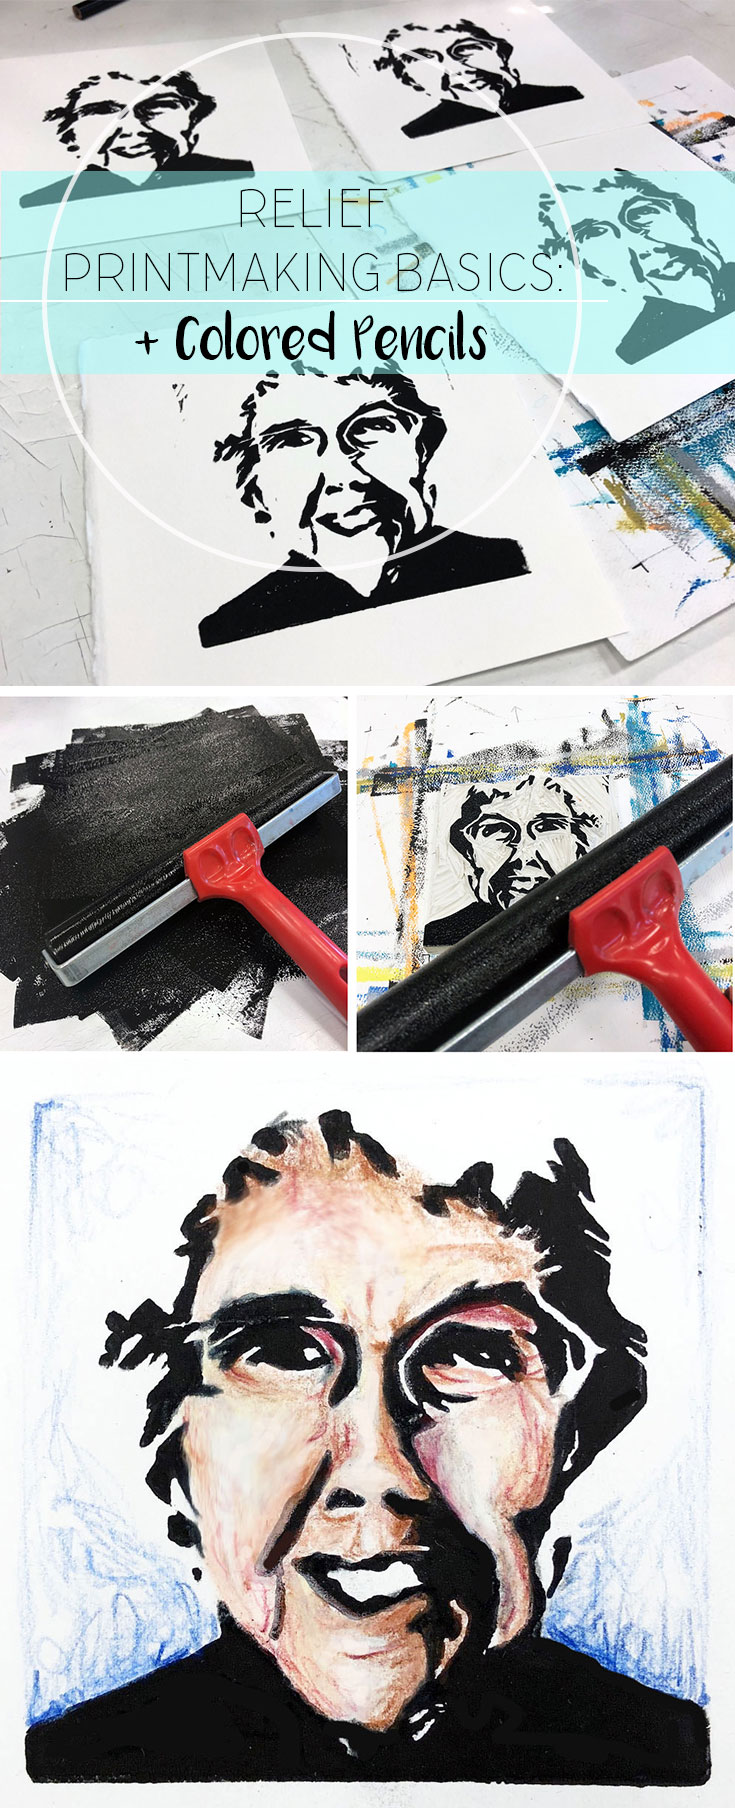
To add another element (and a little color) to the print, I decided to add a colored pencil aspect. Since this project specifically focuses on portraits, I decided it was a great opportunity to include a lesson on creating skin tone with colored pencils. The students select one of their five prints to add color to. For my portrait I needed a lighter skin tone and used the following Prima colored pencils colors:
SKIN TONE COLORS
- White
- Cream
- Beige
- Light Peach
- Peach
- Rosy Beige
- Lilac
- Light Umber
- Chocoloate
- Sienna Brown
- Tuscan Red
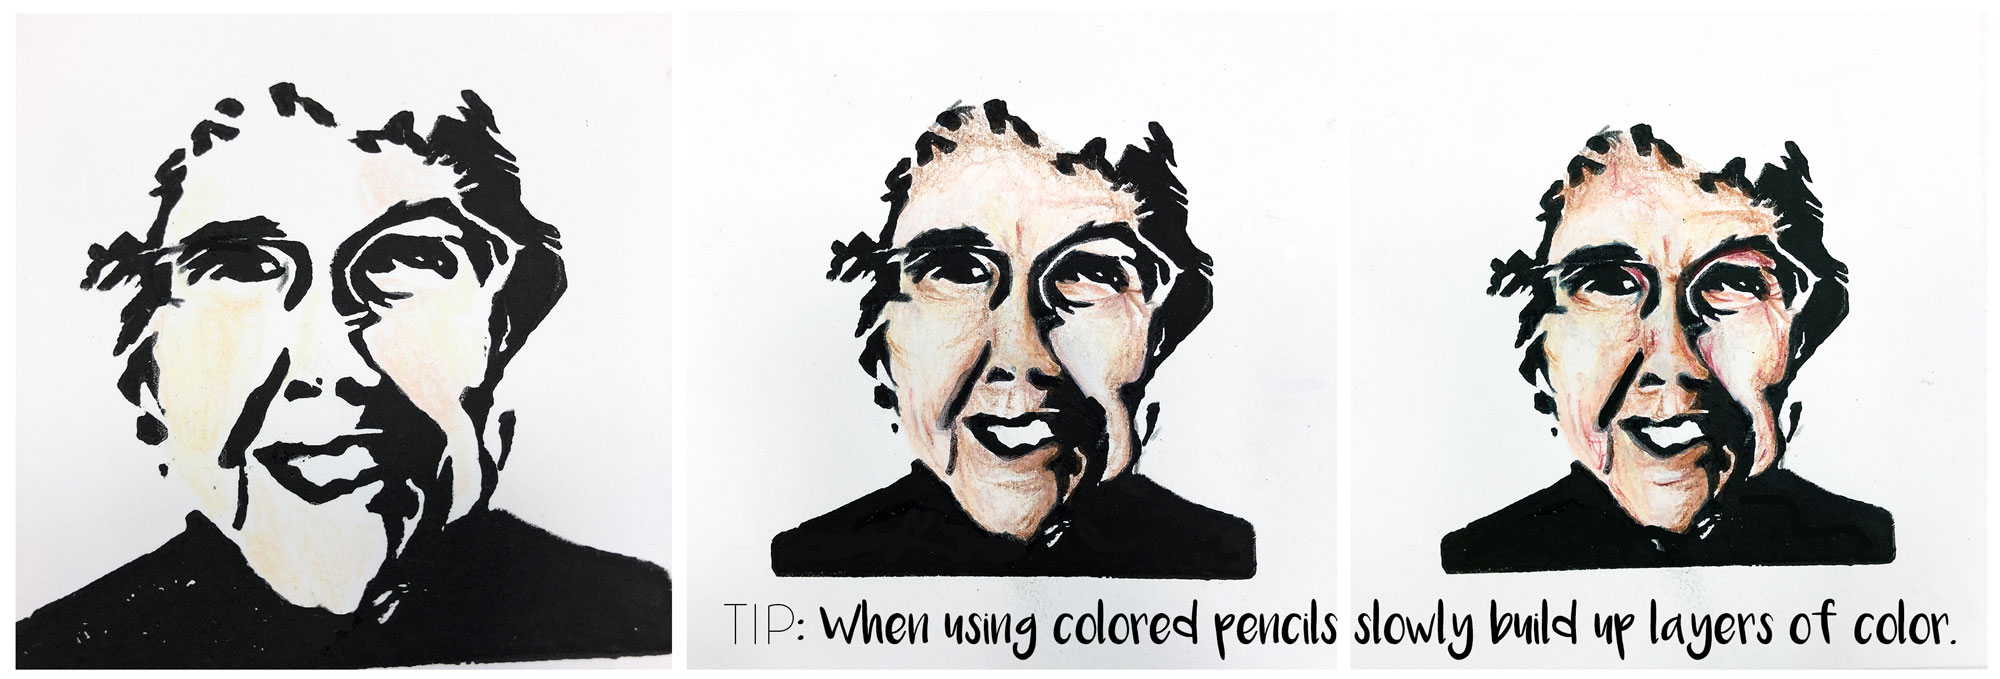
When using colored pencils it’s very important to work in light layers. If too much pigment is put down at once, it creates a waxy layer. The waxiness prevents additional color from sticking and you will end up with a much flatter looking image. It’s important to get layers of various colors to create more depth in your image.
When I work with colored pencils I add in a few highlights to start blocking out the color, then move to the darks and work dark to light from there. With something soft, like skin, it’s best to color in small circles to mimic the softness.
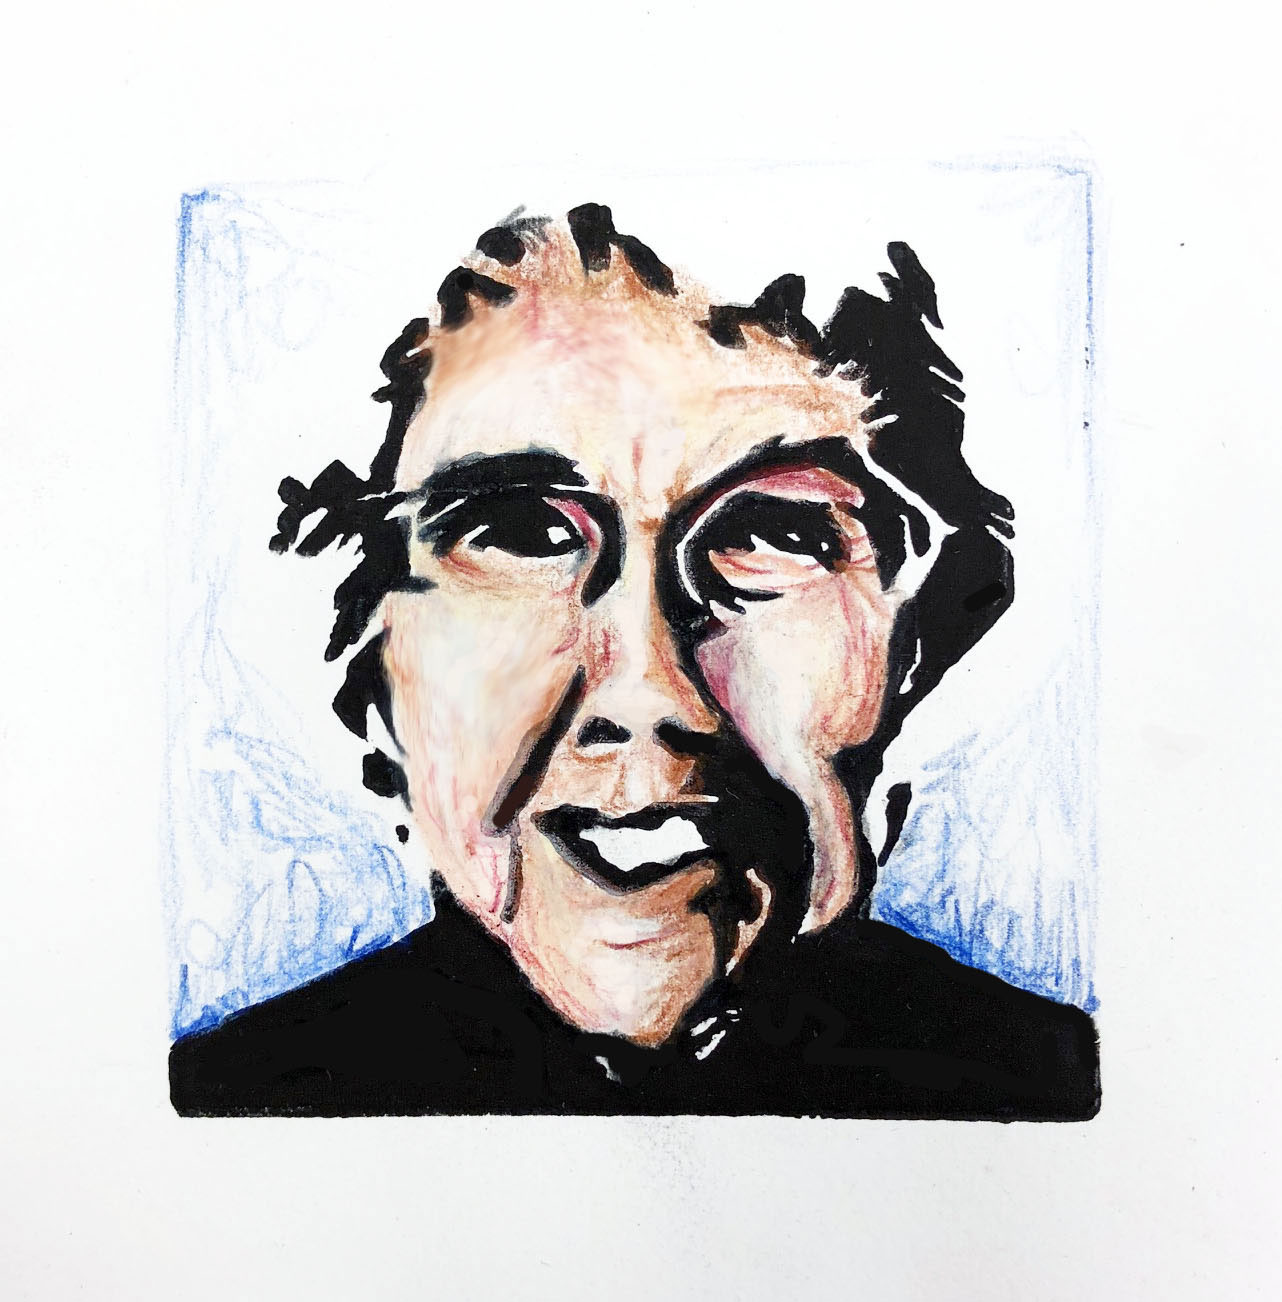
In addition to adding skin tone, I also decided to add a pop of blue in the background. It gave me a way to define edges at the top of the image to create more of a frame and blue reminds me of my grandmother who *unknowingly* became the subject of this lesson. She is a wonderful 94-year-old woman who has an iPad and regularly texts on her iPhone (with text special effects I didn’t even know existed) and made me mac n’ cheese and animal-shaped pancakes as a child. It doesn’t get much better than that in the realm of grandmothers.
Want to discover more art lessons? This relief printmaking post is part of an art education-specific blog hop. My lesson connects to Karen Phillip’s lesson on printmaking with natural materials by making stamps out of potatoes and dying fabric with cabbage, onion skins, and blackberries. Check out Stacey Peter’s lesson next, which connects through mixed media. Her students create mixed media collages that focus on their hometowns and have a literary tie-in. Don’t miss anyone in the loop (or any of the amazing lessons) the list of art teachers involved in the blog hop is below:
- Glitter Meets Glue | Metal Tooling Using Visual Texture
- Art is Basic | Bird Sculptures Using Tactile Texture
- Masterpiece Mama | Dyed & Stamped Pillows
- Look Between the Lines | Relief Printmaking Basics + Colored Pencil | You are already here!
- Expressive Monkey | Mixed Media Hometown Scenes
- Ms. Artastic | Zen Doodle Pinch Pots
- Picassa’s Palette | Henna Hands Art Lesson
- A Space to Create | Past & Future Hands
Thanks for taking the time to check out my relief printmaking blog post. Help me spread the word about making art education personal and getting kids to create by sharing on your social network of choice. Also, if you are interested in purchasing this relief printmaking lesson plan, PowerPoints, handouts, and other materials I use for this lesson, check it out on my TPT store here. Check out more blog posts here. Shop my education resources here. Don’t forget to follow me on Instagram and TikTok for weekly visual journal demos. Until next time!
Love this post! I just finished doing prints with my 8th graders. I have a very small Portfolio Art class with about 7 kids in it. I love the additional idea of incorporating colored pencil into the design. I’d honestly never thought of that and will definitely be trying it with my 7th graders. Thanks for the awesome idea!
The colored pencil was my solution to wanting to add color without more than one printmaking layer, since this is an intro to printmaking assignment.
I can see how this would build confidence in high school students. I love the layering of colored pencil over the print, really cool! Thanks for sharing!
I really like how students have a personal connection to the person in the photo/print! You example turned out beautiful and I’m sure students will treasure their successful prints!
“I have found that if my students can develop a personal connection to the assignment they become more committed to the end product”… SO TRUE!
It seems trickier every year to try to get my middle schoolers to get personally invested in their projects but having the students pick a portrait of someone they know IRL is a great way to allow them to ‘CARVE’ out space in their hearts to create something meaningful!
I totally agree. I try to have more open ended assignments with my high schoolers to allow them to personalize them more, but that can be tough with middle school. I am in awe of anyone who teaches middle school, you are brave!