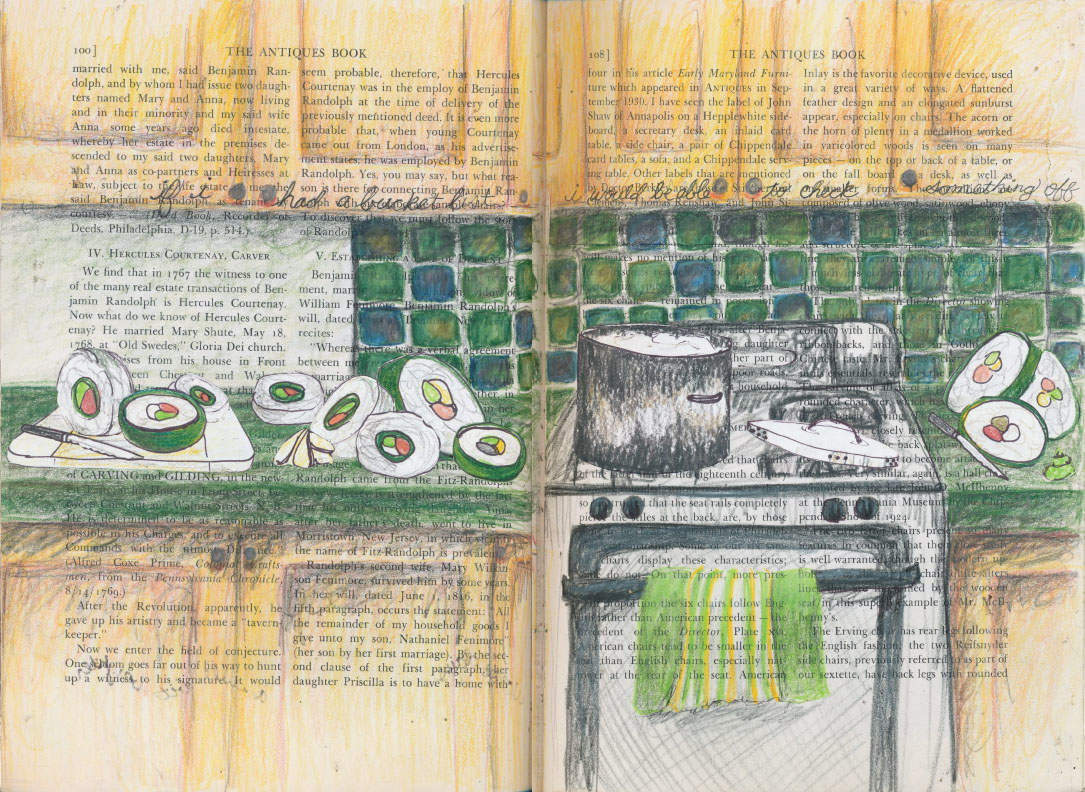
This all began with my love for sushi. I could eat it every other day, filling in the off days with pizza and steak, never getting sick of it. However, the reality is I can’t eat it every other day because on a good day it costs $25-$30 every time I go. Despite the $30 price tag I still yearn for sushi. I love the flavors, the texture, the color combinations of the different varieties of fish.
One day while indulging my most recent sushi craving, a friend and I got to talking about how her brother periodically makes sushi. My interest was peaked, it never occurred to me to make sushi. The fear of hygienically working with raw food was enough to keep the thought at bay, until this particular day.
I went home that night still thinking about sushi, could I actually make it myself? This thought turned into a goal once Christmas came and went, and left behind a sushi cookbook and sushi making supplies, thanks to my brother. It was a sign and it was time, I was going to make my own sushi.
I did research, I visited my local farmer’s market for fish, I prepared, and finally I dove in headfirst and gave it a shot.
Nick, Elly, and I were crammed into our small kitchen slicing, steaming, and rolling. In order to create three different rolls we made more sushi than three people can consume in a week. We carefully laid out the rolls, set everything out in the dining room, and admired our handiwork. Piles of sushi covered the table, I was so proud, starving, and ready to dig in.
Despite a great deal of time and effort our sushi rolls were not pretty. The rice was everywhere, and rice was rolled about an inch thick around each piece. Insides were falling out as we desperately tried to move each piece from the plate to our mouths before the contents scattered. Chopsticks were abandoned for fingers, and our mouths were stuffed.
The end result of the grand sushi experiment was an incredibly messy kitchen, sink pipes clogged with rice, piles of leftovers, and a new appreciation for why sushi costs so much. The time and effort needed to make each biet size piece is amazing. The amount of ingredients required to make a variety truly is amazing. I now gladly spend $30 on my delicious, no-effort, take out sushi.
Since this experience we have made sushi one more time, with a larger group of people. It won’t be my last time, I plan on more sushi experiments in the future, but for now I am satisfied knowing that if I had a bucket list I would be able to check something off…
SUPPLIES
- Visual journal
- Rubber cement
- Scissors
- Prisma colored pencils
HOW TO
This page did not require a lot of materials, but it did require a lot of time. I only used colored pencils, I drew each item separately, cut them out, and layered them together.
I started with the background, I drew out the counter, cabinets, and stove with a pencil, and then began coloring. I sat in my kitchen, and used it as a reference while I drew and colored, to make sure it was accurate. I added a base color to everything, starting with the background (tiles) and moving forward (to the cabinets). In order to get depth, strong color, and a nice blended texture with colored pencils you have to layer. I start with a base color and slowly add on top. I never use just one green, I chose at least five shades, layer them, and as the pigment builds up, they will begin to blend together. I always start with darks and add lights on top, if I have highlights white is the last color I add.
It also helps to have a nice set of colored pencils. I am a Prisma brand fan, and will always buy their colored pencils. The pencils are a dollar or two apiece (crazy!!) but it is worth every penny! Once I had my background complete I drew my pieces of sushi, pot, knives, and cutting board on a separate sheet of paper. When the drawings were complete I cut them out and glued them on top of the background, to give it a collage feel.
CHALLENGE
Use colored pencils to create an image in your book. Remember to use a variety of shades, and build them up slowly! Thin layer on top of thin layer will create a nice smooth look!
Thanks for reading today’s post! I hope it has inspired you to create a page in your journal, or start your very first journal! Help me spread the word about my blog by liking, tweeting, sharing, emailing, commenting, and subscribing!
[subscribe2]


0 Comments