Breaking Down Reality into Basic Shapes and Colors
Abstract art can often seem like a puzzle to students. Its freeform, non-representational nature stands in stark contrast to more traditional styles, but at its core, abstract art is a creative and thoughtful way to express feelings, ideas, and perspectives. Although upper middle school or high school students may see abstract art and think it’s simple and easy to create, it is one of the hardest concepts to teach art students how to do successfully.
Check out one of my favorite intro to abstract art projects below. This art lesson teaches students how to begin with recognizable objects and transform them into abstract art by breaking them down into basic shapes, lines, and colors. Want to hit the easy button and get everything you need to teach this project? Snag it here!
Day 1: Introduction to Abstract Art and Project Kickoff
Start with a PowerPoint Presentation
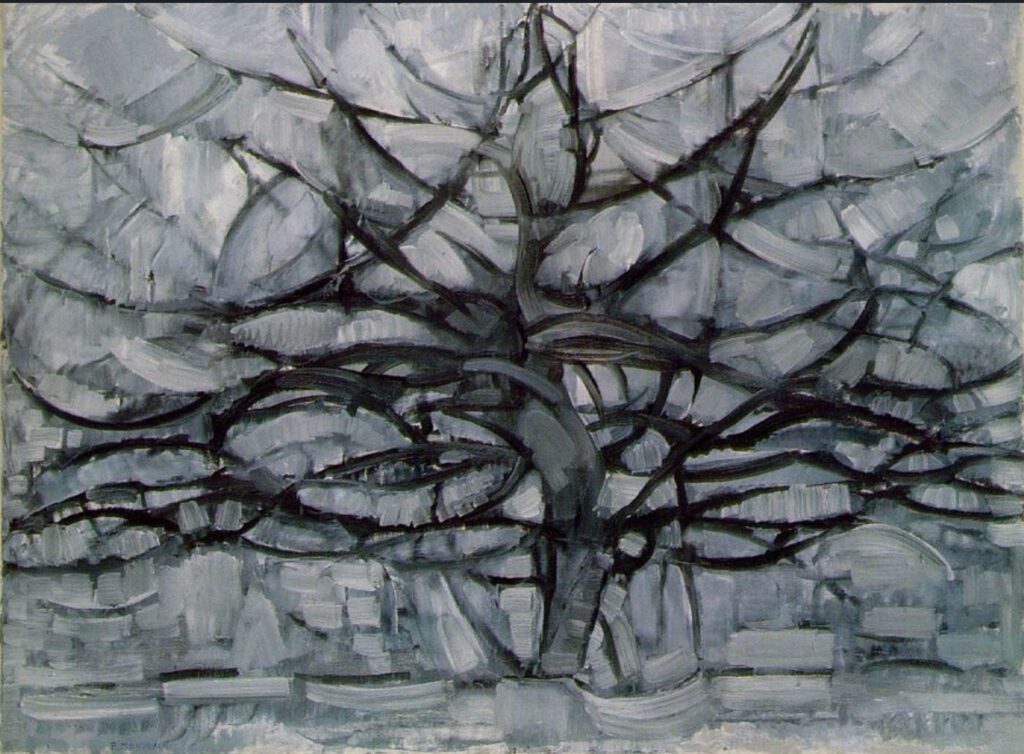
Begin the class by presenting a PowerPoint on the intro to abstract art project. Use this presentation to introduce the concept of abstract art, providing students with an understanding of how artists take the real world and deconstruct it into its most essential parts—shapes, lines, and colors. Piet Mondrain and Wassily Kandinksy are great exemplars for an intro to abstract art project.
Engage the Students in a Discussion
Engage students in an open discussion on the purpose of abstract art. Ask them: What do you think abstract art is? Can abstract art represent something? How is it different from other types of art?
Emphasize that abstract art and abstract thought are closely related. Just as we simplify our thoughts and ideas into symbols or summaries, abstract artists take complex images or emotions and reduce them to their simplest forms. While abstract art may appear simplistic at first glance, it actually involves high-level thinking and creativity. The abstract thought clip from the movie, Inside Out, is the perfect visual for the connection between abstract art and abstract thought.
Outline the Project Steps
Clearly outline the steps of the intro to abstract art project. Explain that each student will select a memory, choose objects that relate to that memory, and gradually transform one object into an abstract design by breaking it down into simpler shapes. Encourage questions as you explain the project, ensuring students understanding the expectations.
Pass Out the Memory Worksheet
Once students are ready to start the intro to abstract art project, distribute the memory worksheet. Students will use this to write down a significant memory that will inspire their abstract piece. Have them reflect on the memory and begin thinking of objects that represent it. Once they’ve chosen an object, they can begin their sketches on the back of the worksheet or in their sketchbooks.
Studio Work
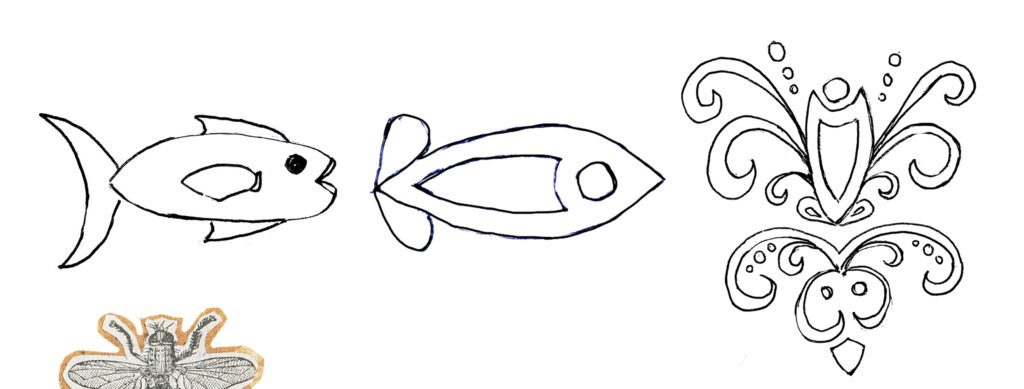
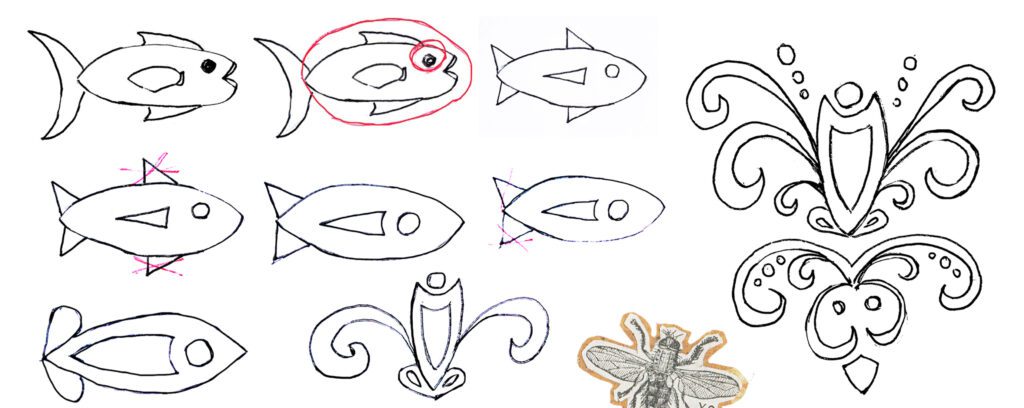
For the rest of the class, students should complete three sketches of different objects related to their memory. They will select one of these objects to transform into an abstract design. Students should sketch the object at least three different times, simplifying the shape each time. Encourage them to continue sketching until they are satisfied with one design that truly reflects their abstract interpretation of the object.
Template Creation and Pattern Development
Hand Out Poster Board
Once students have chosen their favorite abstract design from the sketches, provide them with poster board to draw the design large. Encourage them to think about how the template will fit on a larger sheet of watercolor paper.
Design Considerations
Remind students to think about whether they want a large pattern or a small, repeating one. If they want a smaller pattern, they will need to draw a smaller template; if they prefer a larger pattern, only a portion of the design will appear on the final piece.
Cutting the Template
Once students have finalized their designs in pencil, they will cut out their templates using scissors and X-Acto knives. Caution students to carefully store any smaller pieces from their template in a bag to avoid losing them during the project.
Trace the Design onto Watercolor Paper
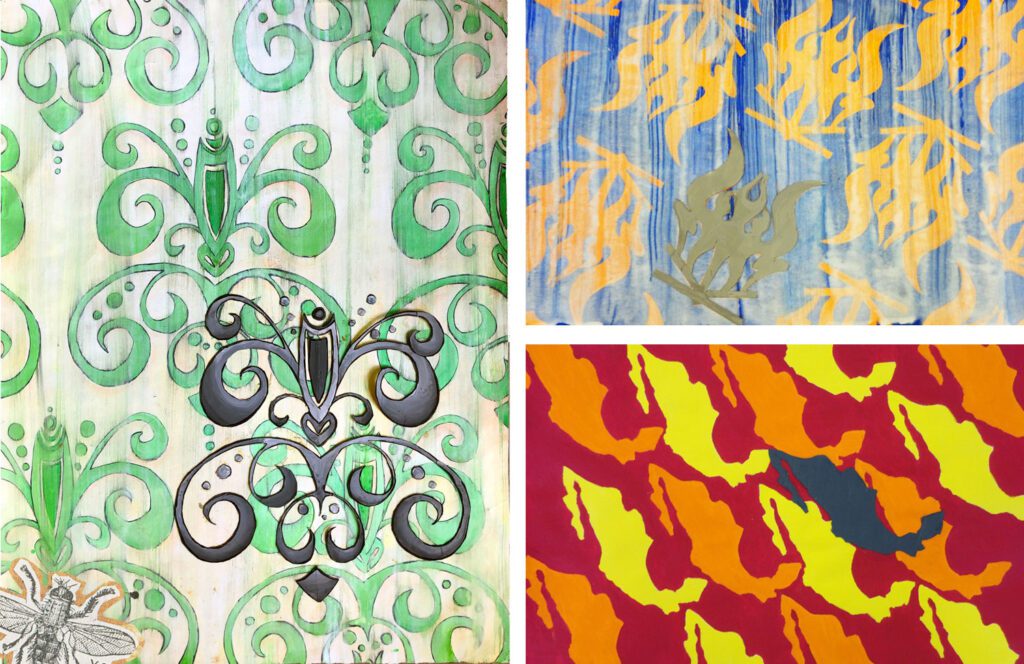
When the template is complete, distribute watercolor paper and instruct students to trace their design onto the paper. They should repeat their design to fill up the watercolor paper to create an wallpaper look. They can repeat the pattern in an organized way or a more random way. Students should consider how the placement reflects the meaning of their memory.
Painting the Abstract Design
Select a Color Scheme
Once students have traced their abstract design onto watercolor paper, they will begin painting. Explain that they need to choose a color scheme—either complementary, analogous, cool, warm, or split-complementary. They are encouraged to use tints and shades of these colors to add depth and value to their pieces.
Grayscale Template Painting
Students will paint their template piece in grayscale. Emphasize that it doesn’t have to be a flat gray, black, or white; they can incorporate value changes within the grayscale to make it more dynamic and interesting.
After the painting is complete, glue the template on top of the painting. This will create a focal point in their abstract work of art. They can either overlap the template, not lining up the design, or perfectly place the tempate over a traced design to make it more unified.
Critique and Artist Statement
Finalizing Projects
On the last day, students will complete their paintings and present their final pieces. Halfway through the class period, ask students to stop working and display their artwork for critique.
Critique Reflection Sheets
Distribute critique reflection worksheets. Students will use these to evaluate both their own work and their peers’ work. These sheets help students focus on key aspects of the art, such as color choice, design balance, and abstraction techniques.
Verbal Critique Session
After the reflection sheets are complete, lead a verbal critique session. Encourage students to guess what each abstract design represents. Discuss color schemes, shapes, and why certain pieces are more successful than others. Celebrate the diversity of the designs and the thought processes behind them.
Complete Artist Statements
To wrap up, students will write an artist statement explaining their memory, the object they chose to abstract, and how they transformed the object into an abstract design.
By breaking down abstract art into manageable steps, students will not only learn how to create abstract pieces, but also gain a deeper understanding of the thought process behind this style of art. This intro to abstract art project encourages creativity, critical thinking, and an appreciation for the abstract, while providing students with tangible skills in painting and design.
Don’t forget to follow me on Instagram and TikTok for weekly visual journal demos and other project ideas. Subscribe here to get freebies, project tutorials, and more straight to your inbox. Until next time!
0 Comments