This week I want to focus on 6 of my favorite art room organization hacks for your art classroom or art studio. Over the many years I was in my classroom I was constantly tweaking, trying new things, and hoarding supplies to try to make my art teaching life easier and my art space more accessible to students. It’s amazing how one minor change can really impact how smoothly your classroom can run. This will be the first installment of many on art classroom hacks, subscribe and hear more ideas in the future.

6 Art Room Organization Hacks
There are lots of things that teachers can do to make their lives easier and create free time. These organization hacks will be sure to get your high school or middle school art classroom in order and give you a new storage solution or two! The good news is they help you organize all of your art stuff.
- Label Everything
- Student Assigned Brushes
- Pre-Make Display Labels
- Hoard Magazines
- Book Donations
- Resource Display
LABEL EVERYTHING
As an art teacher, you are often juggling 1000 things at once. With the variety of art supplies out and the range of individual needs, I always felt like I was putting out fires. To help make my life easier my goal was to increase student independence. If they can find something or do something on their own, that is one less hand in the air or “Mrs. Panetta, Mrs. Panetta” being yelled constantly. A great way to encourage independence is to label everything.
When I say everything, I mean EVERYTHING. Every bin, cabinet, and drawer had a label in my classroom.
I started with simple text labels printed on a label maker. It was easy to do, but I still found myself pestered with “where is…” questions. I eventually made my own labels, which included an image and text. While I still got the occasional question, the addition of an image greatly cut down on students asking me where supplies were. Plus, the labels added another artsy decor to my classroom.
You can hit the easy button by grabbing mine ready to print in the watercolor style or chalkboard style. I have packs that include the basics as well as a wide range of supplies that range in price from $10 to $25.
STUDENT ASSIGNED BRUSHES
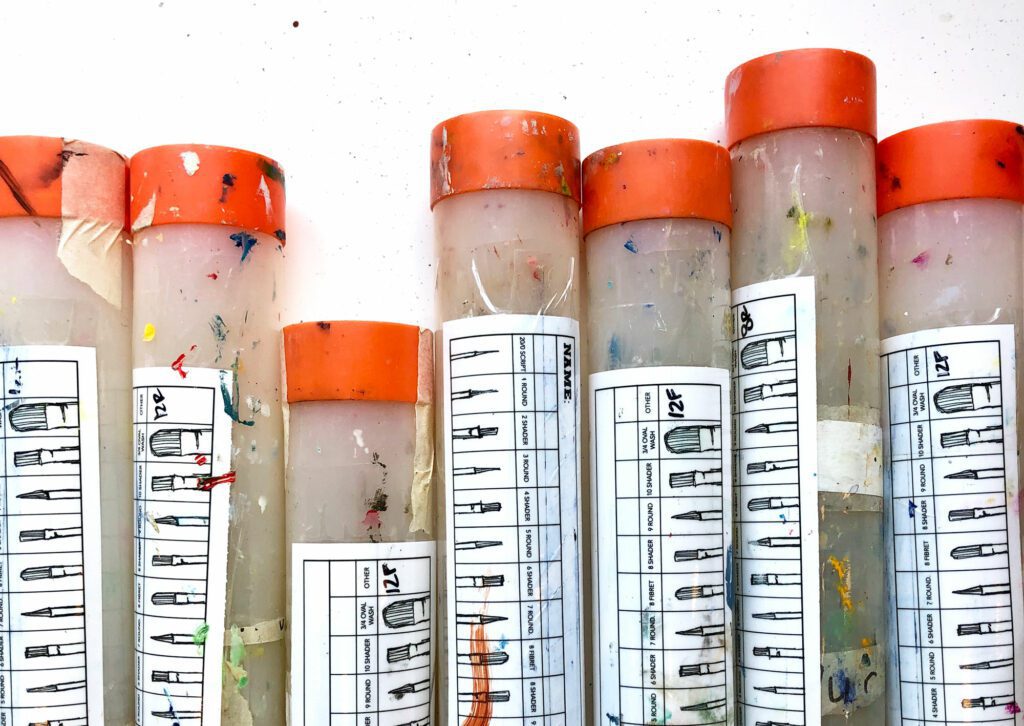
This next art room organization hack saved my paint brushes. Every year I had to order a new set of class brushes which ate up my budget. I finally decided enough was enough, I needed a new system. A light bulb went off when I was lucky enough to find a stash of paintbrush tubes from a previous art teacher. I decided to give each student 3-5 paintbrushes (lower-level students received fewer brushes than upper-level students) that were theirs for the year that they kept in their own separate containers. At the end of the course, they had to return their brush set, intact, and in good condition. They received a grade on this, the worse off the brushes, the lower the grade. I would even blatantly tell them if they lose their brushes they can go purchase new ones to turn in and they will still get full credit, I just want brushes returned in good condition.
The prep on this does take a while but trust me, it’s worth it. I created labels to check off which size and style brush each student got. The labels were laminated, then taped to the tube. I used Sharpie to write their name and mark their brushes. I would complete this task during the first week of school while students were working on making their sketchbooks (read more about that here).
During that first week if they needed a brush they would go to my communal supply, which was total garbage, making them appreciate their brushes even more once they got their hands on them. At the end of the course when they are returned one of the cleaning jobs I assign is for a student to remove all brushes from the tubes, clean them thoroughly, and put them in a pile for me to use in the next course. They then used an Expo marker to color over the Sharpie and wipe it off using a paper towel (if you have never heard Expo removes Sharpie, you will now love me forever). In 3 years of using this system, I only had to buy brushes one time, mostly to supplement a new class, and I never had to replace the labels.
Purchasing brush tubes is a financial commitment. Mine are from Blick and are pricey, I was lucky to inherit most of them. You can also find a comparable, much more affordable option on U-Line. Check out my brush label template here. If you don’t have the supplies to provide a brush set for each student, start with your advanced level art classes and add other classes each year as you are able to.
PRE-MAKE DISPLAY LABELS
My next art room organization hack may not be feasible for every art program, depending on how many students you have, but it really steps up your display game. Once I get my course roster at the start of every year I enter student names and grades into a label template. I print out 3 copies for each class and cut them up. These are set aside in a stack, whenever I put up student artwork the student labels go up with them. I think it’s incredibly important to publicly display student work to highlight your program and the hard work of your students. The best part is, by placing the students’ names alongside their artwork, faculty and other students will get to see who created which piece of art work; it’s amazing to hear them being complimented in the hallways.
For lower-level courses, my labels read: student name, grade, art class they are in. My upper-level courses include a title above their name. In addition to student labels, I often hang a course title with the artwork and a description of the project. These I make, laminate, and keep on hand since I often teach the same classes and projects every year. If you have an annual art show taking care of this step early will save you a TON of time later.
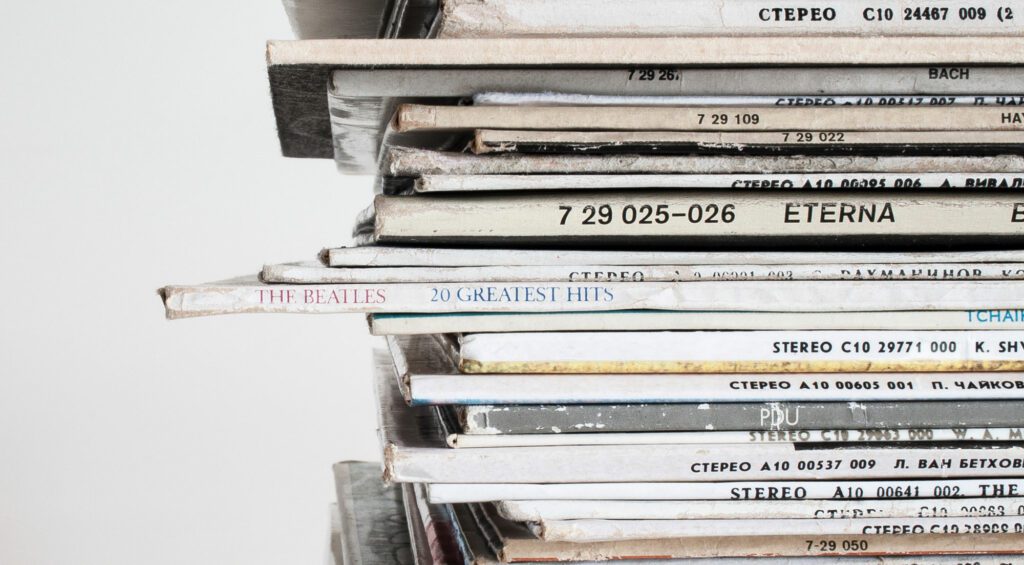
HOARD MAGAZINES
Magazines are one of my most valuable, free supplies. Students use these in visual journals, mixed media art projects, collages, sketchbooks, and more. I often sent home an art classroom wish list and magazines were always included. I also let the library know anytime they had magazines to retire send them my way. I always tried to get a variety, a mix of fashion, news, art, cars, sports, and similar to cover a range of student interests. These were kept in bins under my central supply table in the middle of the room. Students had free access to them whenever they needed them.
Mini art room organization hack, at the end of your course, assign the magazine bins as a cleaning assignment. Have the student go through the bins and throw away any loose pages or overly cut-up magazines.

BOOK DONATIONS
Even if you don’t do visual journals in your class, request book donations. I let the library know at the start of the year we would take any retired books off their hands. I typically only kept hardback books, but sometimes paperbacks had interesting enough images and text to keep as collage material. Often my students would rip up book pages to collage with for mixed media projects or to decorate their sketchbook covers. Also, if students don’t have a book to use for their visual journal, I sent them to my bookshelf to claim one.
Helpful tip: Don’t accept textbooks. The glossy pages aren’t good for painting over, the pages are thin, and they take up a ton of space.
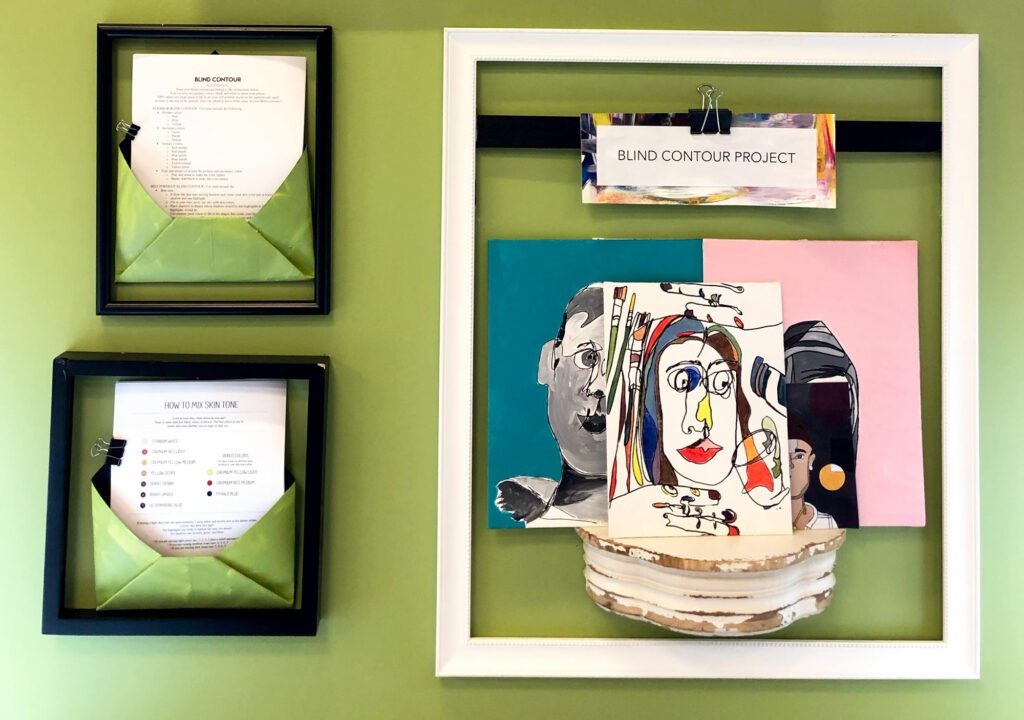
RESOURCE DISPLAY
The final of my art room organization hacks is the resource display or bulletin board. I always had examples and handouts for every project I taught. I often found myself disorganized between all of my classes, students missing introduction days, and similar. Eventually, I created a display section for every class on my wall. Here I would place the project example and any reference handouts the students needed for the project. If they were missing a handout or needed inspiration, I sent them to the resource wall. This was swapped out with every project.
Not everyone has enough space for this, and before my resource wall, I placed all of this information on my central supply table. Every class had a section on the supply table for their project supplies. Everything lived here from paint to pencils to handouts to examples. Their class spot stayed the same all year, and it cut down on confusion about which supplies were for which class.
MORE ART ROOM ORGANIZATION HACKS TO COME!
This is the first installment of many more of my favorite tricks and tips to help in your art class. Check out more posts from my blog here. Shop my art education resources here. Stay tuned and thanks for stopping by! Don’t forget to subscribe for a free poster set and updates straight to your inbox.
Related Posts


Leave a Reply