A few years ago I began teaching a painting class, after taking a a three year break to focus on ceramics and sculpture. While I loved teaching 3D art, I was excited to move back to the two dimensional world. I always loved painting. and couldn’t wait to teach a course that focused on it. However, in order to teach a well rounded painting course I knew I would have include a watercolor lesson. And I hated watercolor.
My mom is an amazing watercolorist. Not only was she an amazing watercolor artist, she was also an amazing portrait artist. Two skills that I am not naturally gifted at. Growing up I remember a number of times when my mom attempted to teach me different watercolor techniques. Despite her many tips and suggestions, I was impatient and couldn’t wrap my head around the need to plan ahead and work in layers.
At the point when I took over the painting and advanced 2D courses, and realized I would have to teach an advanced level watercolor lesson and project, I had yet to create a successful watercolor painting. It was time. I was going to have to learn to properly paint with watercolors , because I was about to have to teach it in my art lessons.
I started with the basics. I needed to plan ahead and pace myself. I knew from experience if you went too heavy too quick you could never get back to whites and lighter colors. Watercolor is about glazing, adding thin layers on top of each other, and letting the layers dry in between, to create detail, depth, and build in shadows.
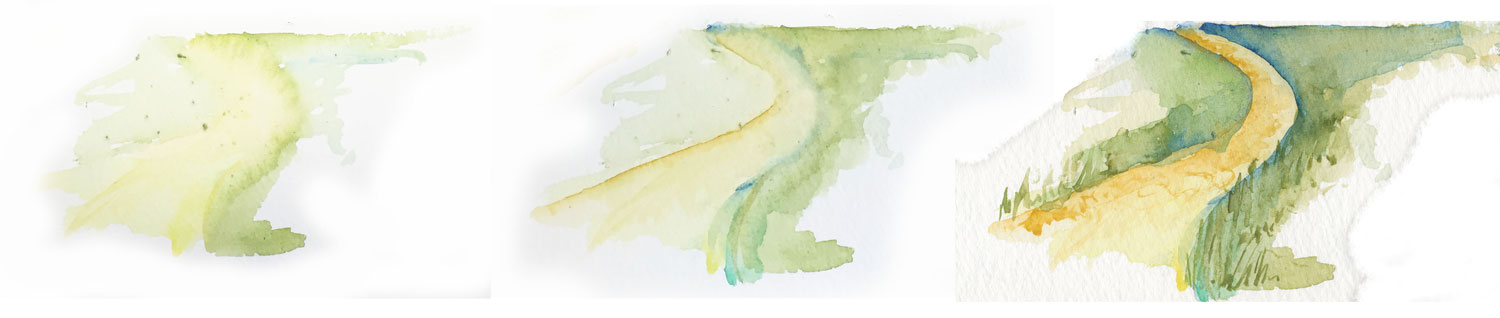
I began doing watercolor testers. First, just blobs of wet on wet, dry brush, and adding other material such as salt. I watched YouTube videos with watercolor courses and checked out a few watercolor books. Next, I began combining the different techniques to create a simple landscape. The above path started with wet watercolor, allowing the first layer to dry, then adding in dark shades. I left lighter areas untouched, and tried not to go too heavy too quick. The final layers involved adding the detail such as the grass. I didn’t shy away from incorporating other colors, such as blue and purple, into the shadows.
I continued to work with combining basic techniques, planning ahead, and building my color in layers. I had my mom once again show me her techniques, and began thinking and applying them in a different way than I had before. I realized at heart, I am an oil painter. I like to throw down color, mix it together, and cover up mistakes as a I go. You don’t have the luxury of that with watercolor. You must plan ahead. You must work slow. You must think highlights vs. shadows before you lay them down. I had to change the way I thought about painting in order to successfully complete a watercolor.
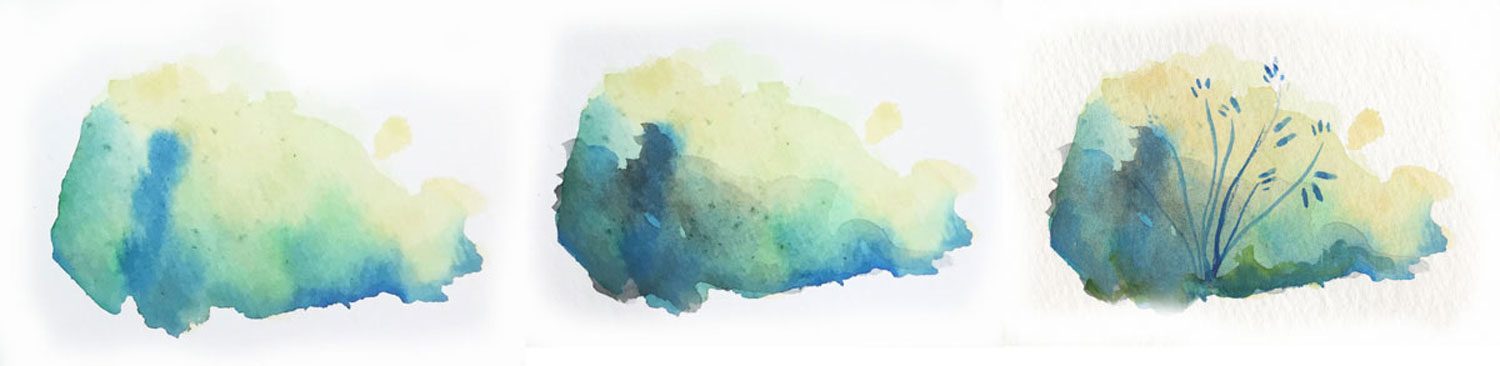
For the example above I tested wet on wet by wetting my piece of paper first, then adding the different colors green, yellow, and blue watercolor. I allowed the first layer to dry, then added brown and more blue to push my shadows and value. I then used a mostly dry brush and painted in a floral shape.

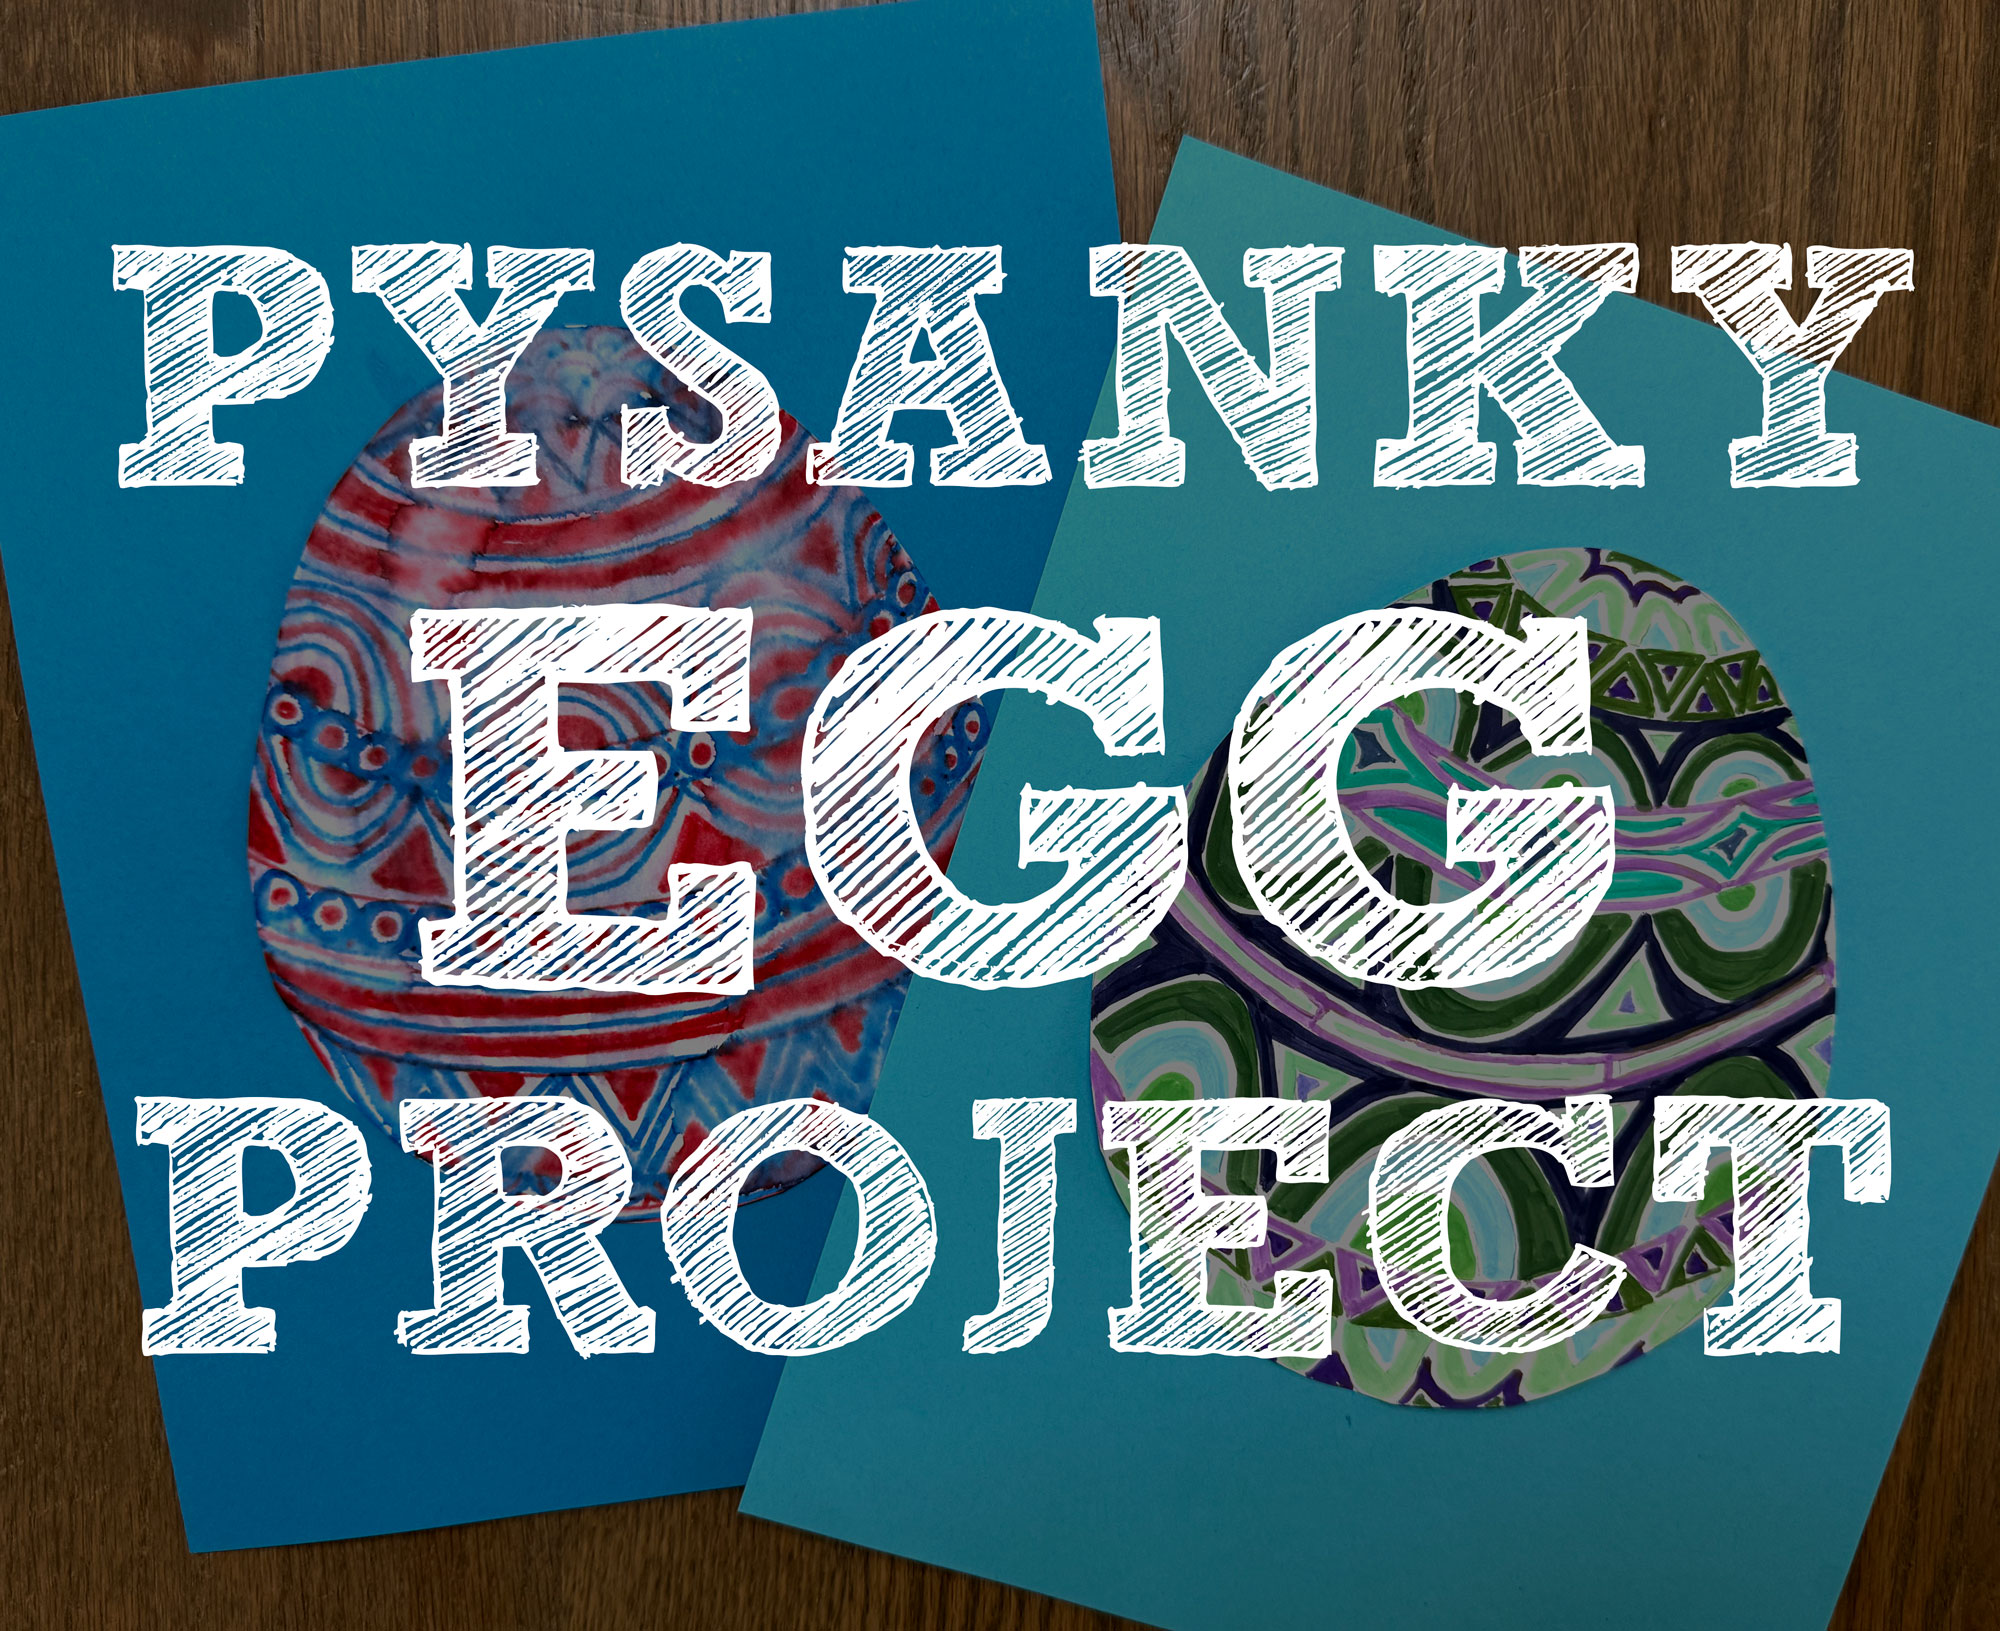
Once I felt confident in the watercolor techniques I was testing, I decided it was time to start my project example. The assignment for my watercolor lesson was for my Advanced 2D art class, the last step before AP Art. They had to select a part of our school’s campus to turn into a watercolor painting. They could go inside, outside, it was up to them, but it had to have some sort of architectural feature in it. This assignment forced my high school students to go out and take pictures to work from, making them consider angles, framing, and composition. It required them to focus on perspective and lines, with the architectural element. And it also focused on honing their watercolor techniques to create a realistic image.
Although they were focusing on a section of the school, I encouraged them to think about what part of the school was important to them. Where was their favorite class? Where did they spend the most time? What space best reflected their view of the school? While I focused on our school for this project, it’s also a great way to have students think personally, and bring in a photograph of a place that is important to them.
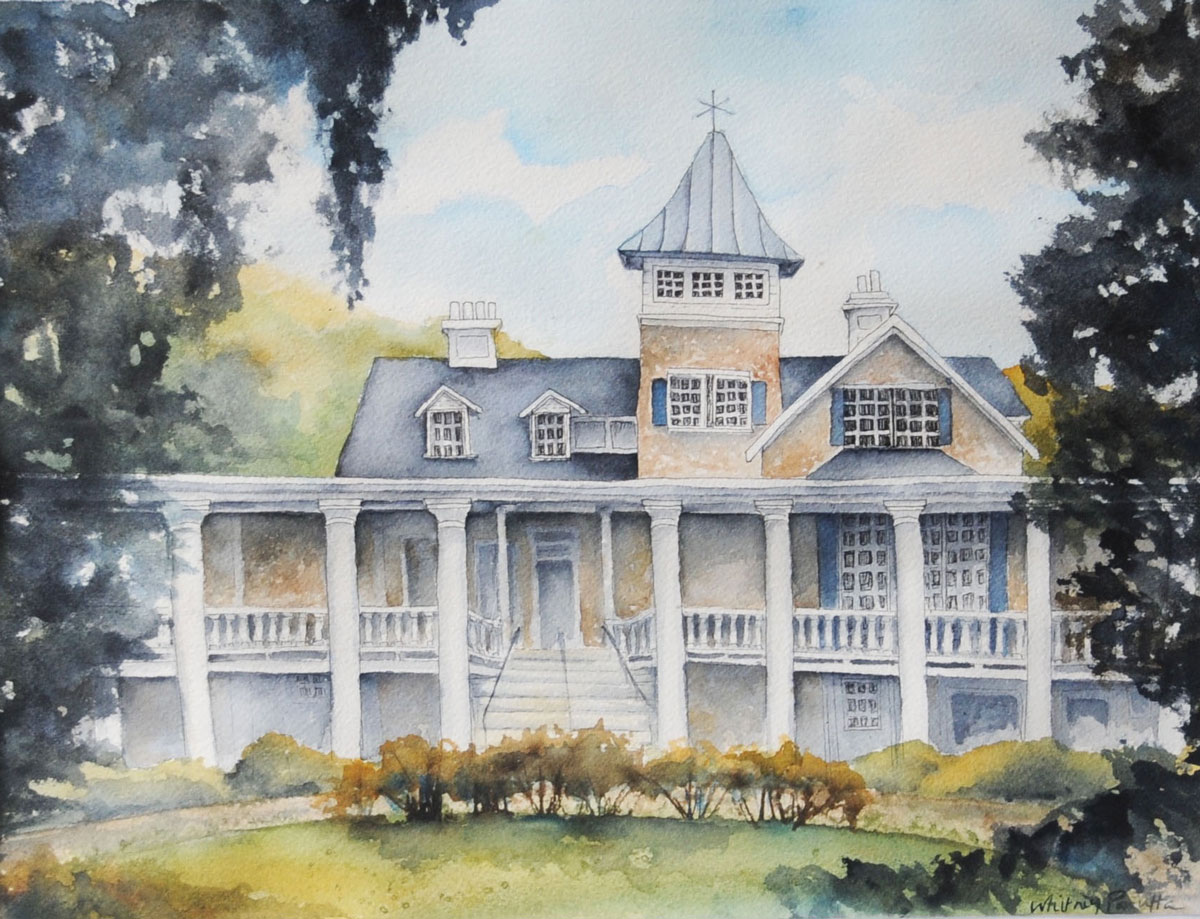
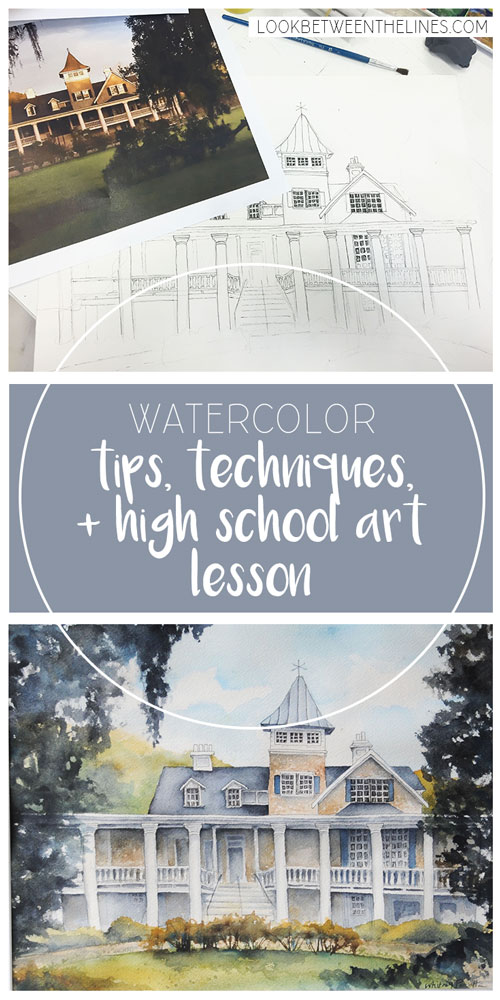
For my example, I did not focus on a section of the school. Instead, I opted to kill two birds with one stone, complete an example and create a wedding present for my brother-in-law and his wife. I chose an image of their wedding venue, a beautiful southern house called Magnolia Plantation in Charleston, SC.
There are two ways I like to do my examples. The first, is complete them before my class starts the assignment to make sure I like it and it will be successful. The other way is to do it along with them. I chose option B for this project, which was scary since I was not confident in my watercolor ability as a beginner watercolorist. The benefit of working on my painting along with my students is I can tell them what issues I come across as I work through them. It also allows me to continue demonstrating techniques throughout the project. And although I wasn’t very confident in my watercolor painting abilities, it showed them that I could do it. I kept telling them if I could do it, they absolutely could as well.
Before I introduced the watercolor lesson, I completed my base drawing. I used pencil, then went ahead and traced over the lines using a waterproof pen. I kept the ink lines tight in sections I knew would be in full view, and loosened up in the areas that would have foliage overlapping it. I at least wanted to base drawing to be complete, so when I introduced the project I could go ahead and demonstrate some watercolor painting techniques.
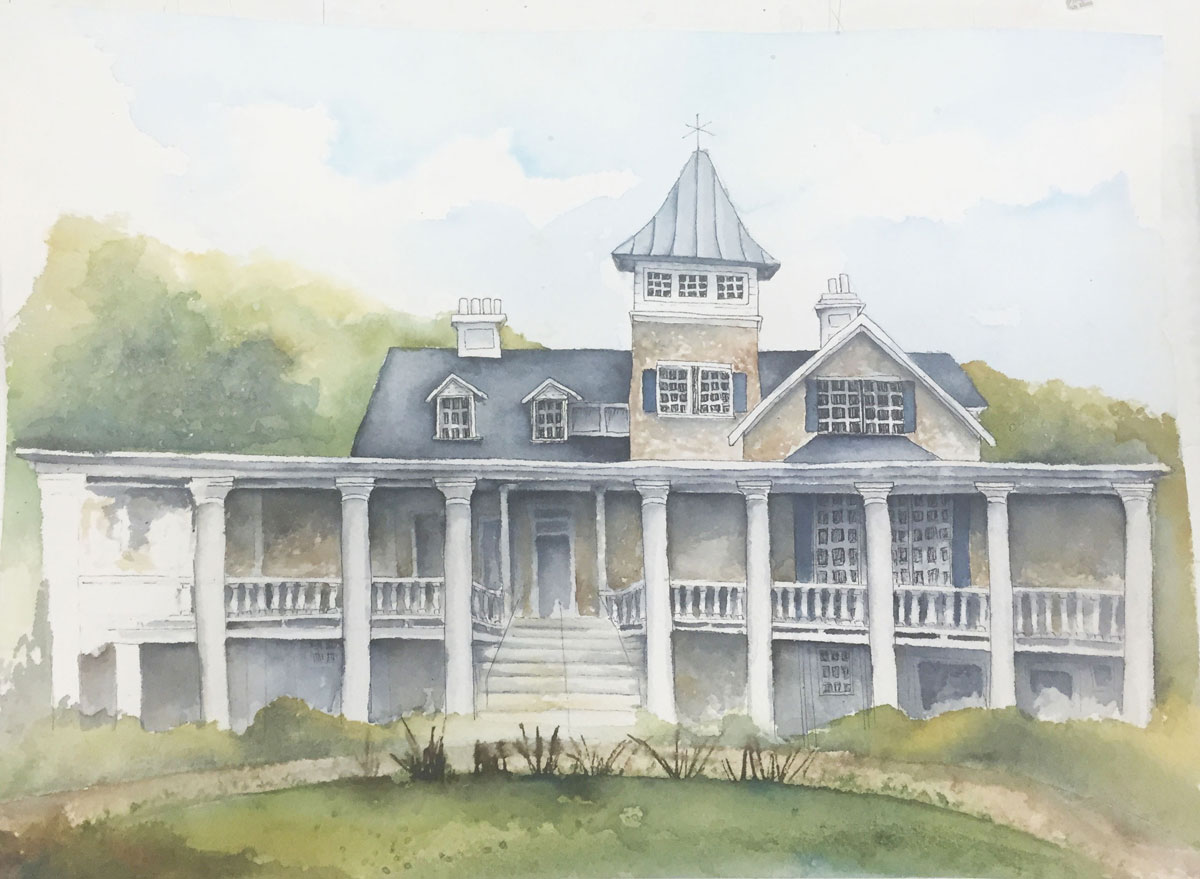
Next, I began painting. First of all, I apologize for the huge jump from zero paint to 75% complete. I always intend to photograph throughout the process, but I often get caught up in what I am doing. I started with the sky, using the wet-on-wet technique and blotting out the clouds. Next, I went into the roof and walls of the building using a combination of wet on wet, dry paint brush, and adding salt for texture. I then continued adding details and blocking out color for the background.
As I continued to add detail I slowly built up the shadows and was very careful not to go too dark too quick. I constantly told my students they could always go darker, but couldn’t go lighter. They were going to paint the painting at least four times through the layering technique.
The final touches came with the trees and bushes that overlapped the front of the building and were the darkest color. I then went back in with pen and added more lines as needed.
I was very pleased with the final product and with myself for pushing out of my comfort zone by tackling a medium I had never liked before. Since this painting was completed, I have done a number of other landscape and architecture watercolor paintings. I have a new found love for it, and although it will never be my first choice, it isn’t one I will shy away from anymore.
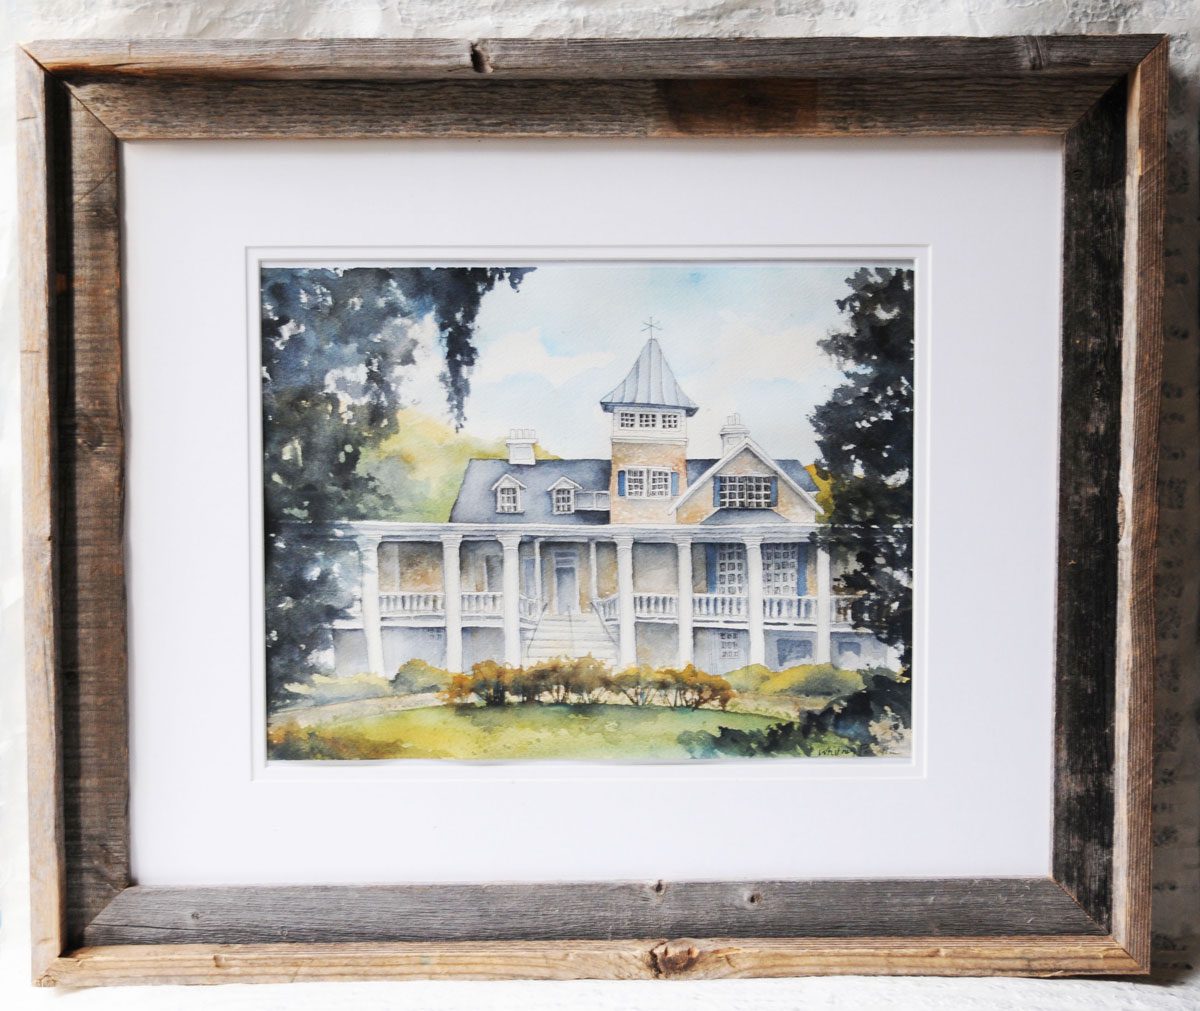 I matted and framed the painting for them as a Christmas gift. I hope they cherish is for years to come.
My students’ painting from this watercolor lesson also turned out beautifully and they gained various watercolor techniques that they can use in the future. I love putting the campus painting on display in the school. It gives the faculty, administrators, and student body a chance to see their school in a different light. It’s always interesting to see what part of the school they choose to focus on.

Megan and Vince were married in gardens right next to the plantation home. It was beautiful with the Spanish moss and pond as a backdrop to the beautiful wedding party, bride, and groom. The reception took place on the porch of the house. It was an amazing day from start to finish.
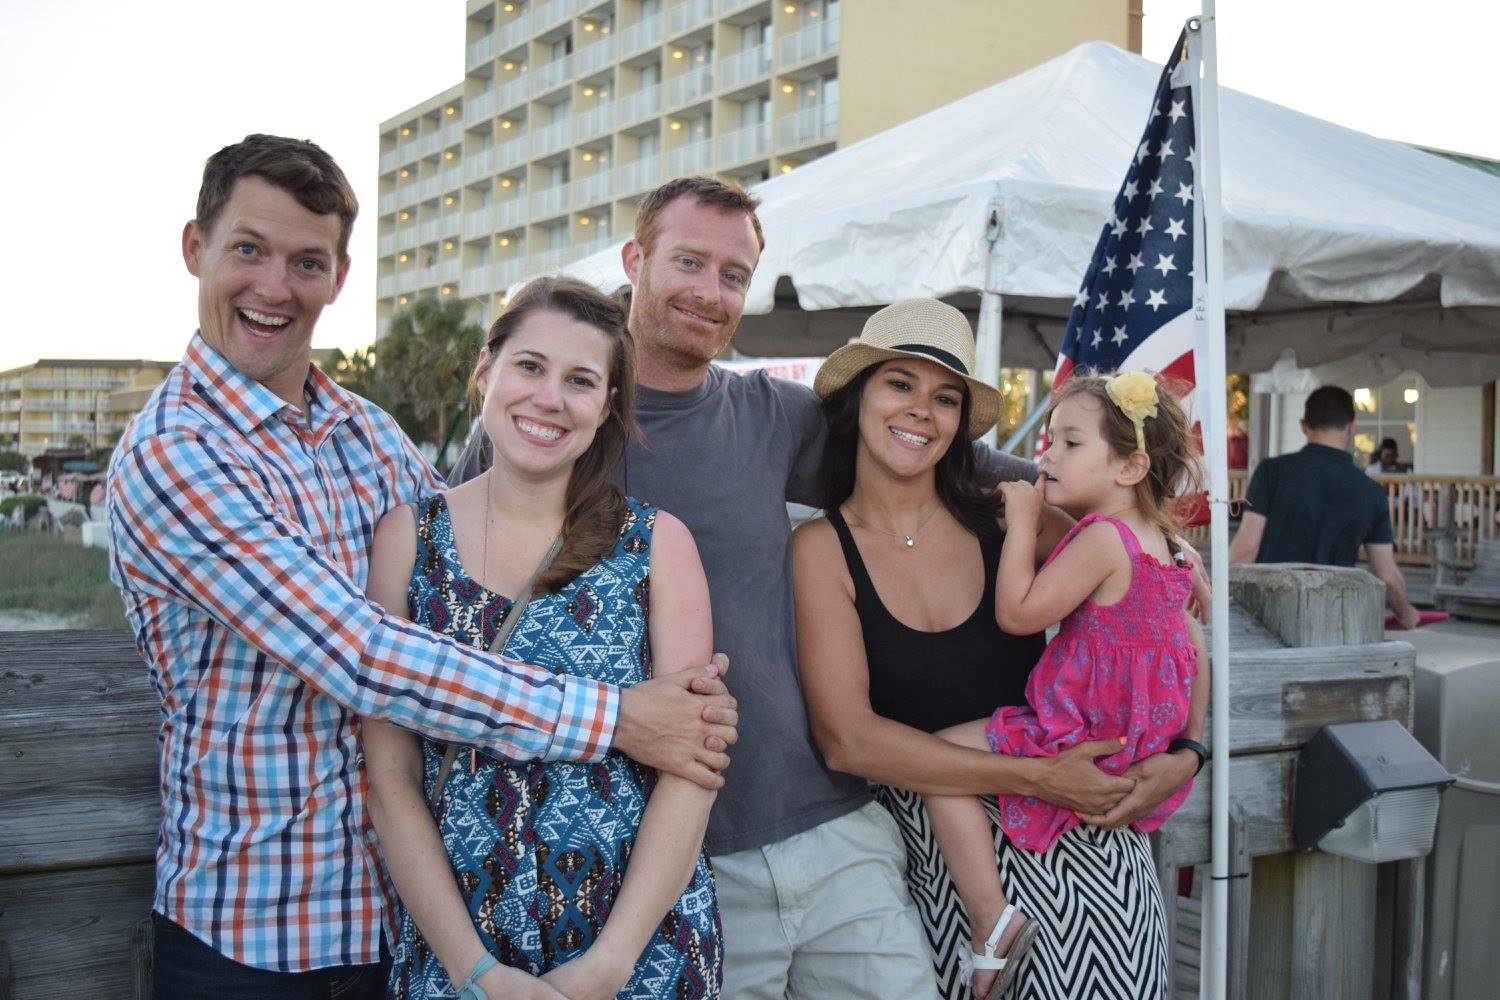
This was a picture of my husband, brother-in-law, sister-in-law, niece and myself during the wedding weekend. It was so much fun celebrating with the Panetta family and witnessing Vince and Megan’s commitment to each other. Nick and I also announced the coming of our first baby the same weekend, who is now a two year old wild man Cooper.
Thanks for taking the time to check out my blog for art teachers and reading this blog post! You can find the watercolor lesson plan and all the resources I use to teach this fun art project at my TPT store here. I have also created watercolor how to posters here and here. Also check out different ways I use watercolor in my visual journal here and here. Help me spread the word by sharing this post on your social media site of choice. Thanks for stopping by.
Related Posts


Leave a Reply