Want to create an amazing leather mask project, with not as much money as you may think? Read details below.
As a current 3D I and 3D II teacher I have a ton of sculpture lessons up my sleeve. I like to change things up every year; I keep some projects consistent while switching others out completely and slightly altering others. While student teaching I developed a Venetian mask lesson, inspired by my trip to Italy a year prior. I spent endless hours planning, researching, PowerPointing, and creating my example.
The original lesson had students create a mask form using plaster strips as a base and liquid plaster on top to create a smooth surface. For the most part, the project was a success, the masks looked nice, and the students had a good time, but I still felt limited. It was difficult to achieve fluid shapes or add large forms with a material as rigid as plaster. Despite a few doubts, I taught the lesson two more times before taking a break.
When I started my new job I returned to the world of sculpture after a two-year hiatus. As I planned for my first year as the 3D I and 3D II instructor, I found myself returning to the idea of mask-making. While researching my mask resurgence I discovered leather mask-making.
I never would have considered this project at my last school. On a shoestring budget materials that contain the word “leather” are automatically turned down do to cost. However, at my private school job with my private art school budget suddenly these expensive-sounding words were appealing. I began to research and quickly realized leather is an incredible material that can be twisted, curved, cut, and carved very easily. I made a few phone calls and found a leather provider.
After some research, I was shocked to discover I could actually get the leather I needed at a reasonable price. Through a company called Brettun’s Village I could get a hide for a decent price. After calling the company I was told they would send me enough leather scraps for a small town to make masks for only $50. I was in, and the leather mask-making began.
SUPPLIES
- Paper for template
- Scissors and Xacto to cut template and leather
- Pins to hold template onto leather to trace
- Sharpie or pencil to trace around the template onto leather
- Leather (3 oz veg tan leather)
- Bucket/sink with water to soak the mask
- Towels to help dry mask
- Hair dryer or heat gun to help dry the mask as you mold it
- Pliers for folding mask
- Plastic and wooden ribs for folding leather (clay tools and bookmaking tools work well)
- Acrylic paint and paintbrushes to paint the mask
- Elastic to use to hold the mask onto their face
HOW TO
STEP ONE
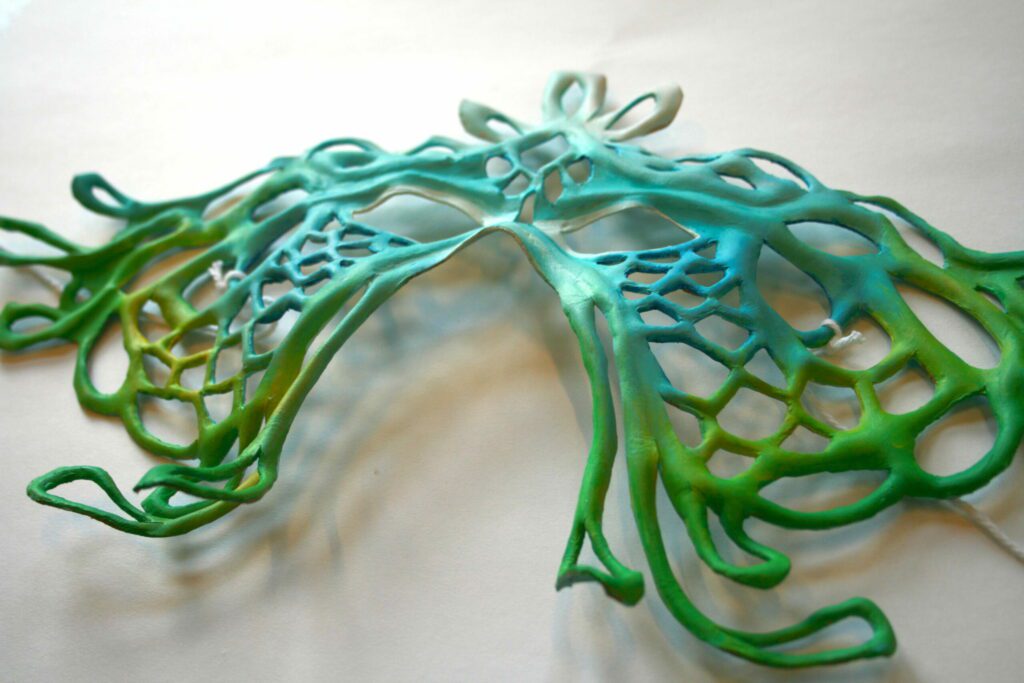
Introduce the students to Venice, give them some history and background as a base. Introduce the holiday, Carnivale, the traditional mask wearing holiday celebrated right before Mardi Gras. Show them examples of mask shapes and the meaning behind the shapes. Introduce the idea of symbolism, using colors, shapes, and symbols to represent something specific. Show them work by artist, John Flemming. His work pushes the boundaries of a typical mask. He uses leather to create extreme and interesting mask shapes.
STEP TWO
Have students do their own research on masks and symbols. Have them consider their favorite color, horoscope sign, birthstone, interests, and ways they can represent themselves through their mask.
STEP THREE
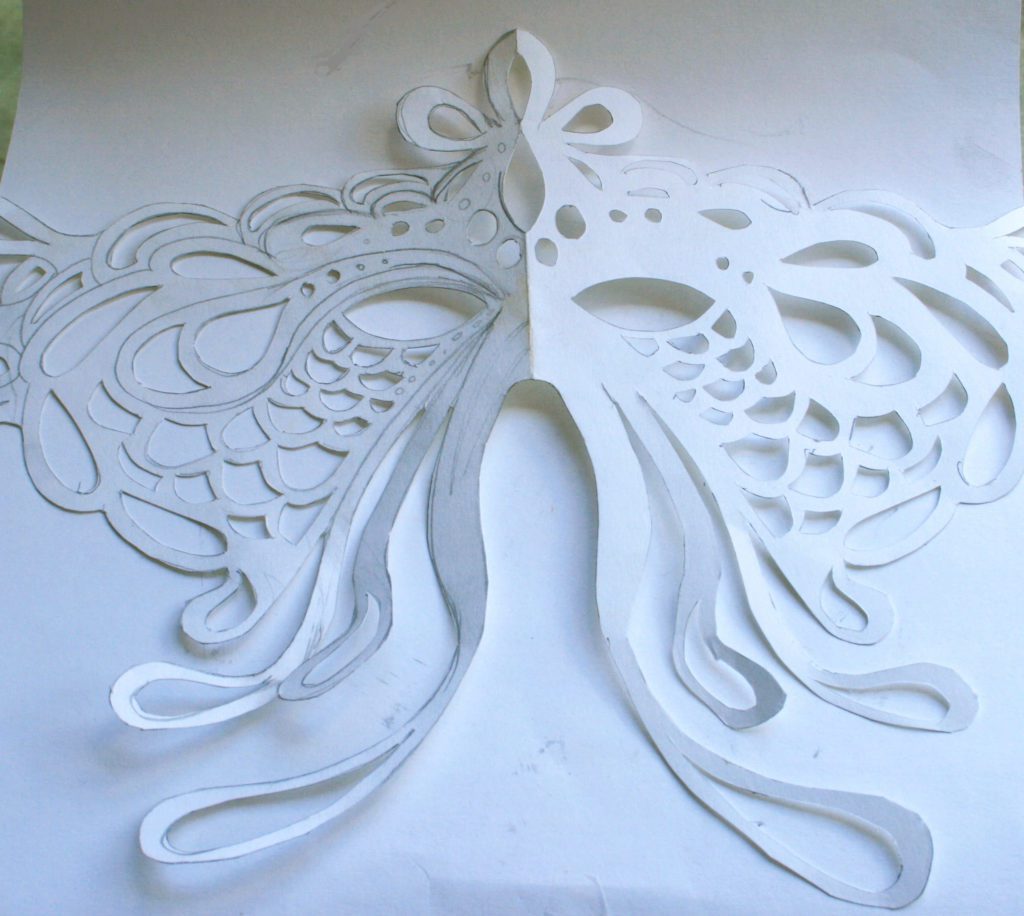
Have students do three full-color sketches of different mask ideas. Help them select the best option.
STEP FOUR
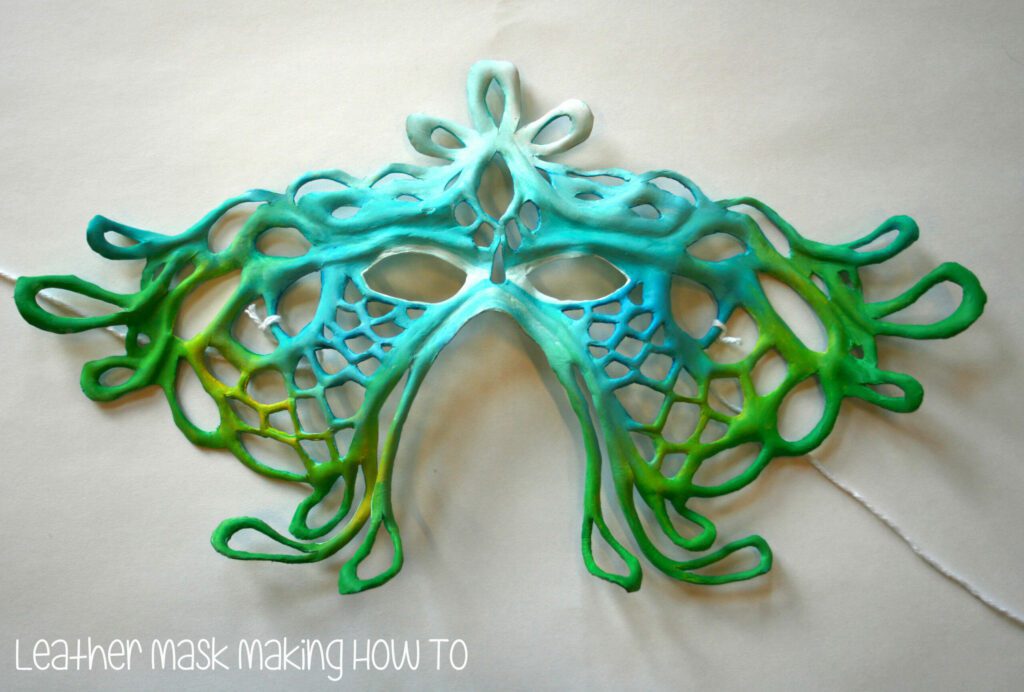
Draw a life-size version of the mask. Use a Xacto knife to cut out areas on the inside of the mask, cut the outside shape with scissors.
STEP FIVE
Cut a piece of leather roughly to the size of the template. Pin the template to the leather using straight pins. Trace around the exterior shape and interior shapes with a pencil or sharpie. Cut the mask out of the leather using scissors and a Xacto knife.
STEP SIX
Soak the mask in water for approximately 10 minutes, or until the leather is saturated. Sandwich the leather between two towels to squeeze out excess water.
STEP SEVEN
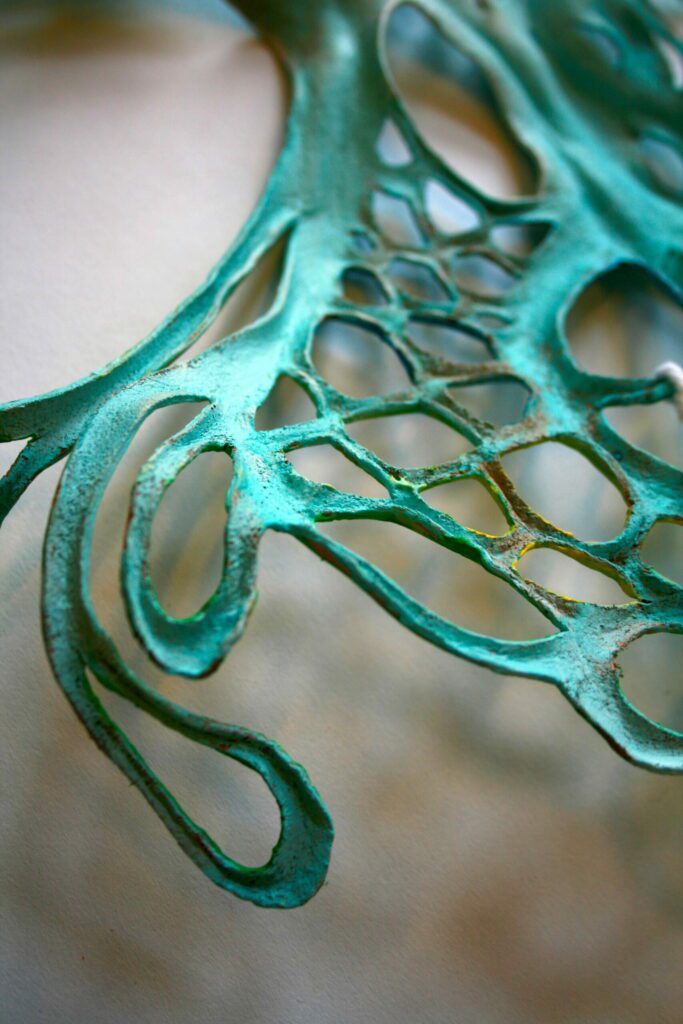
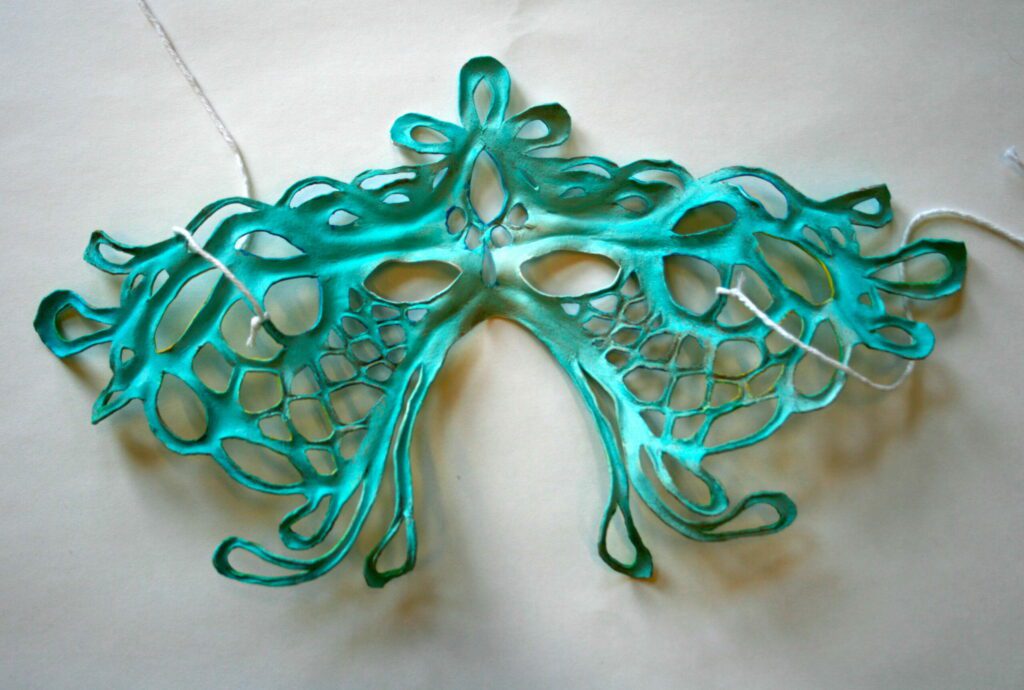
Have students place the mask on their faces and begin forming the mask on their faces. As the leather dries it begins to hold the shape. To help speed the drying process use a hair dryer or heat gun on the leather. Once the mask is roughly formed to their face have them add details. Use pliers to round out the edge of the mask or cutouts. Pinch the leather between the pliers to create raised areas. Use a bone folder or wooden rib to press into the leather to create lines and indentations. Use your hands and fingers to round out and roll over areas. The leather can be twisted, dried, and will hold it’s shape. Have the students continuously press the mask to their faces to make sure it maintains a good fit.
STEP EIGHT
Have the students cover the masks in bags if they aren’t finished molding the mask before the end of class. Areas can be re-wet and re-molded. Once their mask is molded, allow the mask to dry out completely.
STEP NINE
Paint the mask using acrylic paint. Encourage the students to use light shades to emphasize raised areas and dark shades to emphasize low areas of their design. The mask should be painted inside and out.
STEP TEN
Create holes on the edge of the mask for the elastic band to be strung through. Have the students write an artist statement about how their mask represents them. Have a class critique of the completed masks.
This project is a great assignment to introduce history and symbolism to your class. The students also become very invested because of the personal nature of the lesson. If you love this lesson but don’t feel like doing the research check out my Leather Mask PowerPoint here! Check out the rubric I use here.
Thanks for taking the time to check out one of my art lessons, check out more in my shop. I hope it helps you in your classroom. Help me spread the word about my lessons and art by sharing, tweeting, liking, or whichever social networking method you like best. Thanks for stopping by! Don’t forget to follow me on Instagram and TikTok for weekly visual journal demos. Until next time!
Related Posts
Leave a Reply