Check out how I made this DIY baby sign for your monthly update pictures the first year, and years after.
THE STORY
Time goes by faster and faster the older I get. Now that I have a little boy it seems like time has hit warp speed.
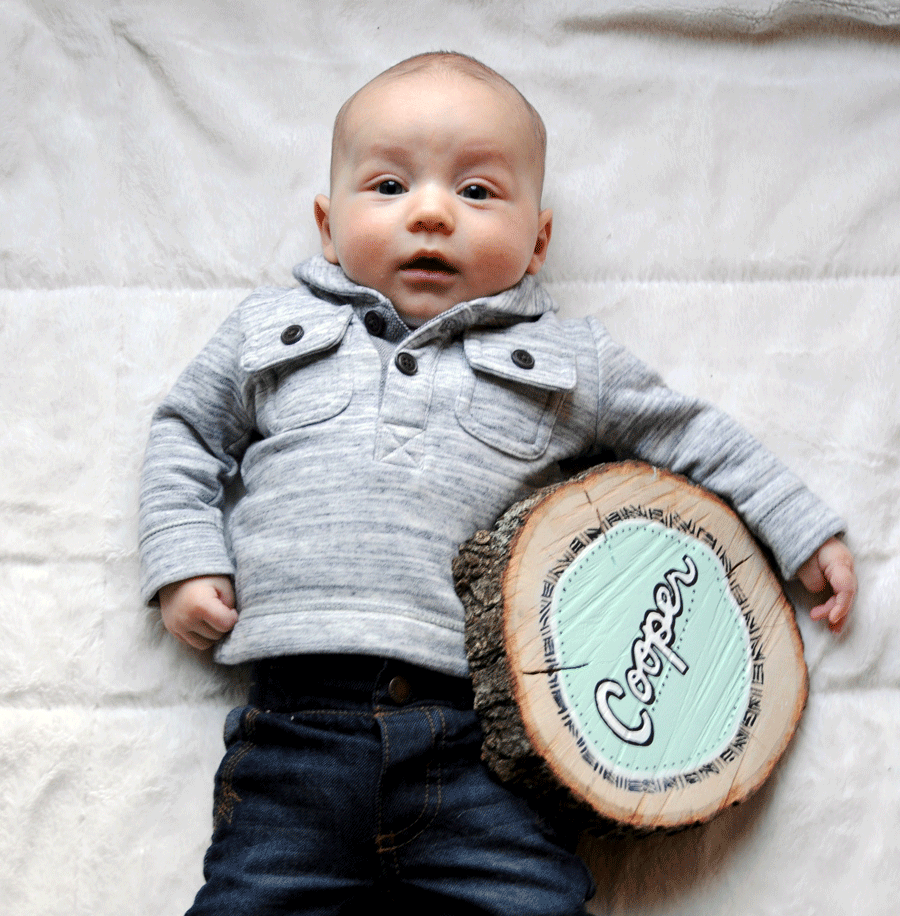
Cooper is literally growing up before my eyes. By the time I wrap my brain around the fact that he is making a new cooing noise, he is suddenly laughing, smiling, and wiggling more than ever. I can’t believe in a few short months he will be sitting up, crawling, and on the verge of walking and talking.
The time warp of motherhood has also overlapped into my projects. My spare time has greatly decreased and my productivity has gone down with it. I had no idea the amount of time this little guy would need. His unpredictable nap schedule was the only chance I had to work on my crafts, which is why this particular one is three months late. Better late than never, right? This is my new mantra.
While I was pregnant I began looking for the monthly stickers to use when photographing Cooper for his monthly pictures and update. Over the years I saw these stickers increase in popularity, and eventually they were clogging my Facebook wall and Instagram account. When it came time for me to select my own, I was over it. I had seen it too many times, I wanted something different. In my hormonal fog, pregnant state of mind I decided I would have plenty of time to put together a handmade sign to use for the photographs after Cooper made his entrance into the world.
Once Coop arrived my time was gone. If I wasn’t feeding him or rocking him to sleep, I was half asleep trying to guess when he would wake up next and whether or not I had the energy to pick myself off the sofa and feed myself. This sequence would end with me ultimately deciding it was too much work to stand, I was more tired than hungry and the sofa was too comfortable to move. If I was too tired to eat, there was no way I was going to put time or effort into a craft project.
Once things began to settle down, and Cooper began to fall into a more predictable schedule, I started to feel like myself again. I was ready to do something other than binge watch TV. I started planning out his sign.
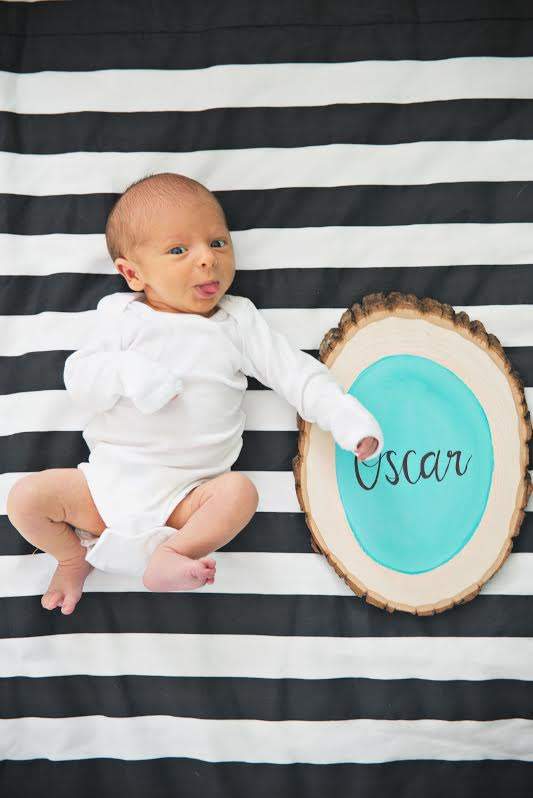
I had no idea what I wanted to create for his monthly updates. Everything I came up with I had seen before. I kept putting it off and putting it off out of lack of inspiration and time. One day while perusing Facebook I saw one of my friend’s post a one month picture of her sweet son, Oscar. Next to him was a beautiful sign with his name on it, made out of a tree trunk round. On the back she put chalkboard paint to allow her to change information about him has he grows. I was immediately inspired, and highly motivated. Coop’s three month birthday was on the horizon, and I was dead set on at least getting pictures for his 3, 6, 9, and 12 month birthdays.
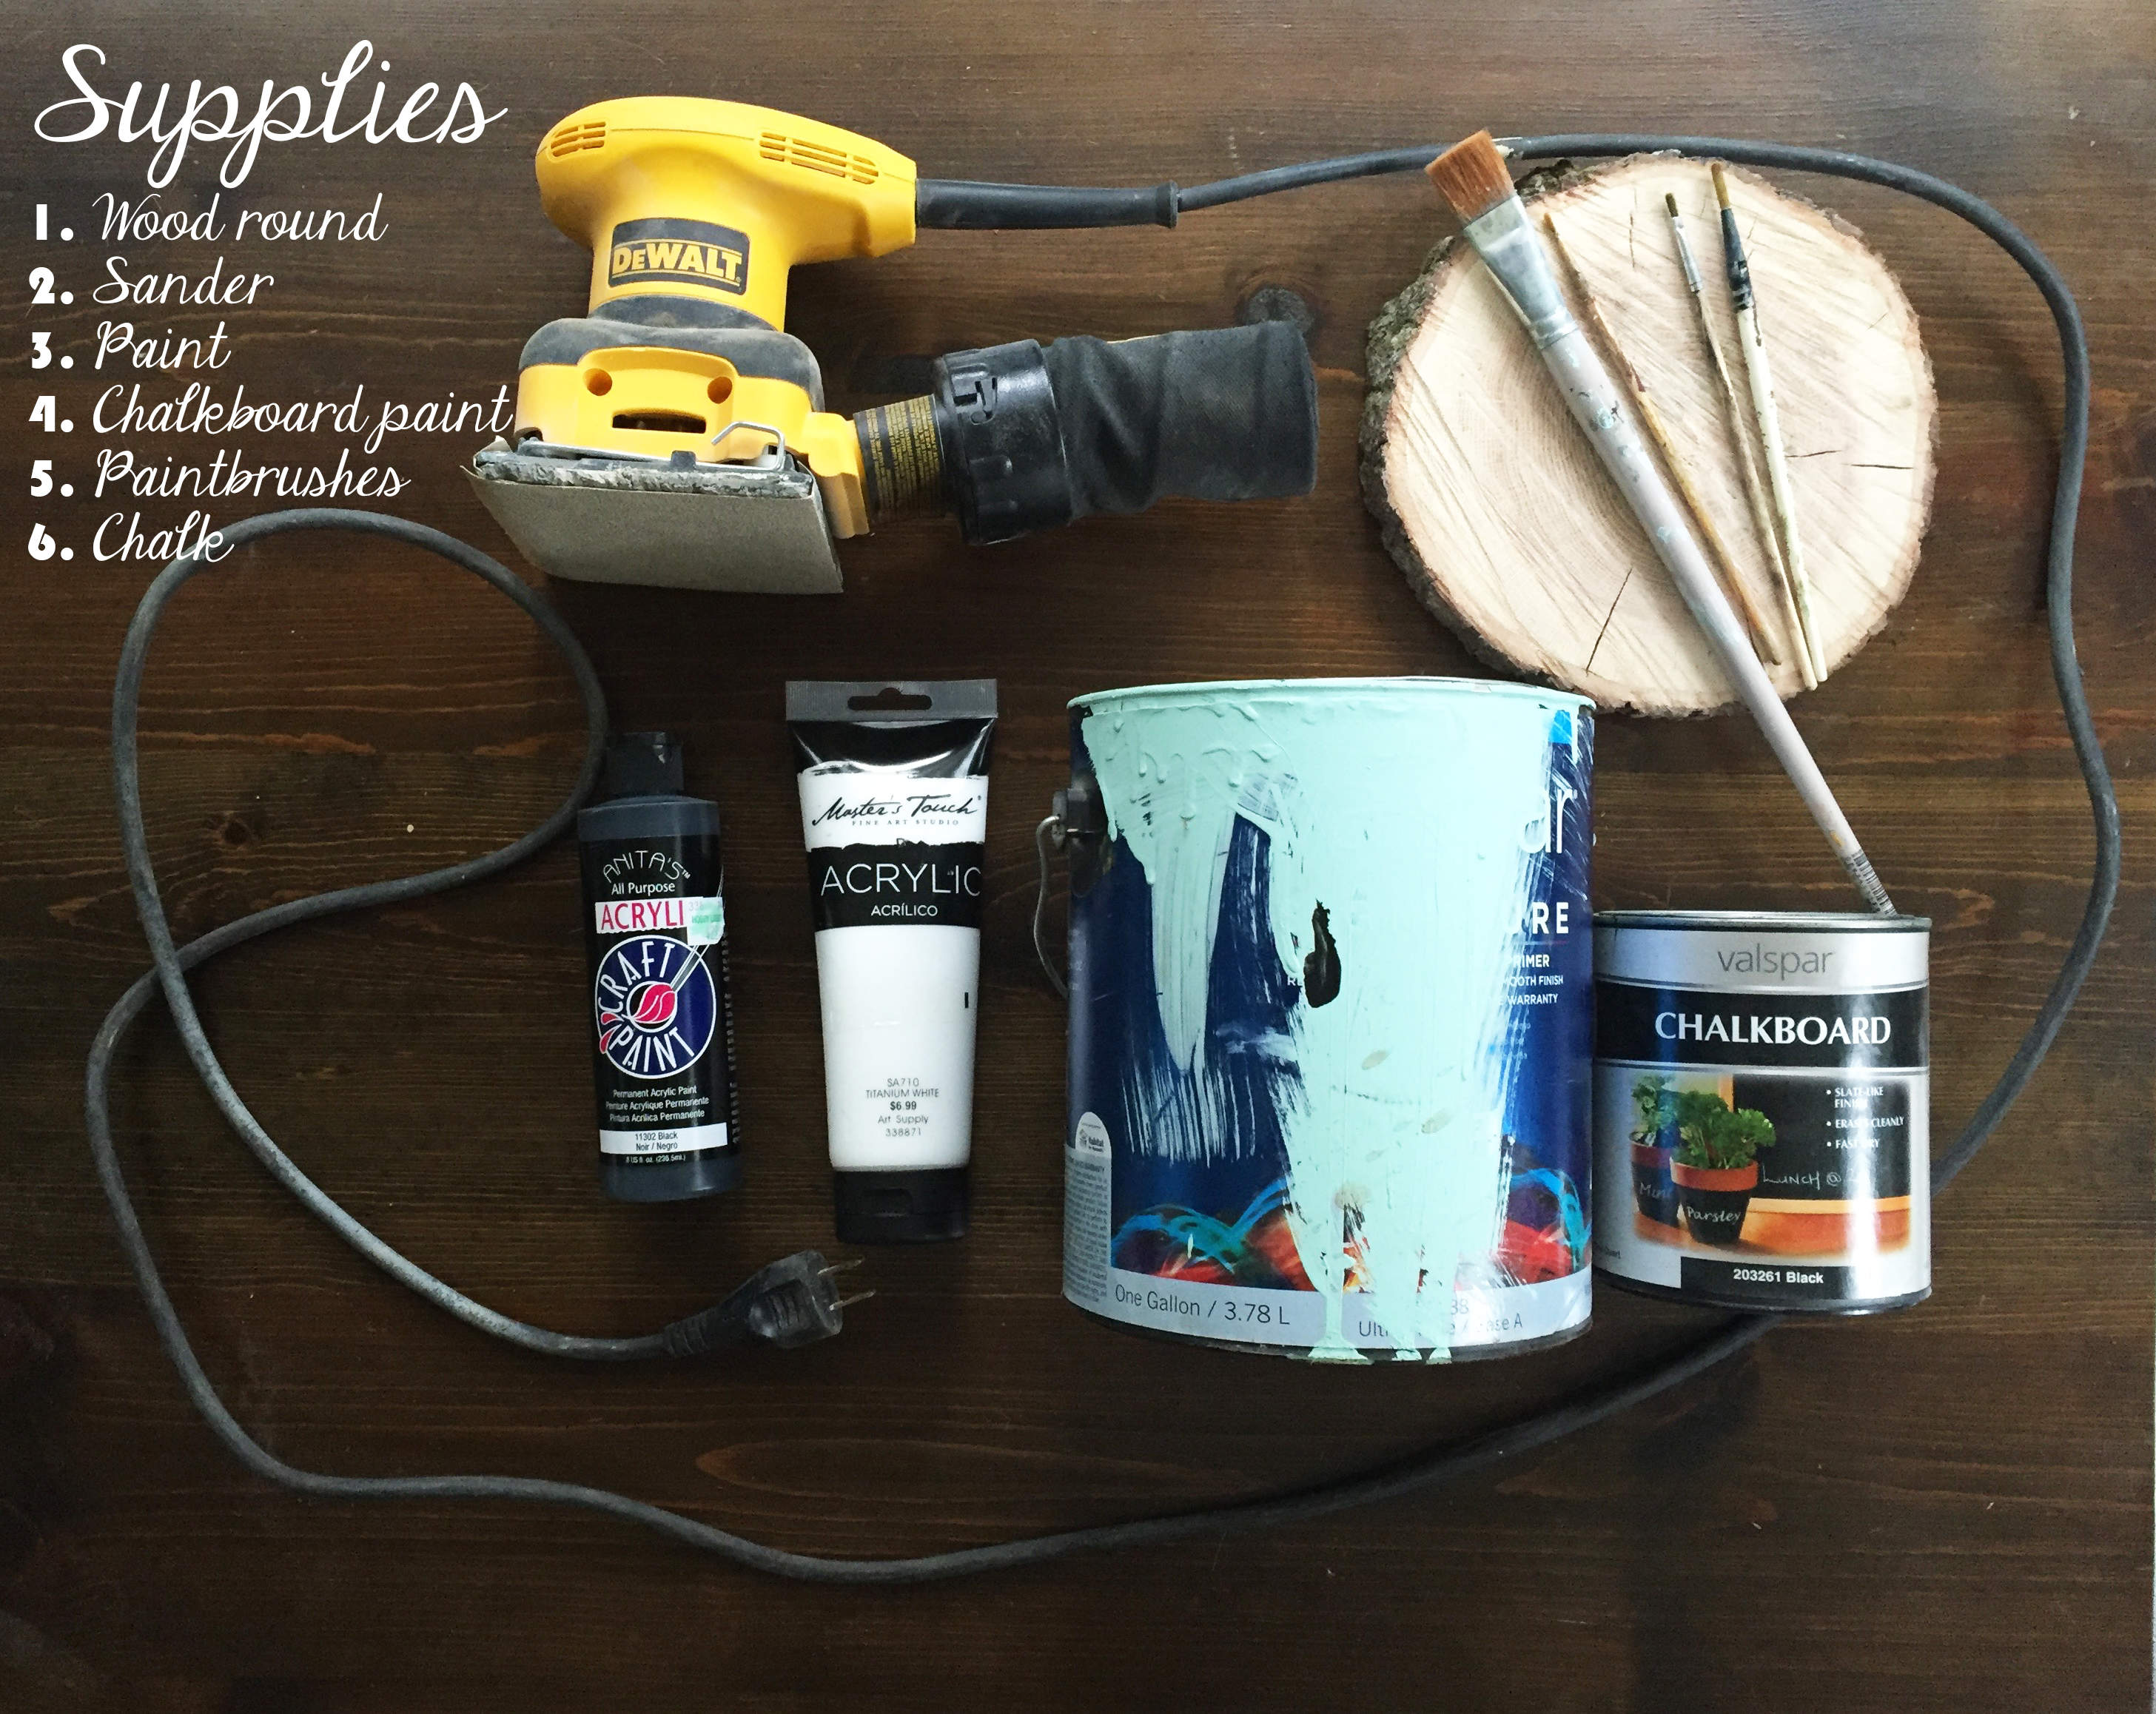
SUPPLIES
For this project you will need a wood round, sander, paint (the colors are up to you!), chalkboard paint, paintbrushes, chalk, and a sharpie (not listed and optional). At the time my husband just happened to have three trees taken down on our property and he was hard at work chopping them up. I had him cut me a few rounds, approximately 1 inch thick. It took another week to start my project once I had my rounds cut, and when I finally set up to start I realized the rounds had cracked. I assume this happened because it was fresh wood. I chose the least damaged one and get to work.
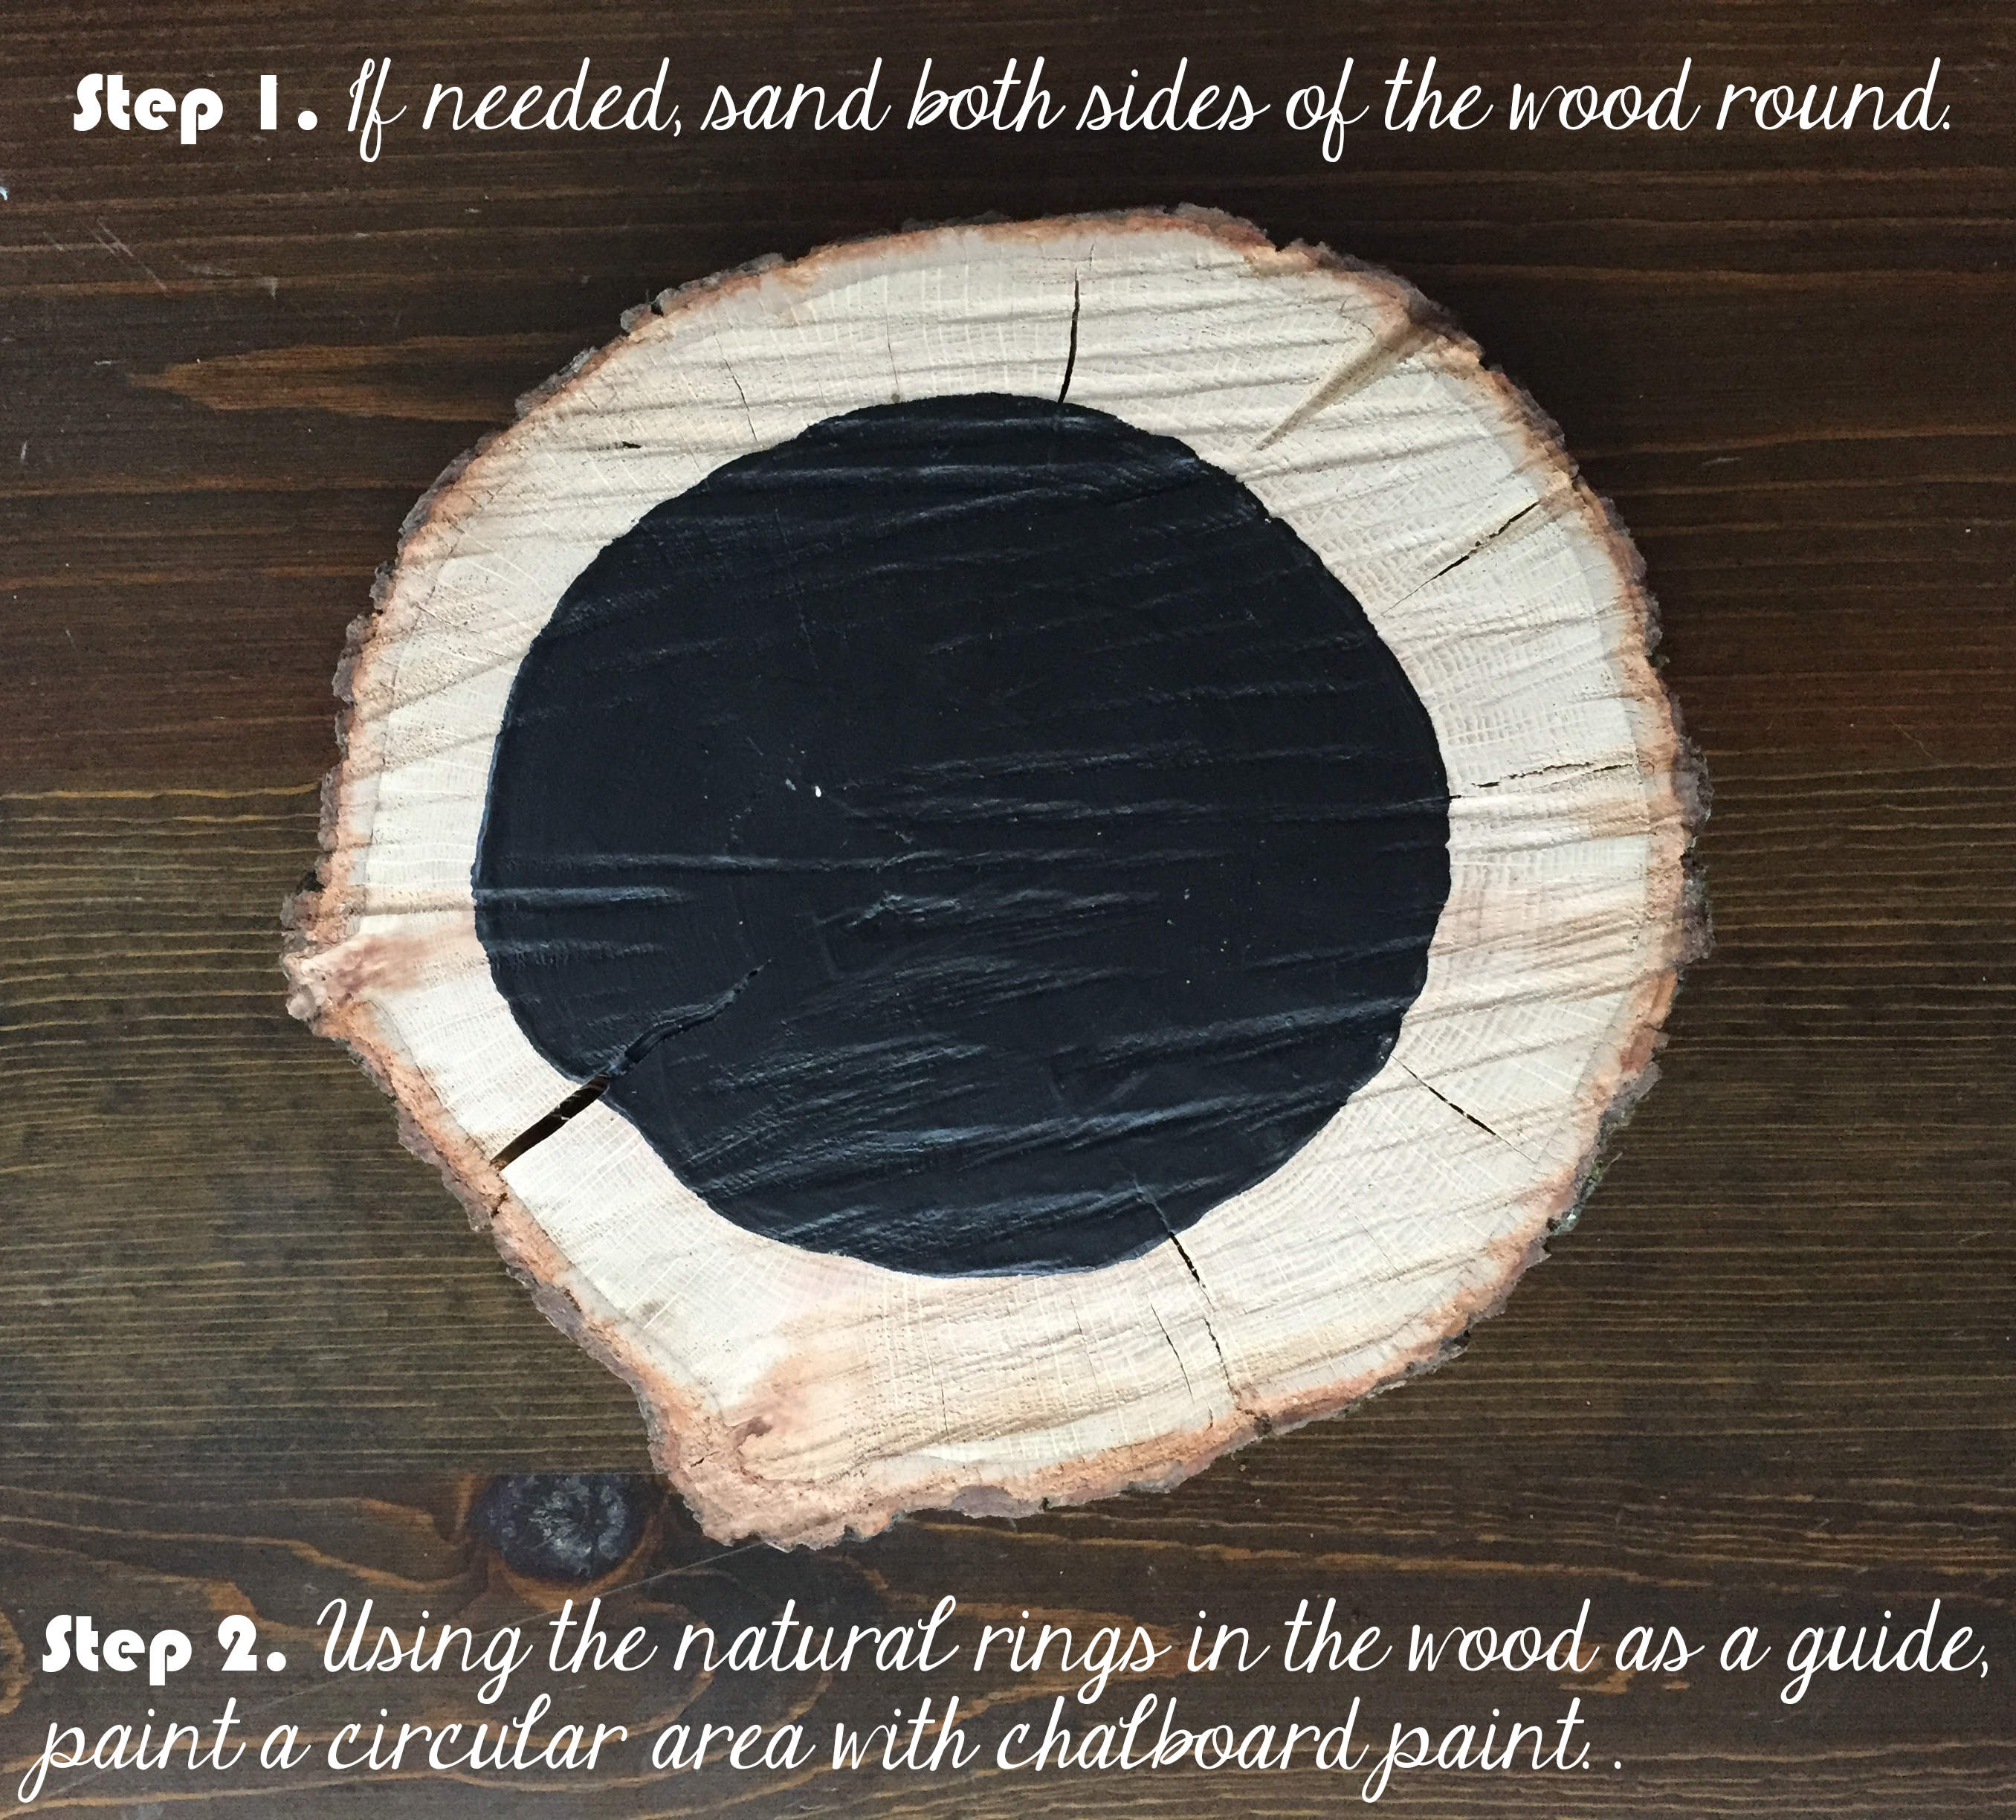
The surface of my round was pretty rough because of the way it was cut, so my step 1 was taking a power sander to it. I never got it as smooth as I would have liked, the chalk goes down a little rough, but I made it work.
Next, I painted the chalkboard paint on one side. I used the natural pattern of the rings as a guide for the edge of my shape, and I chose to leave a natural wood border around the edge. I applied two coats of the chalkboard paint, allowing it to dry in between layers.
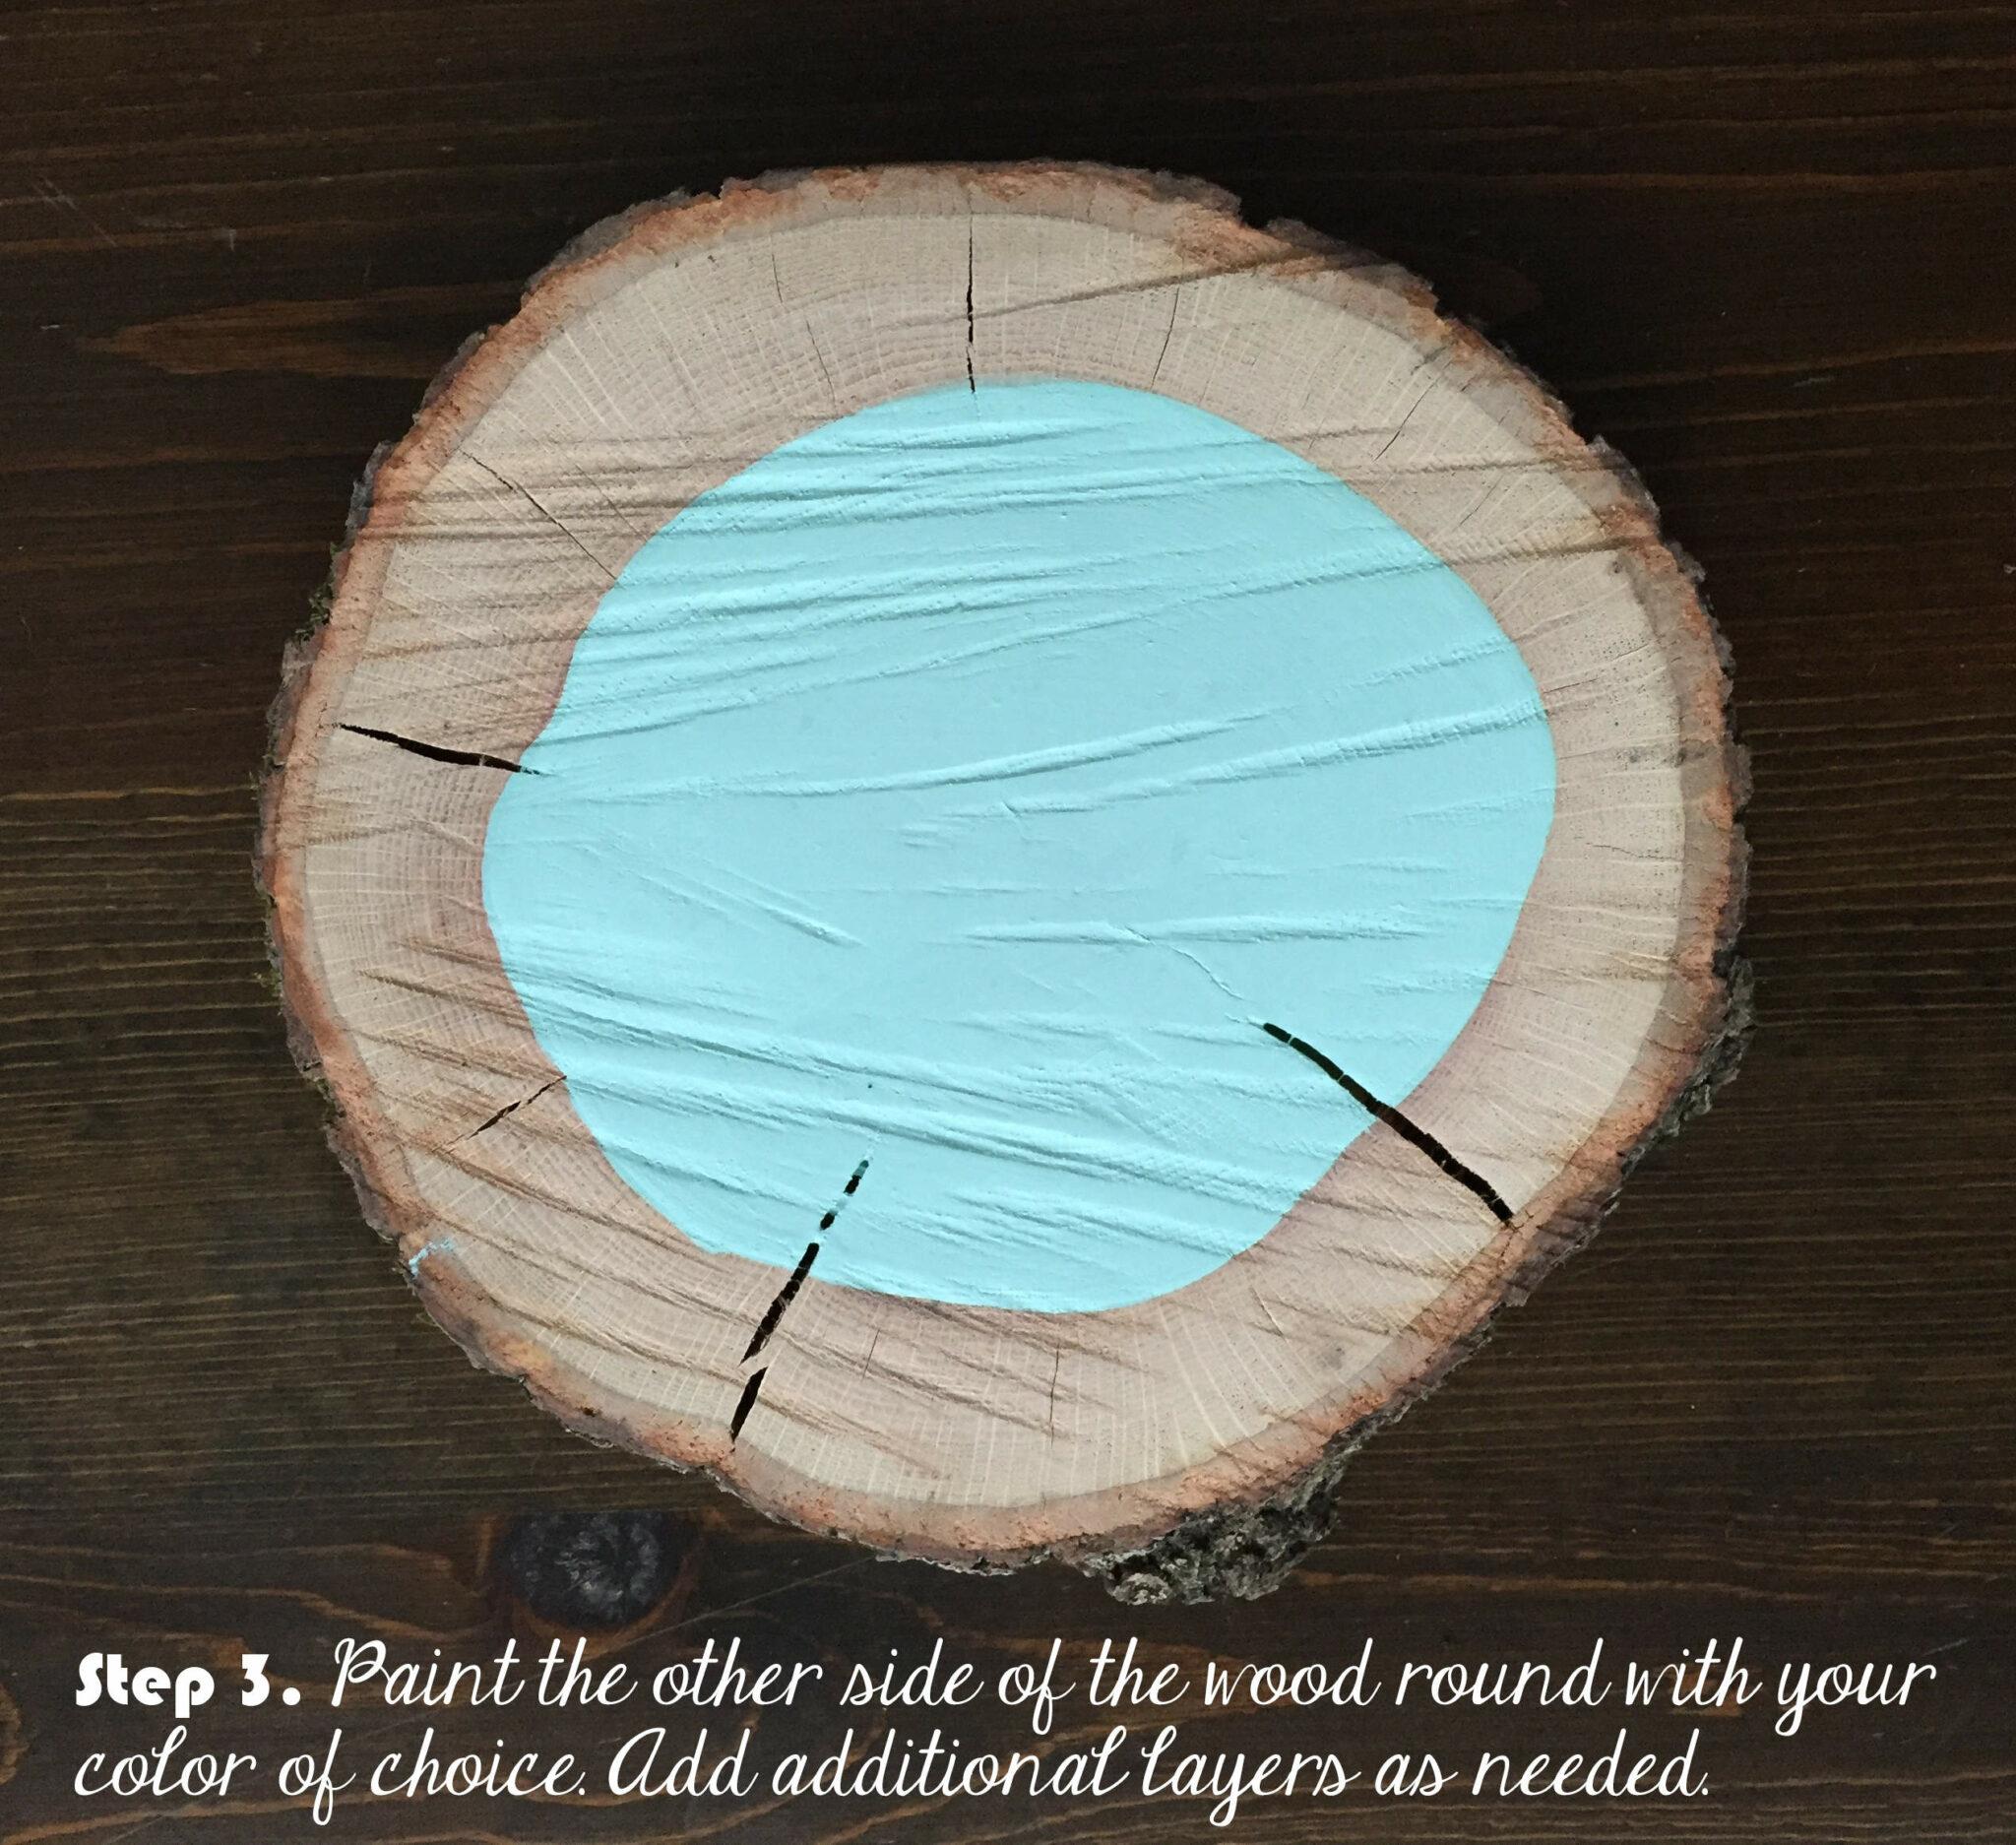
After the chalkboard paint dried I flipped the wood round over, and painted the back with a turquoise color. I wanted it to match his room, so I used leftover wall paint from painting the walls. Again, I used the natural ring pattern to create the edge of the shape and left a natural wood border.

Using a pencil I lightly wrote out his name in cursive. If you are not confident in your lettering ability, all you have to do is print out typed letters and trace them onto the surface.
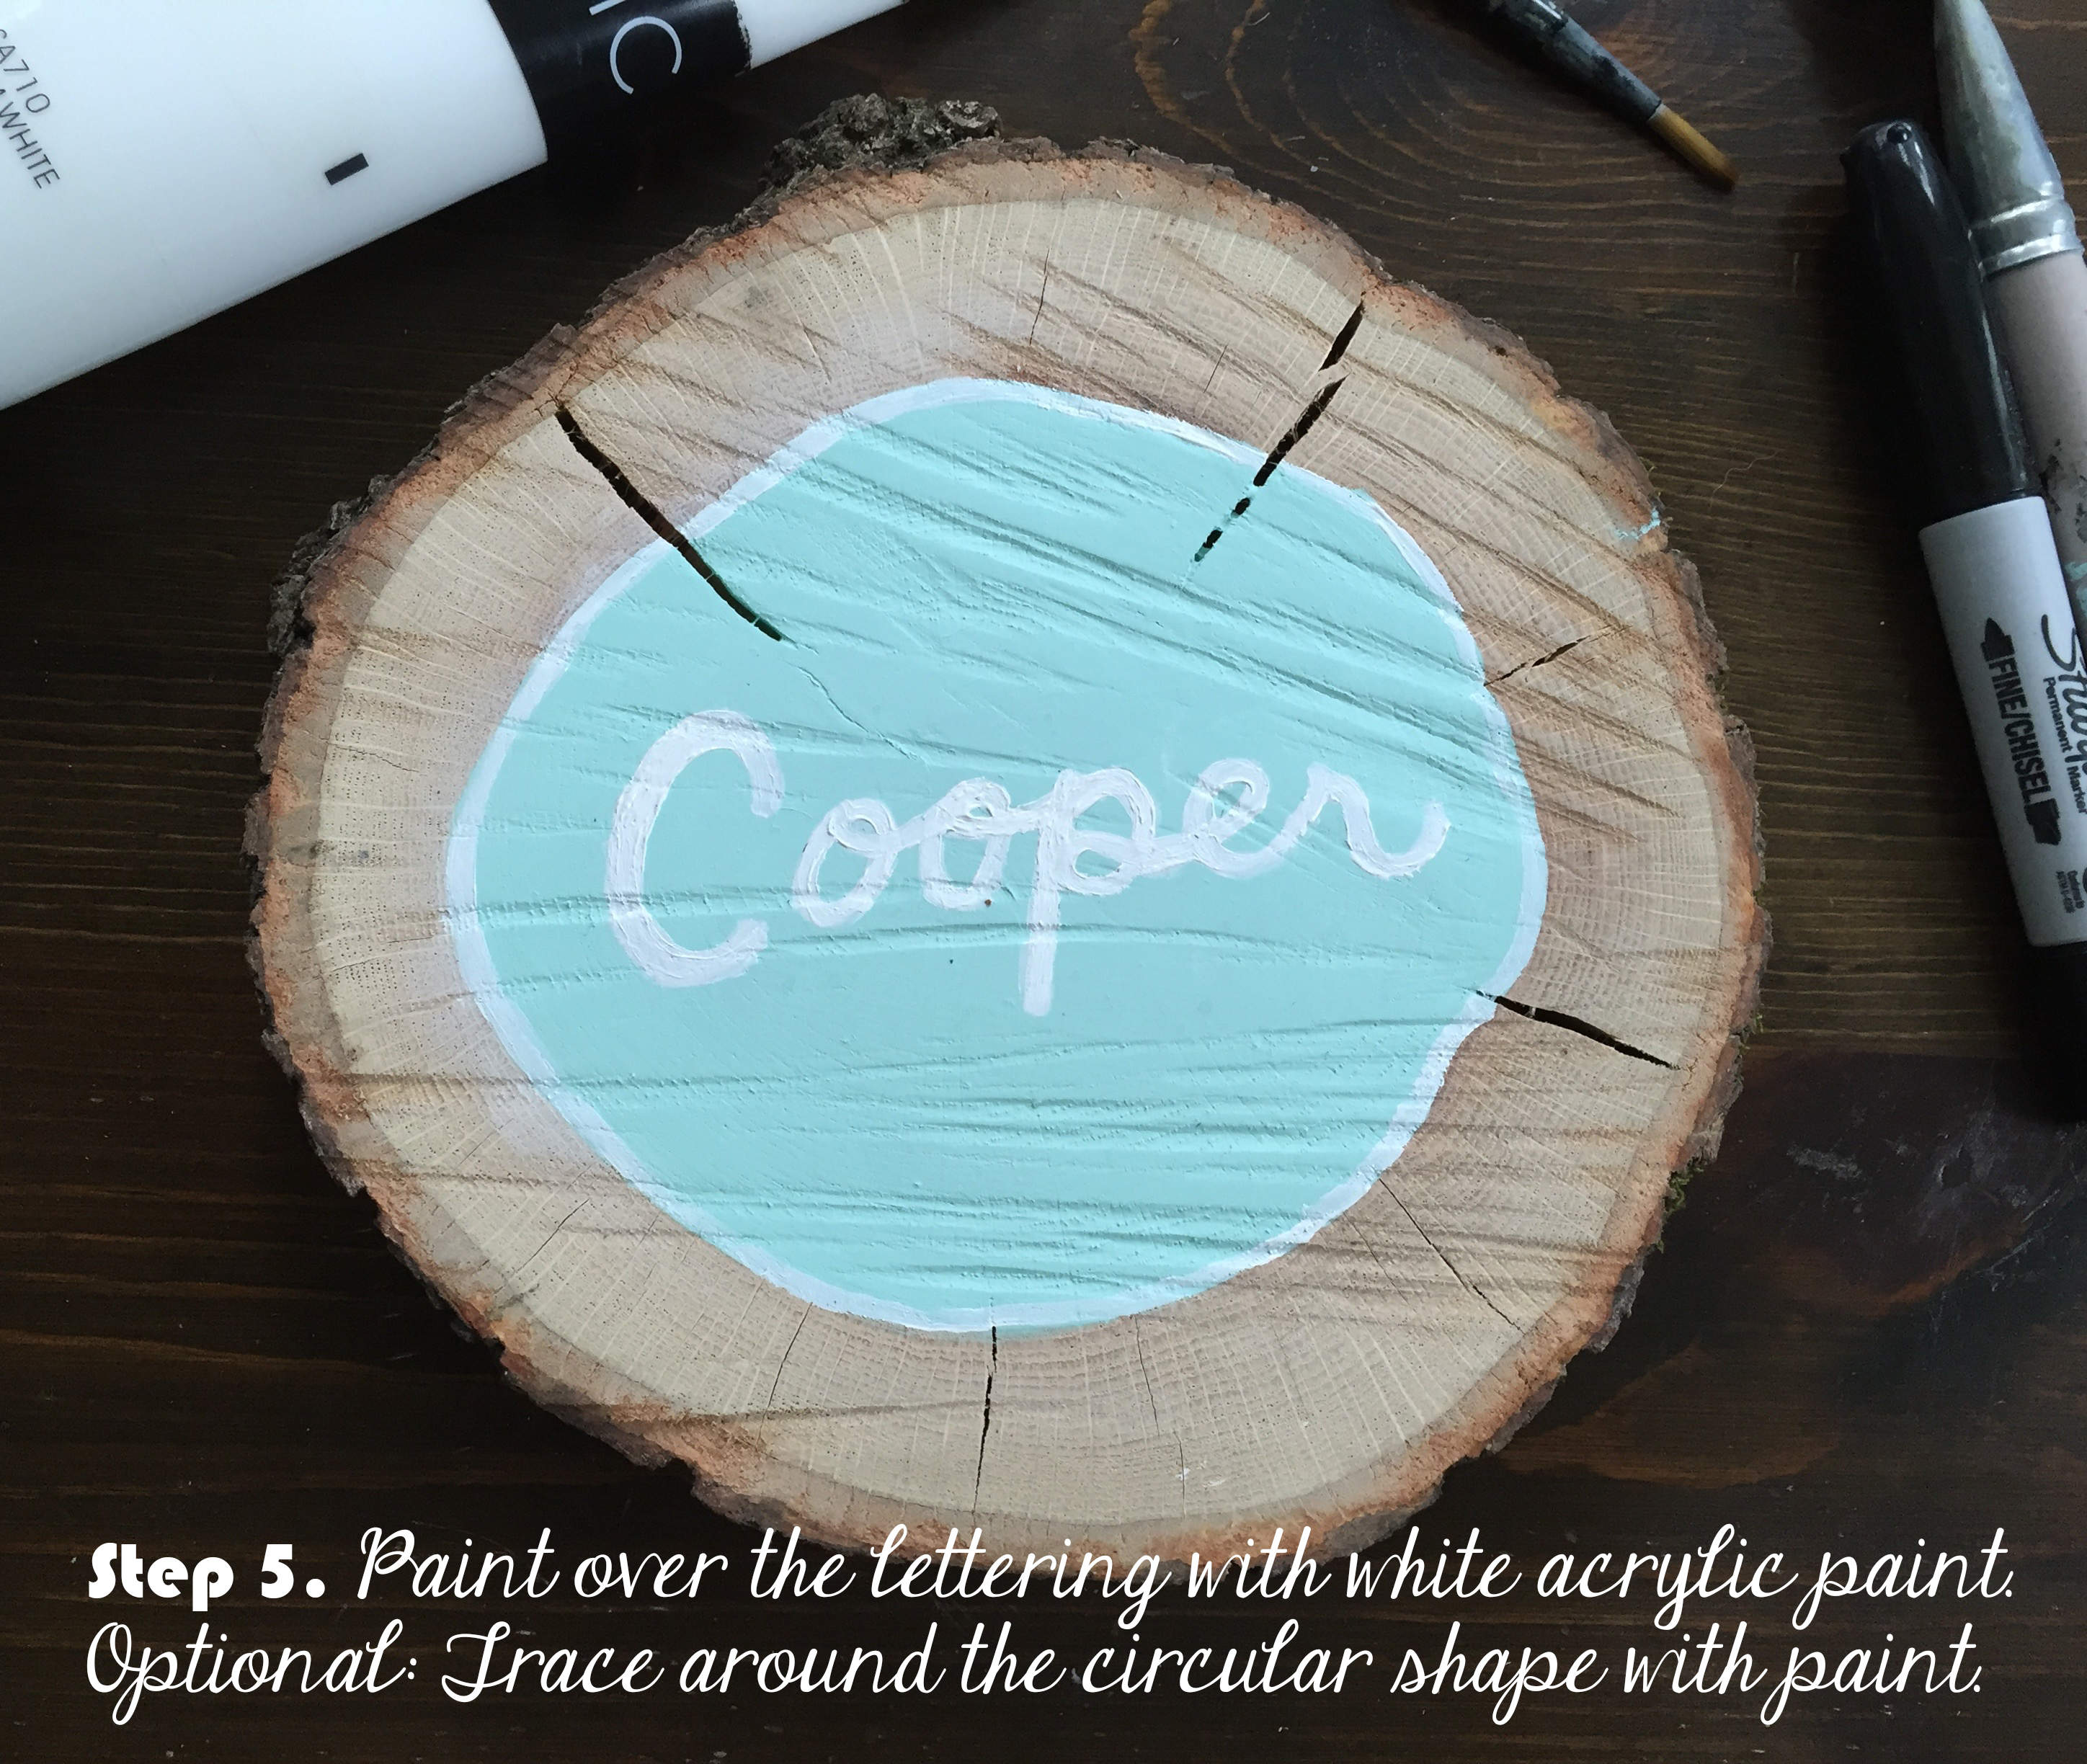
I used a thin paintbrush and white acrylic paint to paint his name and outline the turquoise shape. It took a few coats to get the white solid enough to pop out against the background color.
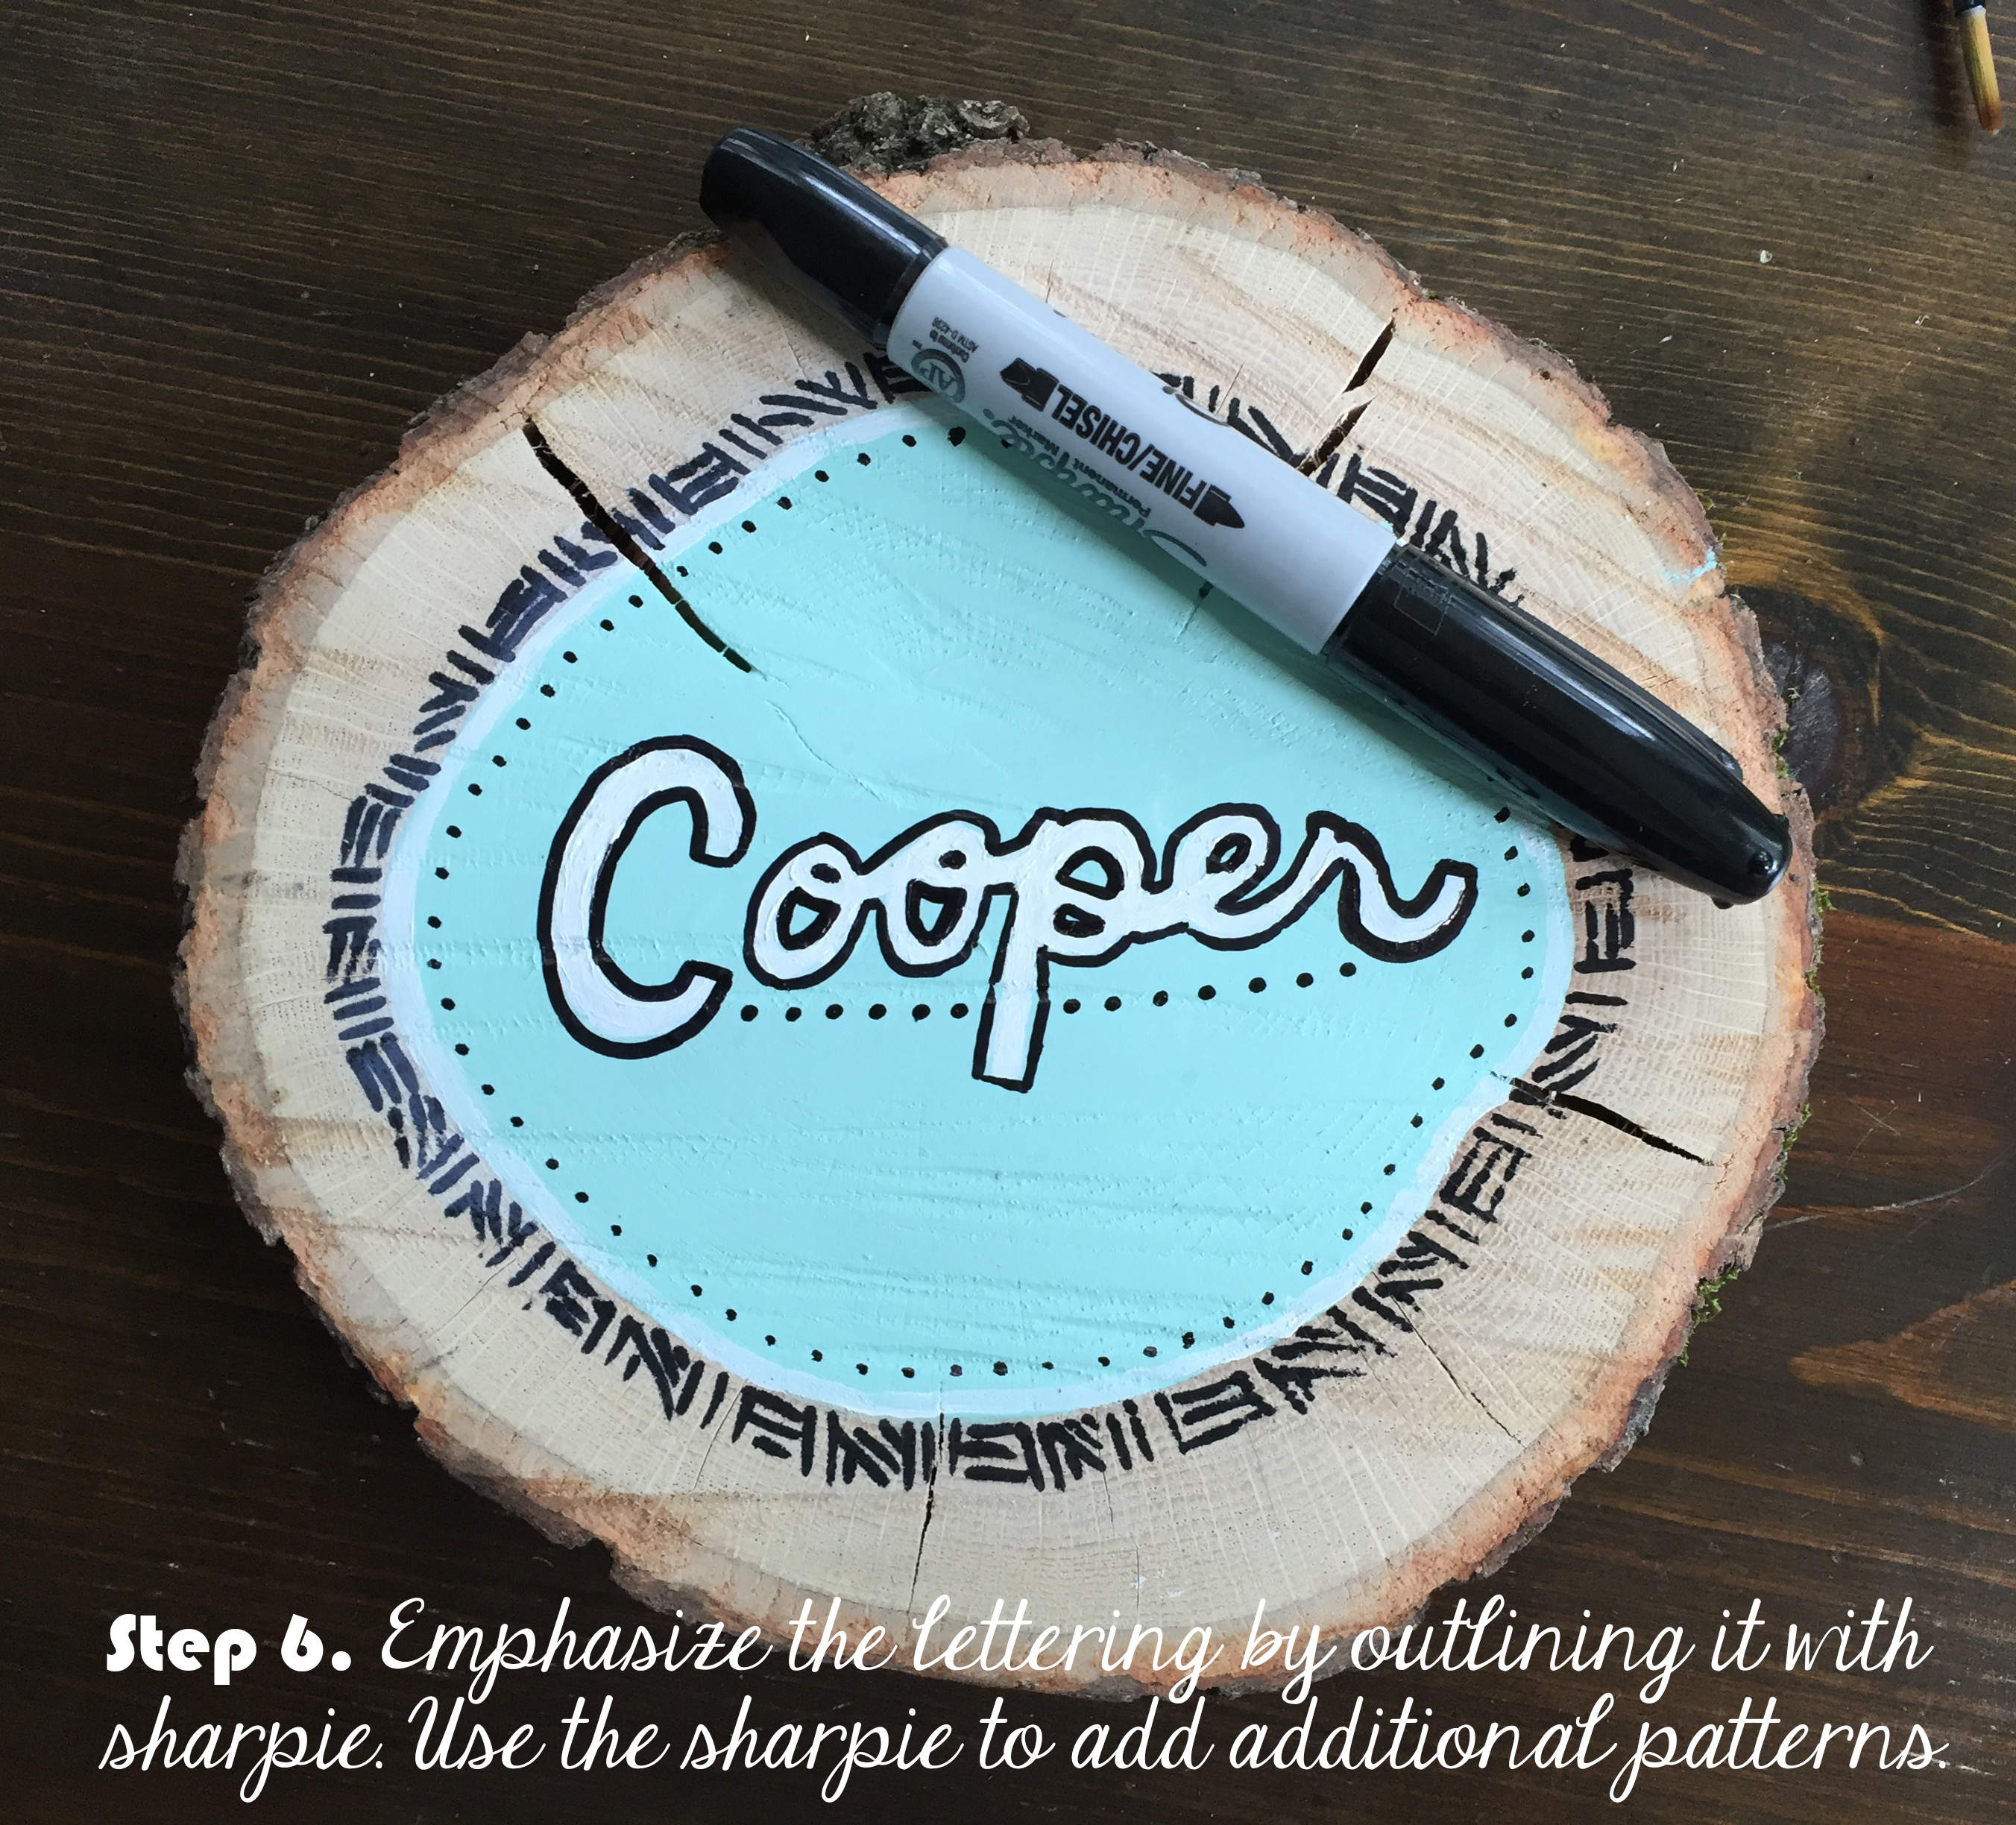
Initially I planned to outline everything in black acrylic paint, but the details were too small to easily add them using a paintbrush. I instead opted for a black sharpie, and it worked perfectly. Because I was able to control the application of the sharpie more than paint, I was able to clean up the edges of his name and add small details to the border.
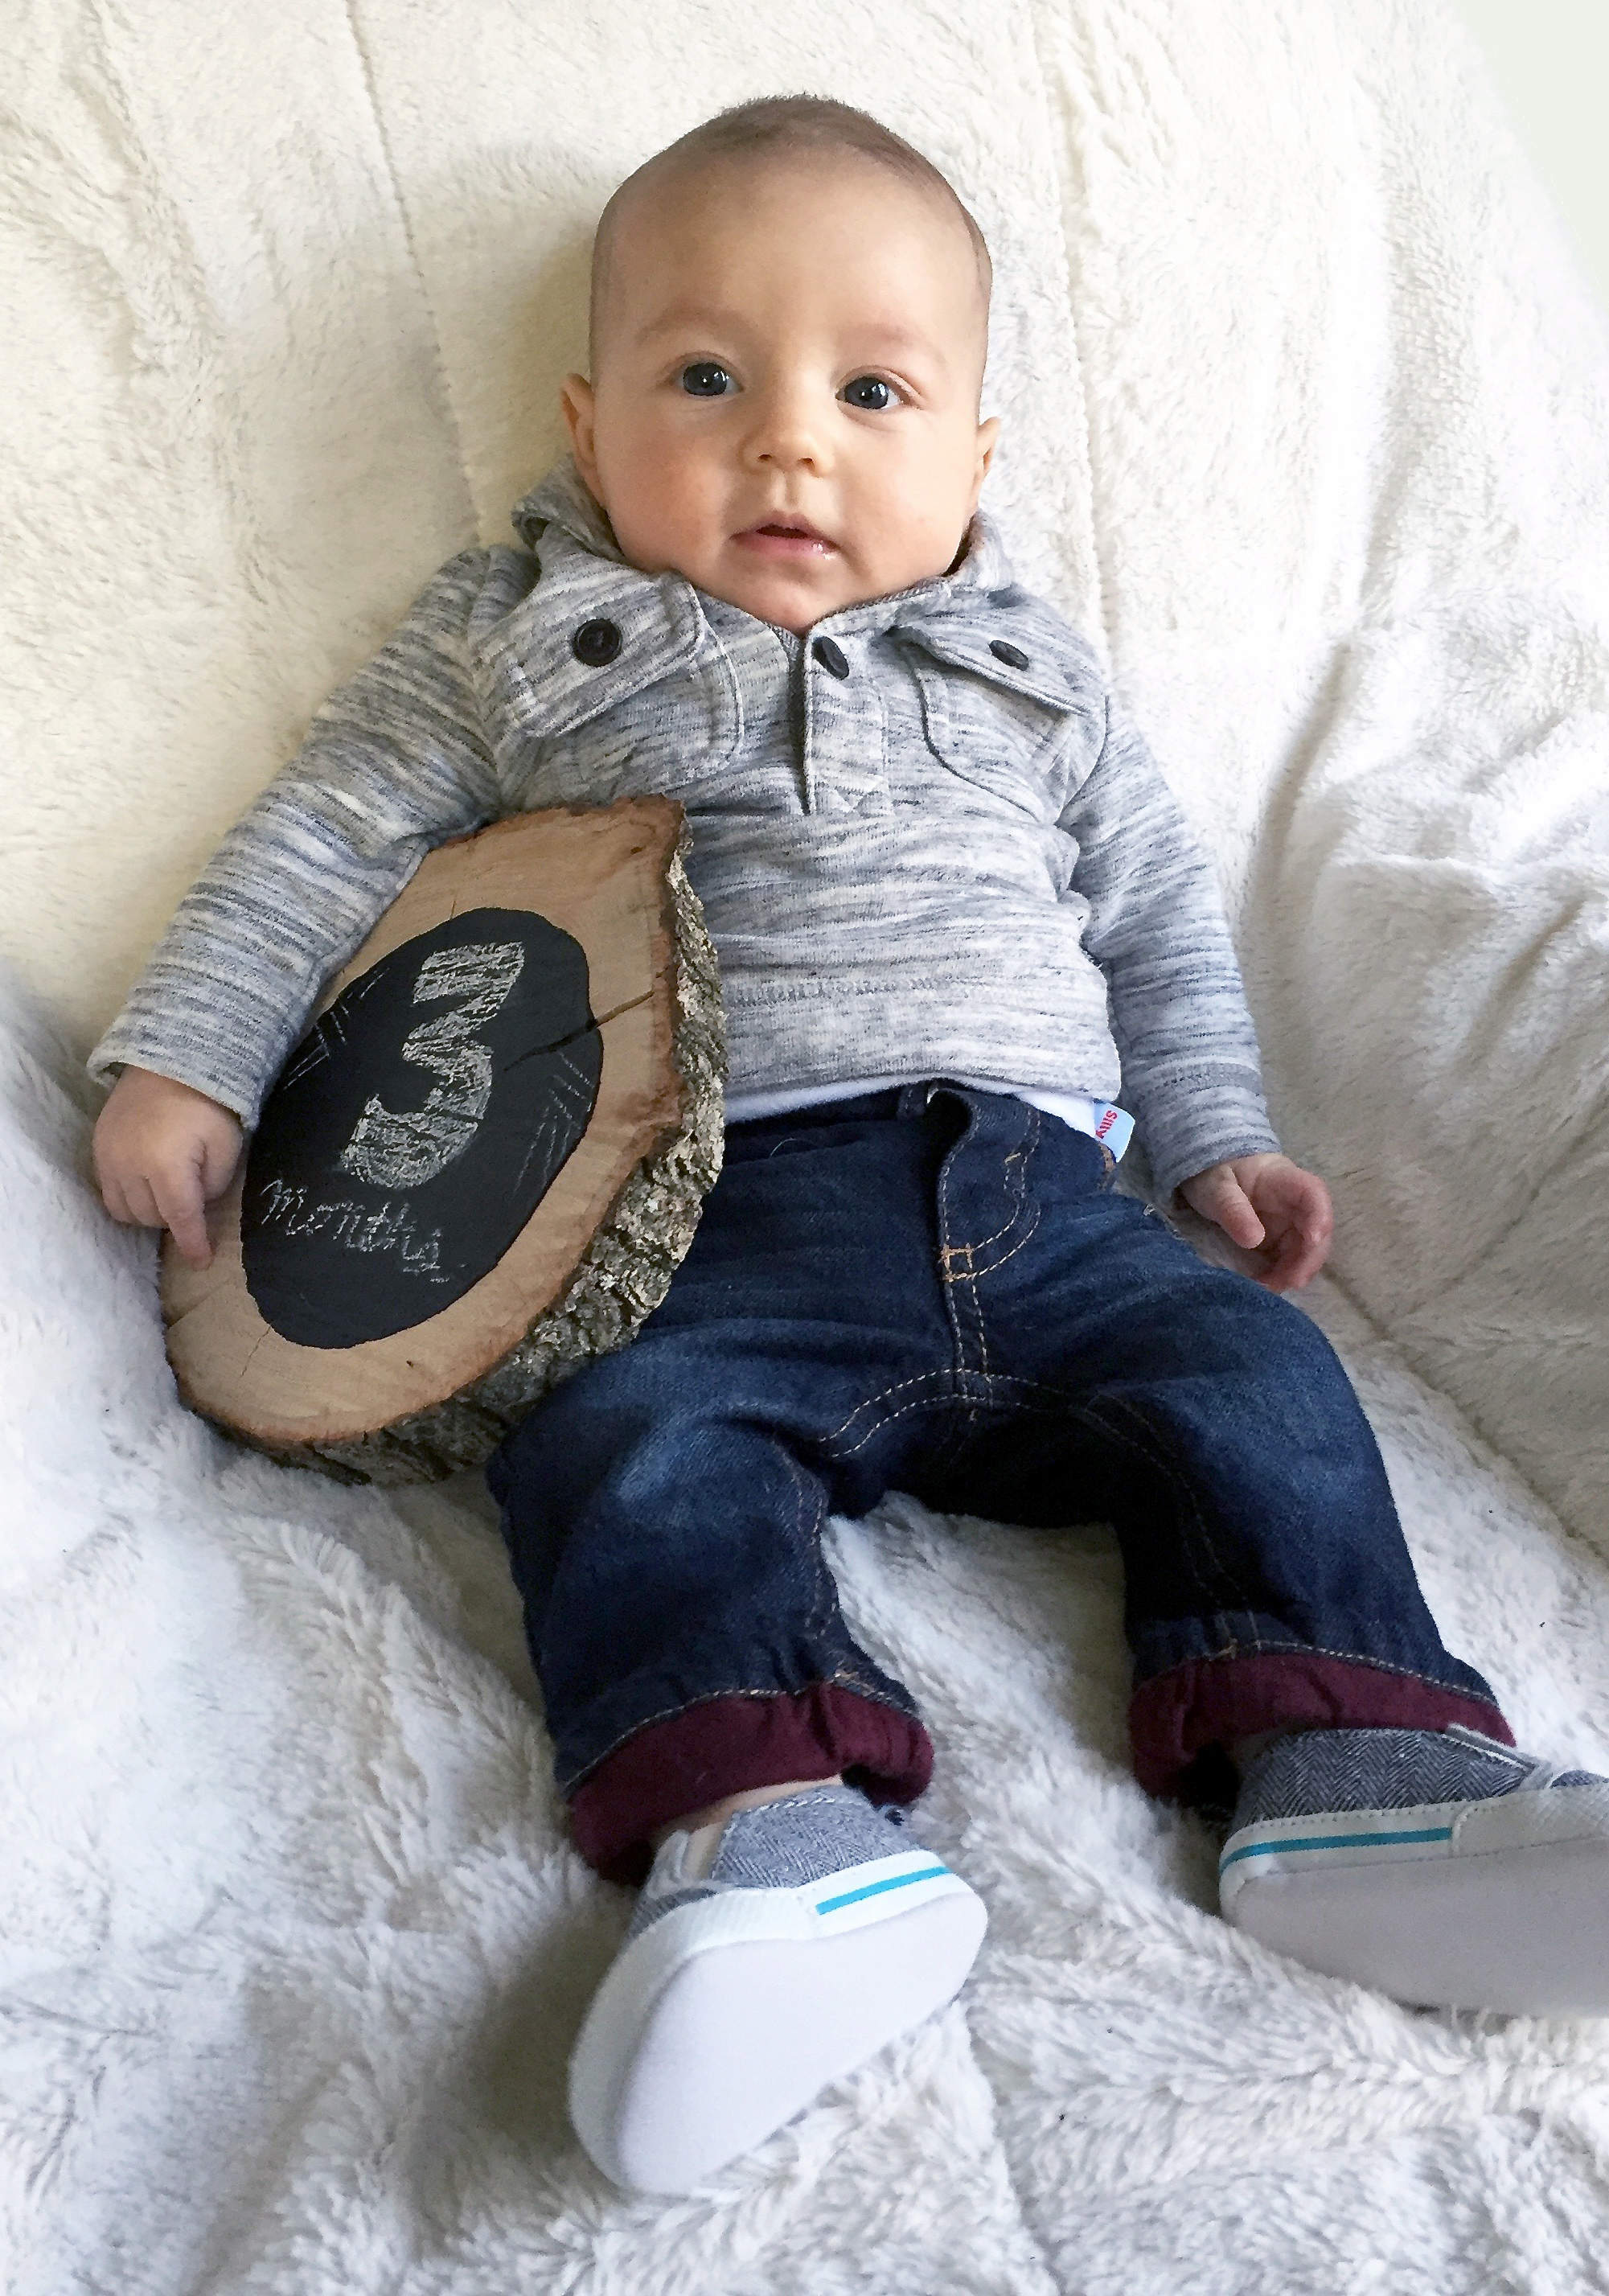
I used chalk to write “3 months” on the chalkboard for his first monthly photo shoot. I set up a white blanket over an arm chair and placed it near our backdoor where sunlight was coming in. I frantically shot picture after picture in between sticking a pacifier in his mouth, dancing around like a crazy person, and making odd sounds to keep him entertained.
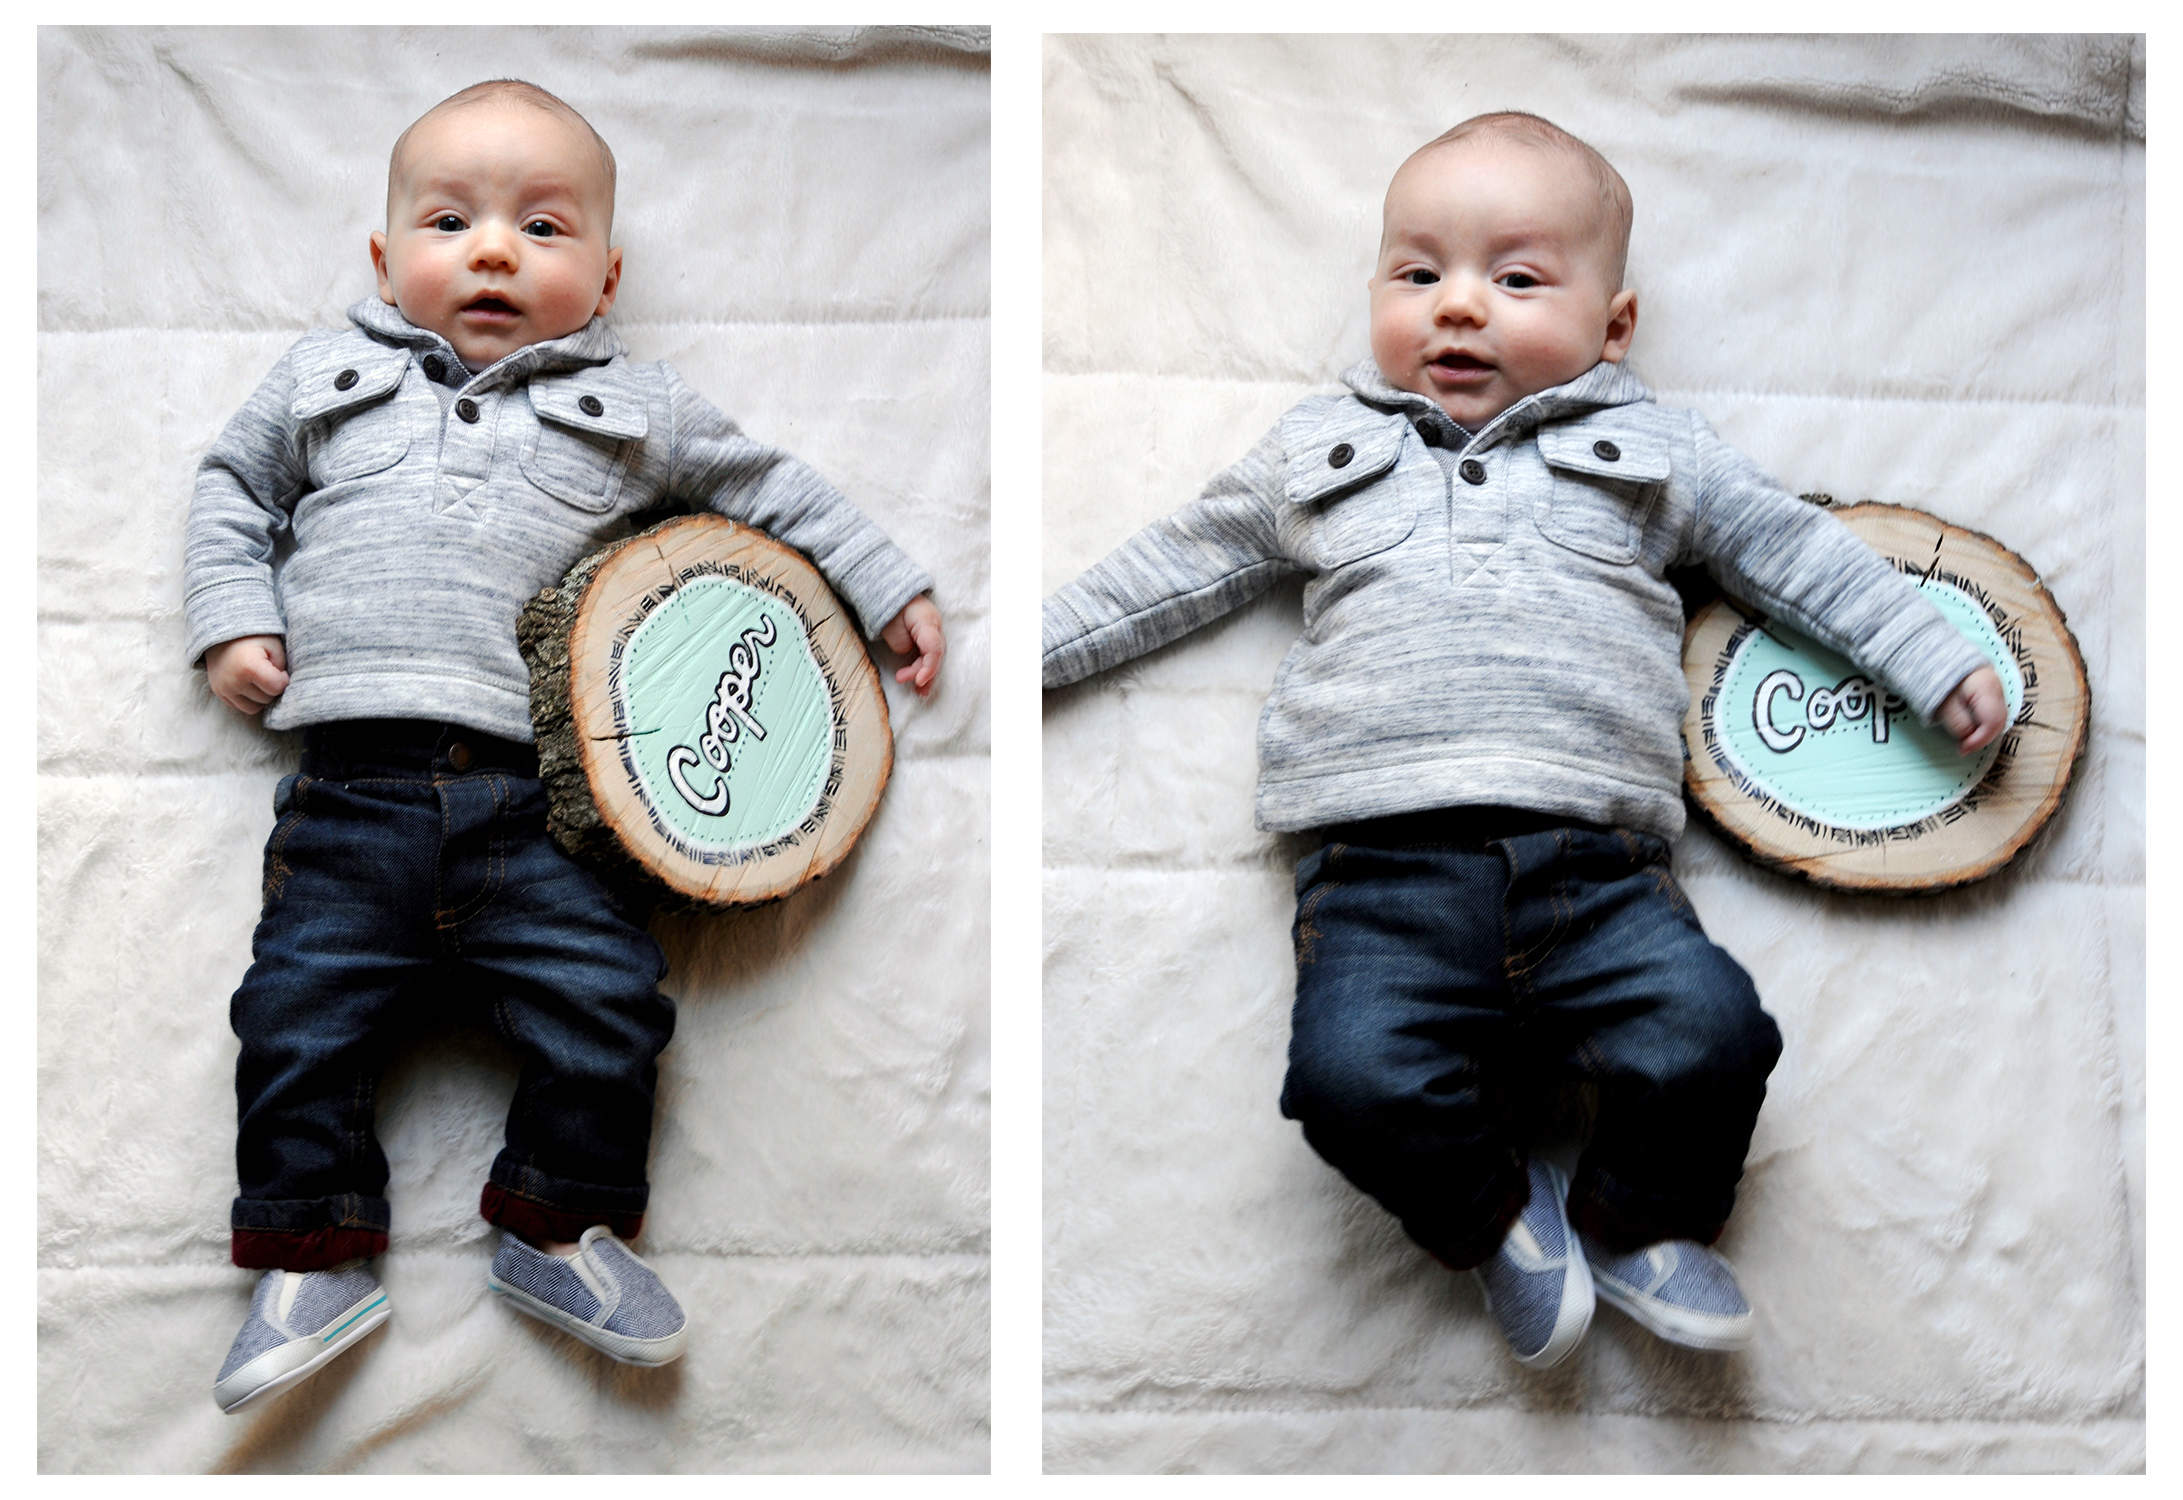
I laid the blanket on the floor for a few of the pictures to allow him to move around more. I love that as he grows he will be able to start holding the sign by himself. I can’t wait to look at how the pictures transition with him growing and the wood sign staying the same size.
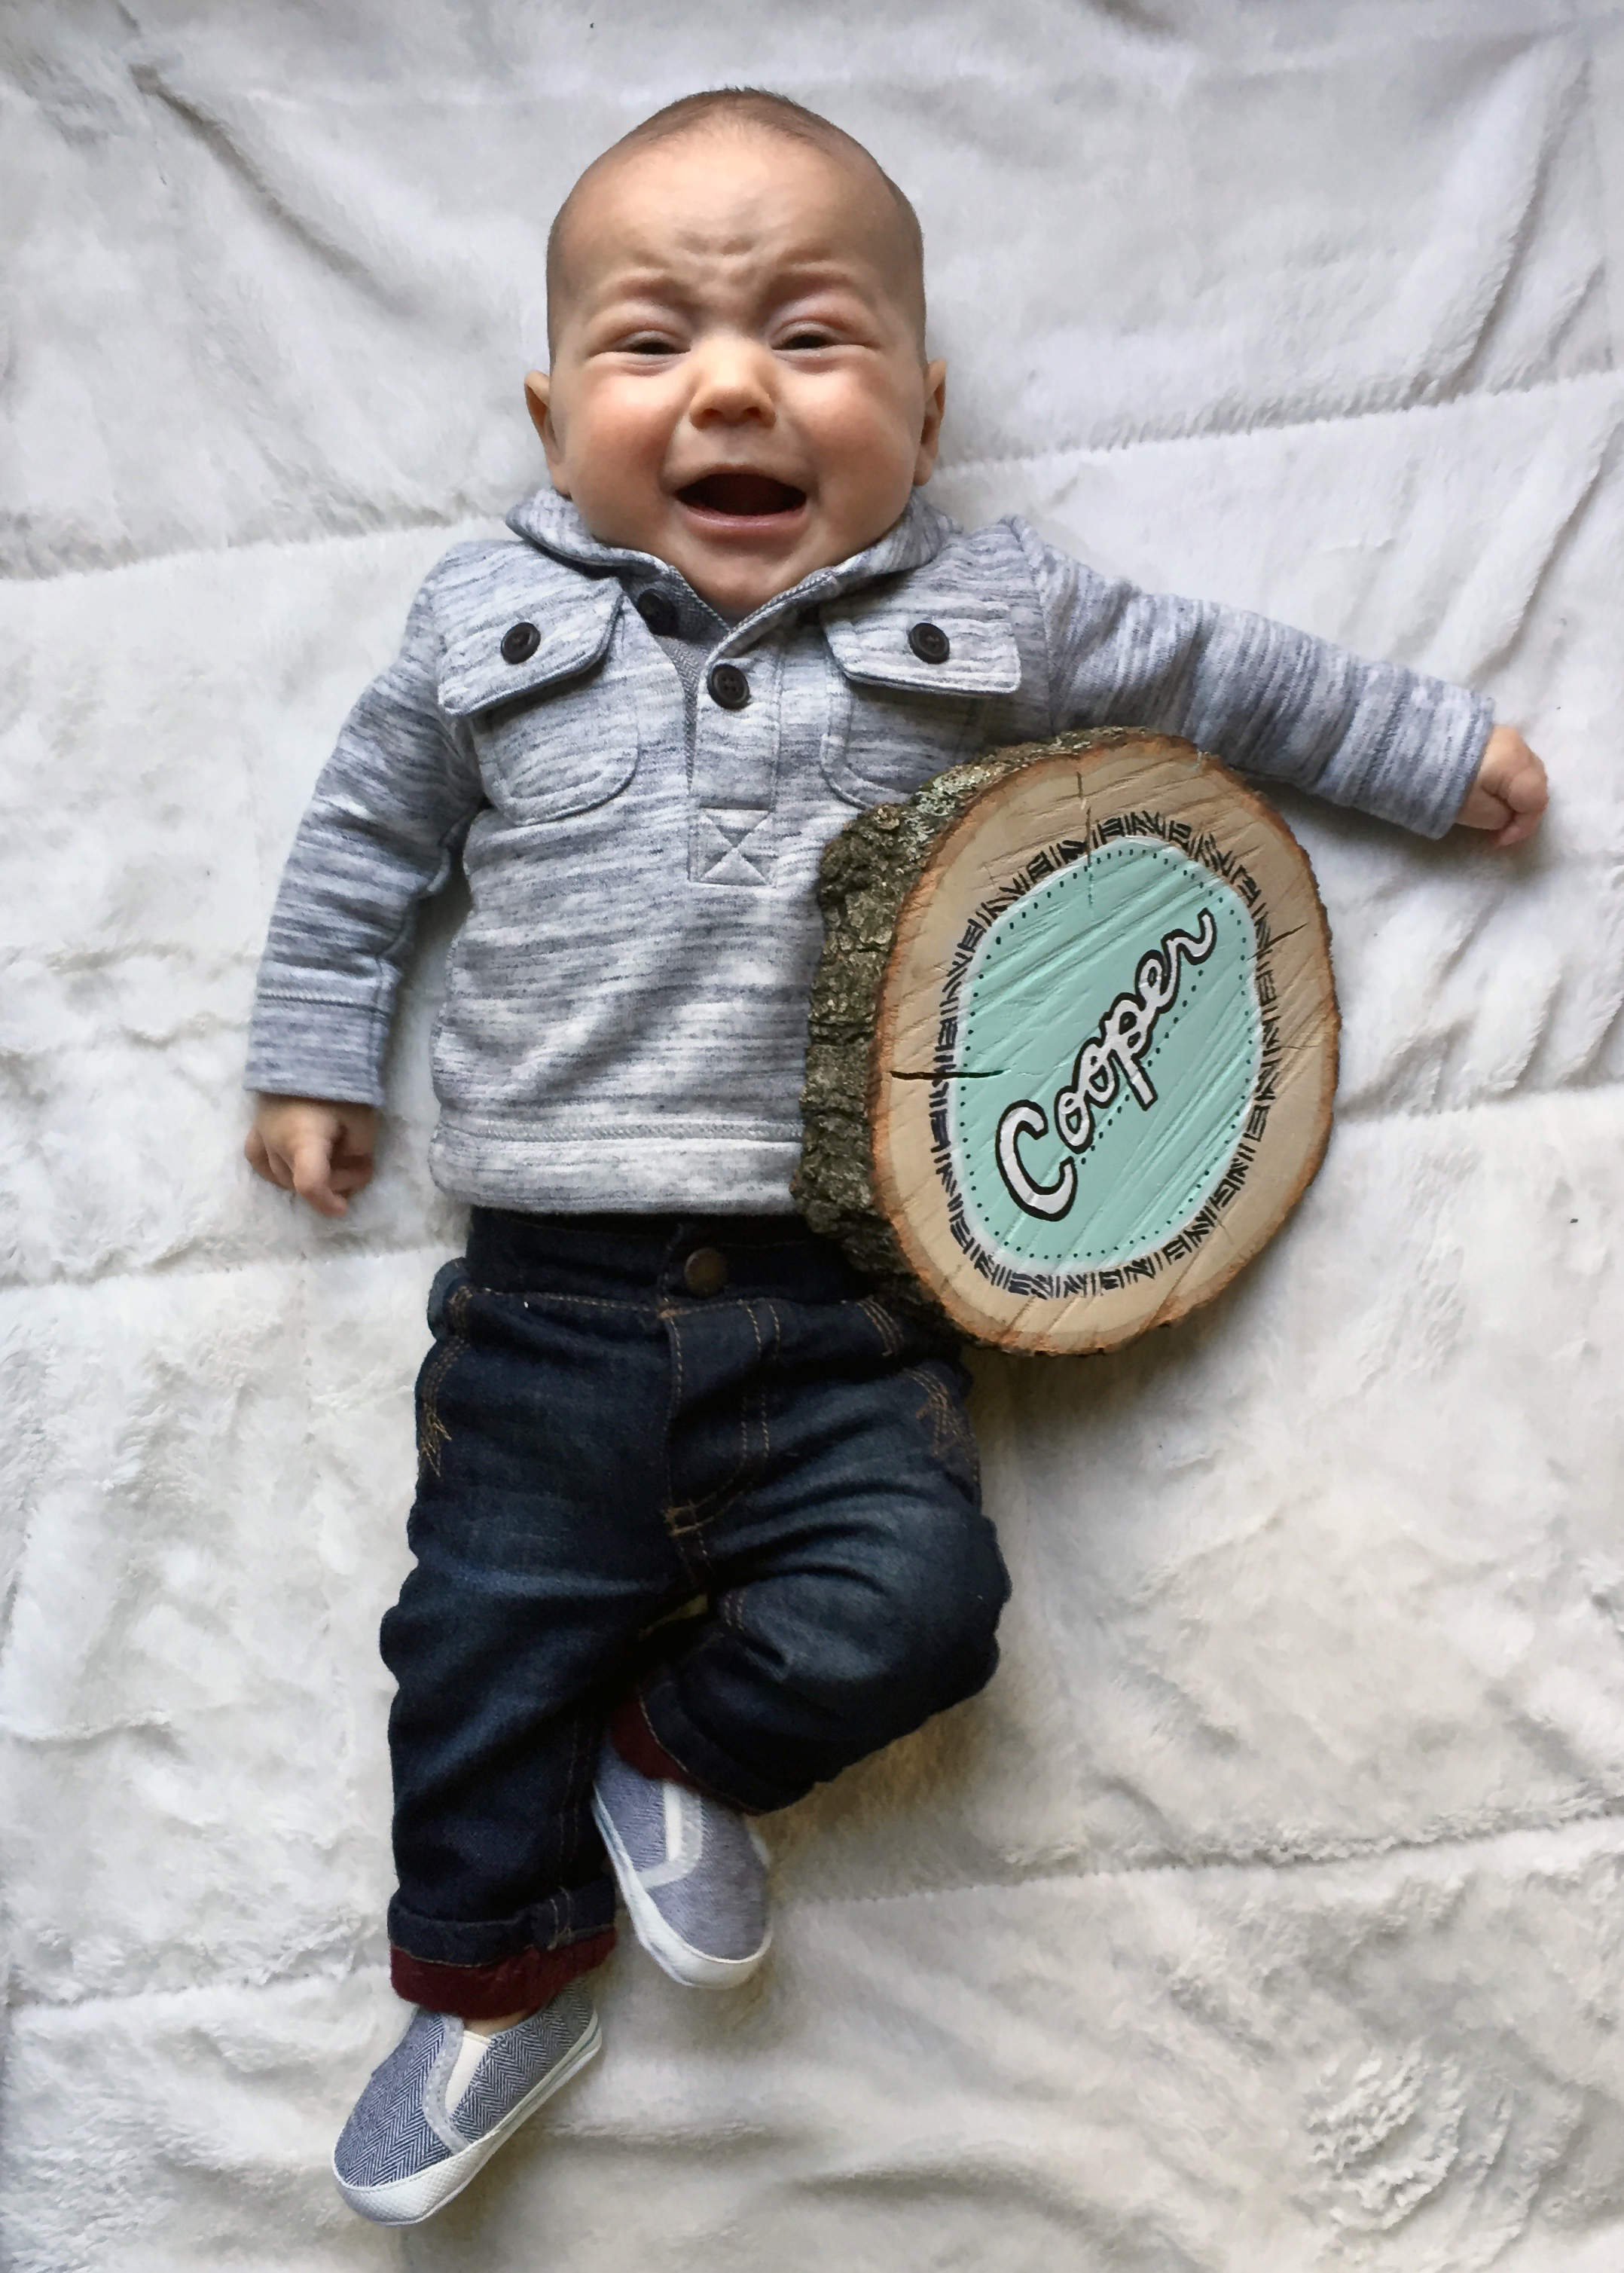
Of course not every picture will be perfect, but I love this one just as much as the rest.
Thanks for taking the time to check out my blog! Keep checking back for more Cooper updates and hopefully more craft project how tos, as long as Coop and time allows. Help me spread the word about my blog by sharing on your social network site of choice. Thanks for stopping by! Check out more blog posts here. Shop my education resources here. Don’t forget to follow me on Instagram and TikTok for weekly visual journal demos. Until next time!
3 responses to “Craft Project: DIY Baby Sign”
Leave a Reply
Related Posts


So cute can’t wait to try
This looks so adorable. I was looking at new ways to keep my followers updated during my pregnancy.
I wanted to move away from the typical chalk and paper board. I am confident that I have found my new way 🙂
Thank you so much!
So glad you like the craft! I love how mine turned out. I would love to see pictures of yours if you make one!